

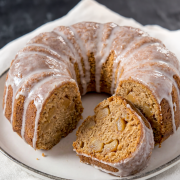


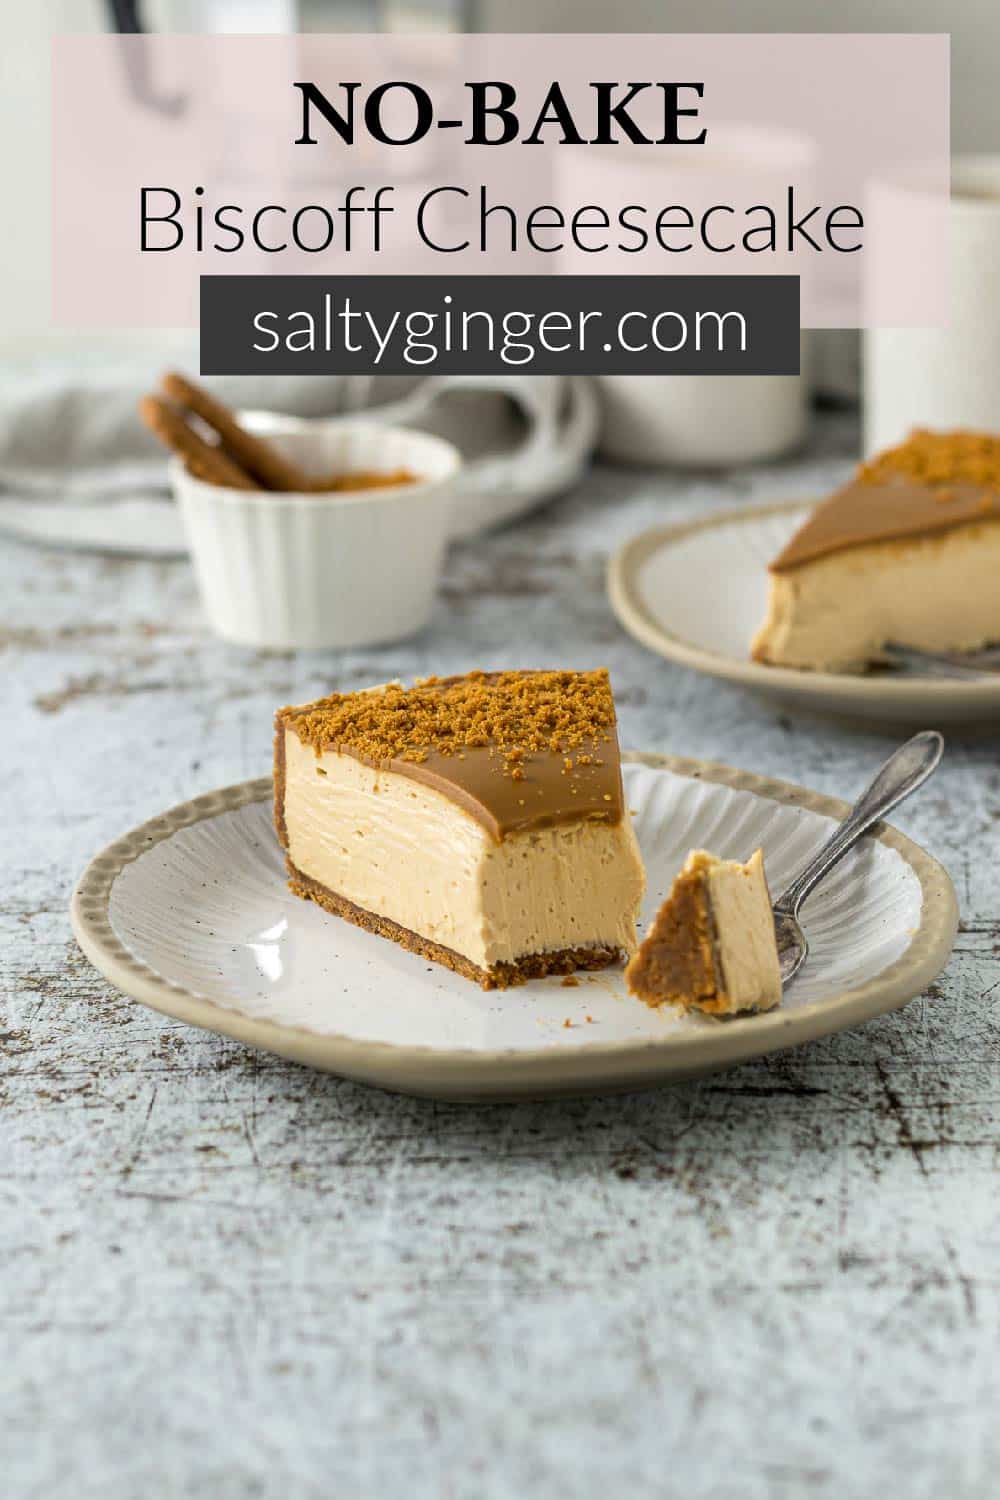
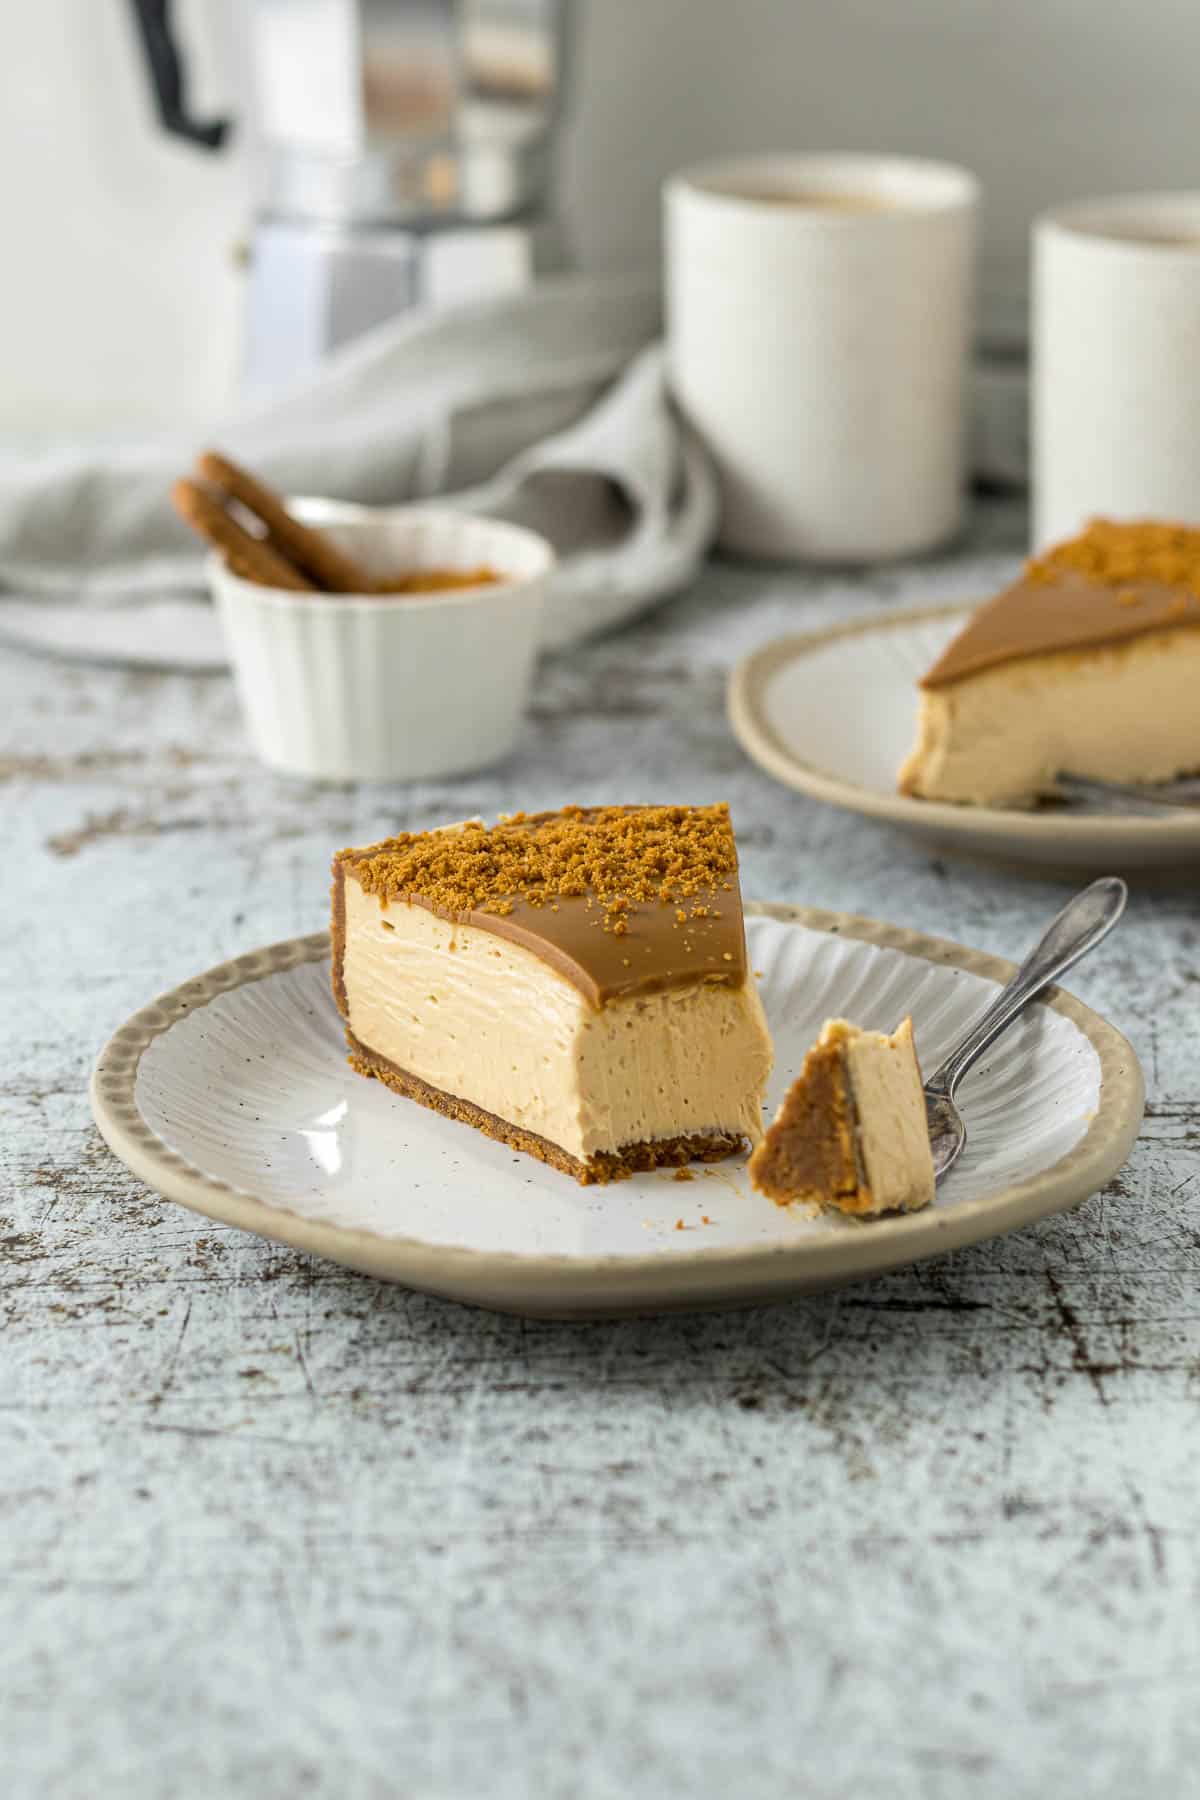
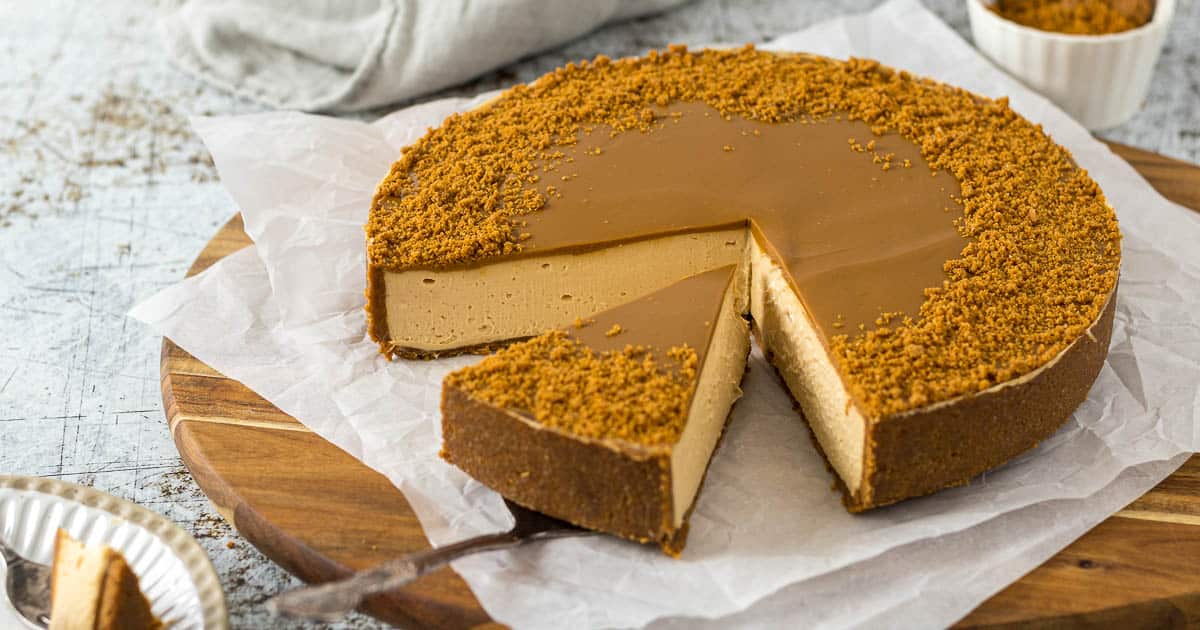
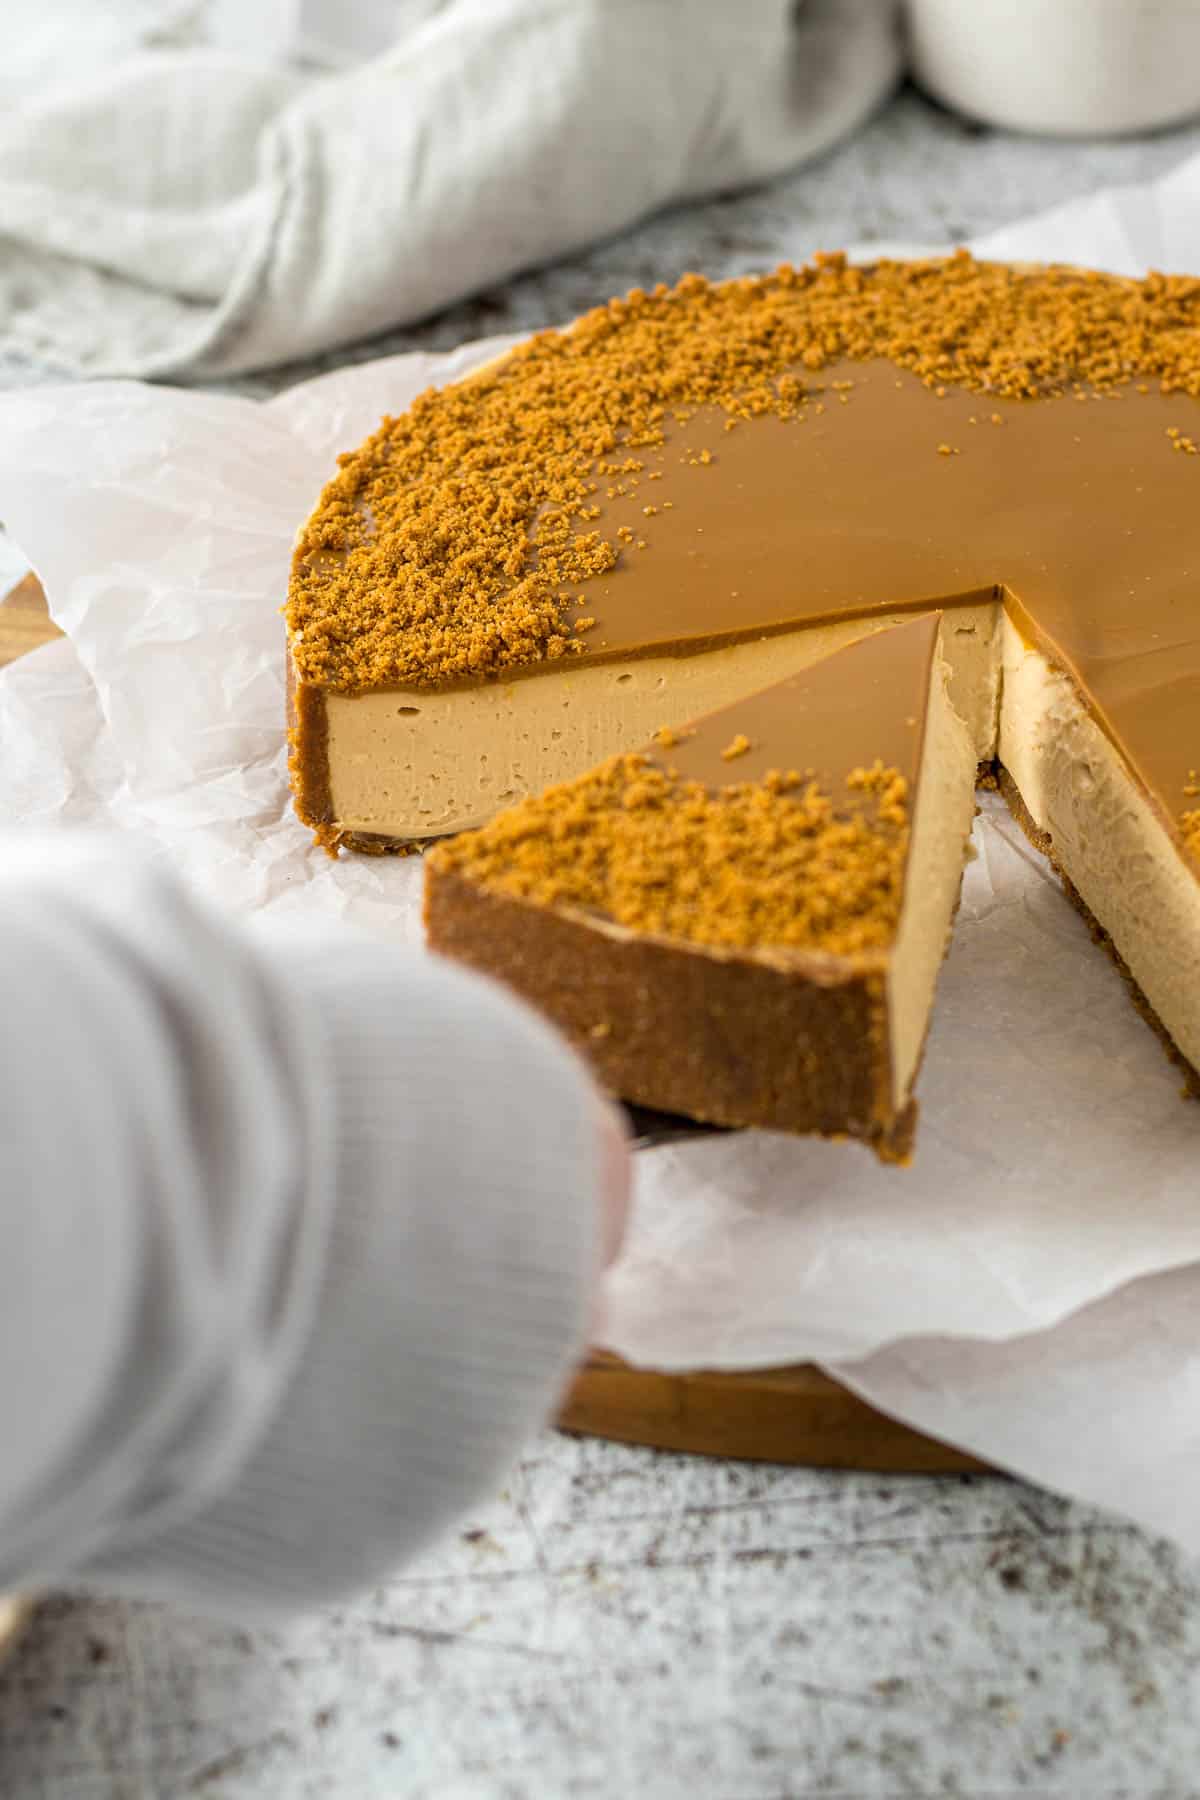
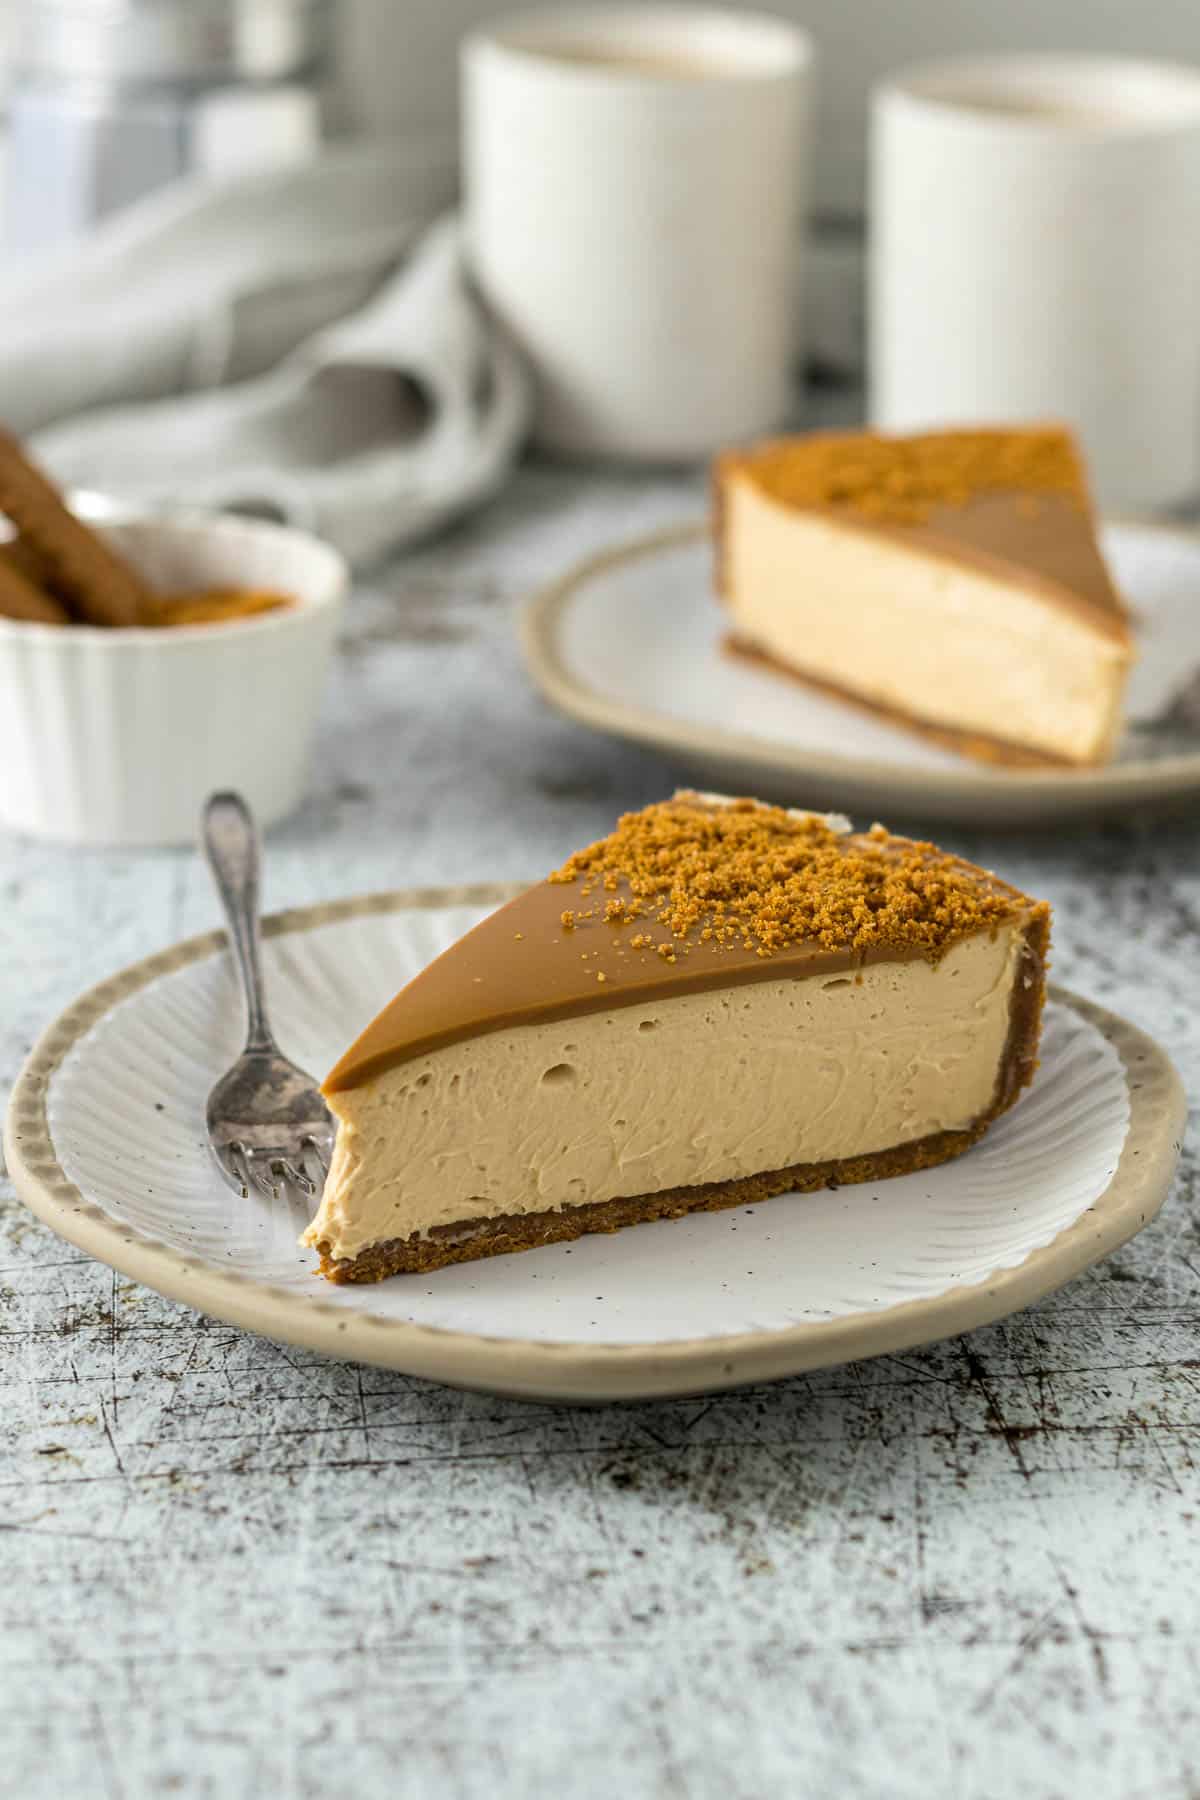
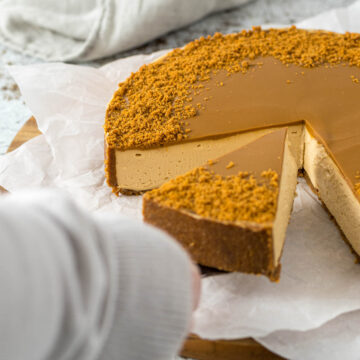
This no-bake Biscoff cheesecake is a cookie butter lover's dream. A crunchy Biscoff cookie crust supports a silky, spiced Biscoff cheesecake filling, all finished with a glossy Biscoff spread glaze.
Every bite delivers that irresistible caramelized speculoos flavor that made Lotus Biscoff famous. Best of all? No oven required. Whether you're celebrating something special or simply indulging your Biscoff obsession, this effortless dessert always impresses.
Jump to:
Recipe Testing and Updates
I originally had a baked Biscoff cheesecake recipe in mind. But once I perfected my Philadelphia no-bake cheesecake, I knew this soft, creamy version complemented the Biscoff cookie spread better.
Plus, a no-bake cheesecake comes together quickly, which is why I think it is a great dessert for any special occasion.
During testing, I had to drop the amount of lemon juice when compared to my no-bake cheesecake, as the lemon competed too much with the delicate Biscoff flavor. And while I was tempted to reduce the sugar slightly, I decided against it because I feel this cheesecake has the perfect amount of sweetness.
Ingredients
Here are notes on the ingredients used, please refer to the recipe card for full quantities.
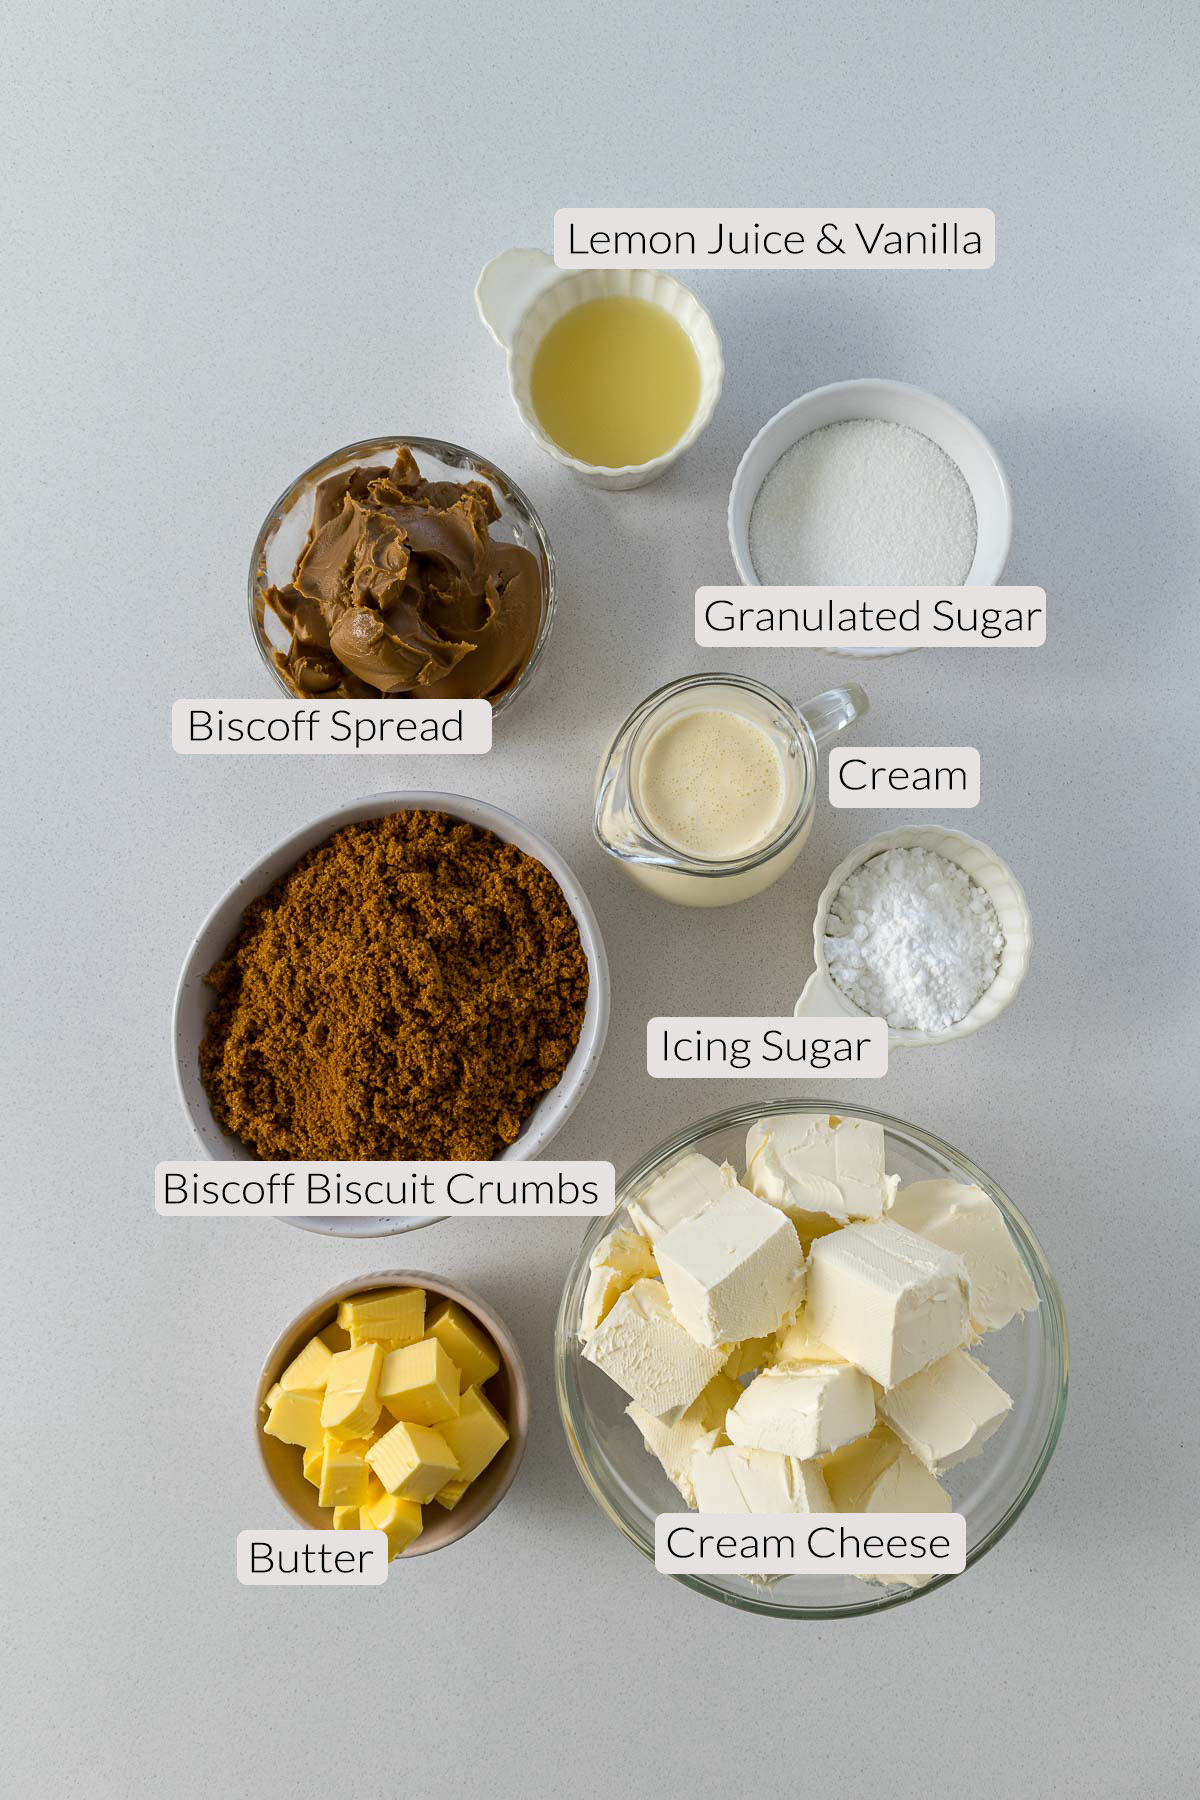
Lotus Biscoff Biscuits are used to make this biscuit crust.
Melted butter binds together the biscuit crumbs for the cheesecake bake. Butter can be substituted with a baking margarine.
Lotus Biscoff Spread, or cookie butter, is used not only to flavor the filling but also to make the final melted cookie butter glaze spread over the top of the cheesecake.
Philadelphia Cream cheese is my go-to cream cheese when it comes to making cheesecakes, cream cheese frosting, or baking in general. It should be noted that in the USA, blocks are 8 ounces (226 grams), while in New Zealand and Australia they are 250 grams (8.8 ounces). Please check the weight of your blocks. Always use full-fat cream cheese for cheesecakes.
Cream: Heavy cream or whipping cream is used to lighten the cream cheese filling and give it that creamy texture we love in no-bake cheesecakes. Make sure your cream contains at least 35% milk fat.
Lemon juice (I prefer fresh, but bottled works too) helps stabilize the cheesecake and adds a delightful tang.
White sugar (granulated or caster sugar) adds sweetness without significantly affecting the flavor of the cream cheese, cream, and lemon juice in the creamy filling.
Icing sugar, powdered sugar, or confectioner's sugar is used to slightly sweeten and stabilize the whipped cream. When I first tested this recipe, I used half a cup, but dropped this down to a third to make sure the filling wasn't too sweet.
Vanilla extract enhances the flavors of the other ingredients in this easy recipe.
Weighing and Measuring Ingredients
Weighing ingredients with a kitchen scale is more accurate than using measuring cups. All my recipes are developed and tested using grams only.
However, I have activated the metric-to-cup conversions. Simply click on "USA/Cups" or "metric" for your preferred measurements. For these conversions, cups are equal to 240mL/8 fl oz, tablespoons are 15mL, and teaspoons are 5mL.
Biscoff Cheesecake Step-By-Step Instructions
Step 1: Allow the cream cheese to come to room temperature. This allows the cream cheese to be beaten into a nice, smooth base for the dessert.
Step 2: Melt the butter and allow it to cool.
Step 3: Crush or process the Biscoff biscuits in a food processor until you have mostly fine crumbs. Add the melted butter, and stir together until all the crumbs are coated.
Step 4: Pour the cookie crumbs into the bottom of an 8- or 9-inch springform pan or loose-bottomed cake pan with tall sides.
Note: You can line the bottom of your springform pan with baking paper to help the cheesecake release more easily once completely chilled. When using springform pans, I like to cut a piece about 2 inches bigger than my pan, then I scrunch the paper into a ball, straighten it out, and press it into the bottom of the pan before clipping the sides in place.
Step 5: Using the back of a spoon, press the crumbs about an inch up the side of the pan. Then press the rest of the biscuit crumbs into the bottom of the pan. Use the bottom of a measuring cup to press the crumbs into the bottom of the pan.
Note - Take your time when working the crumbs up the side of the pan. They may fall off a few times, or even stick to the spoon. Just be patient. A good, well-pressed biscuit base is crucial to a no-bake cheesecake.
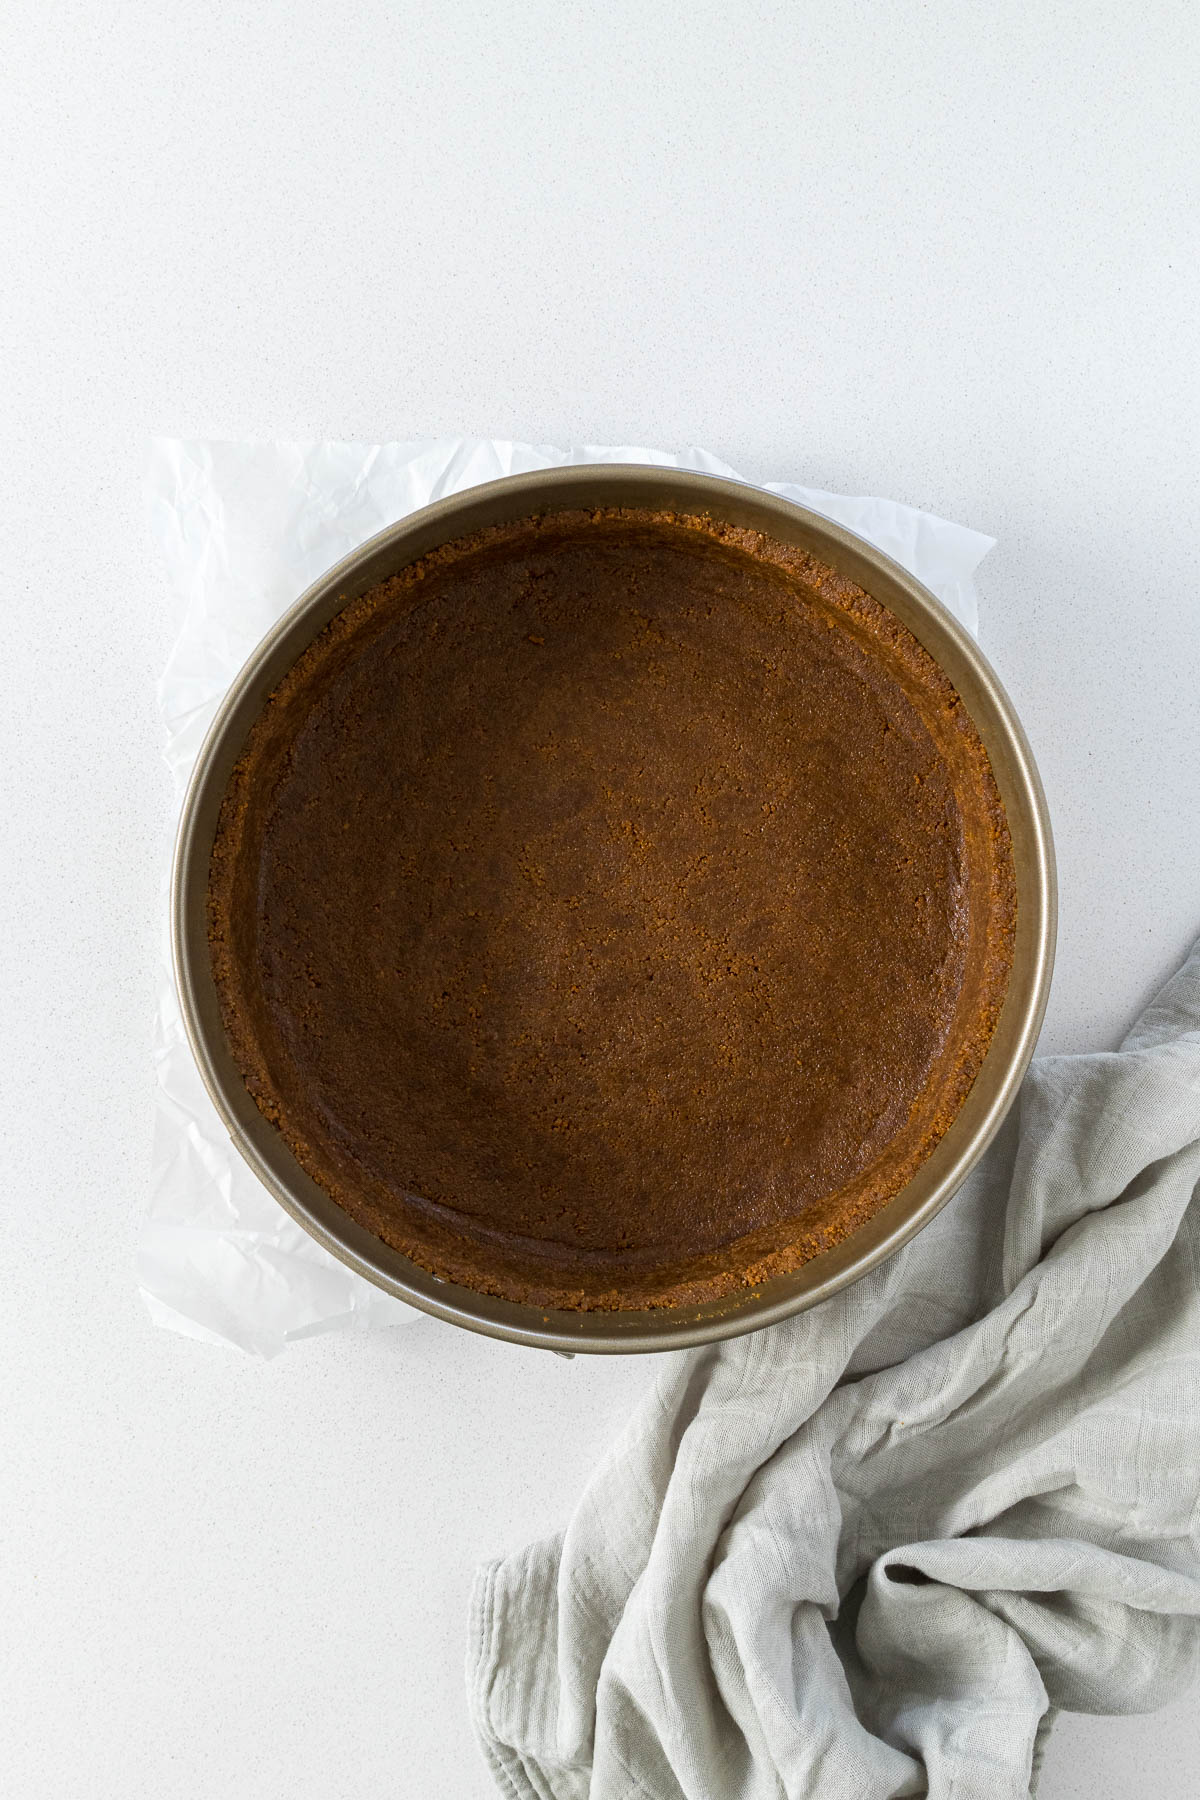
Step 6: Place the biscuit base in the fridge for at least 30 minutes to allow the butter to set.
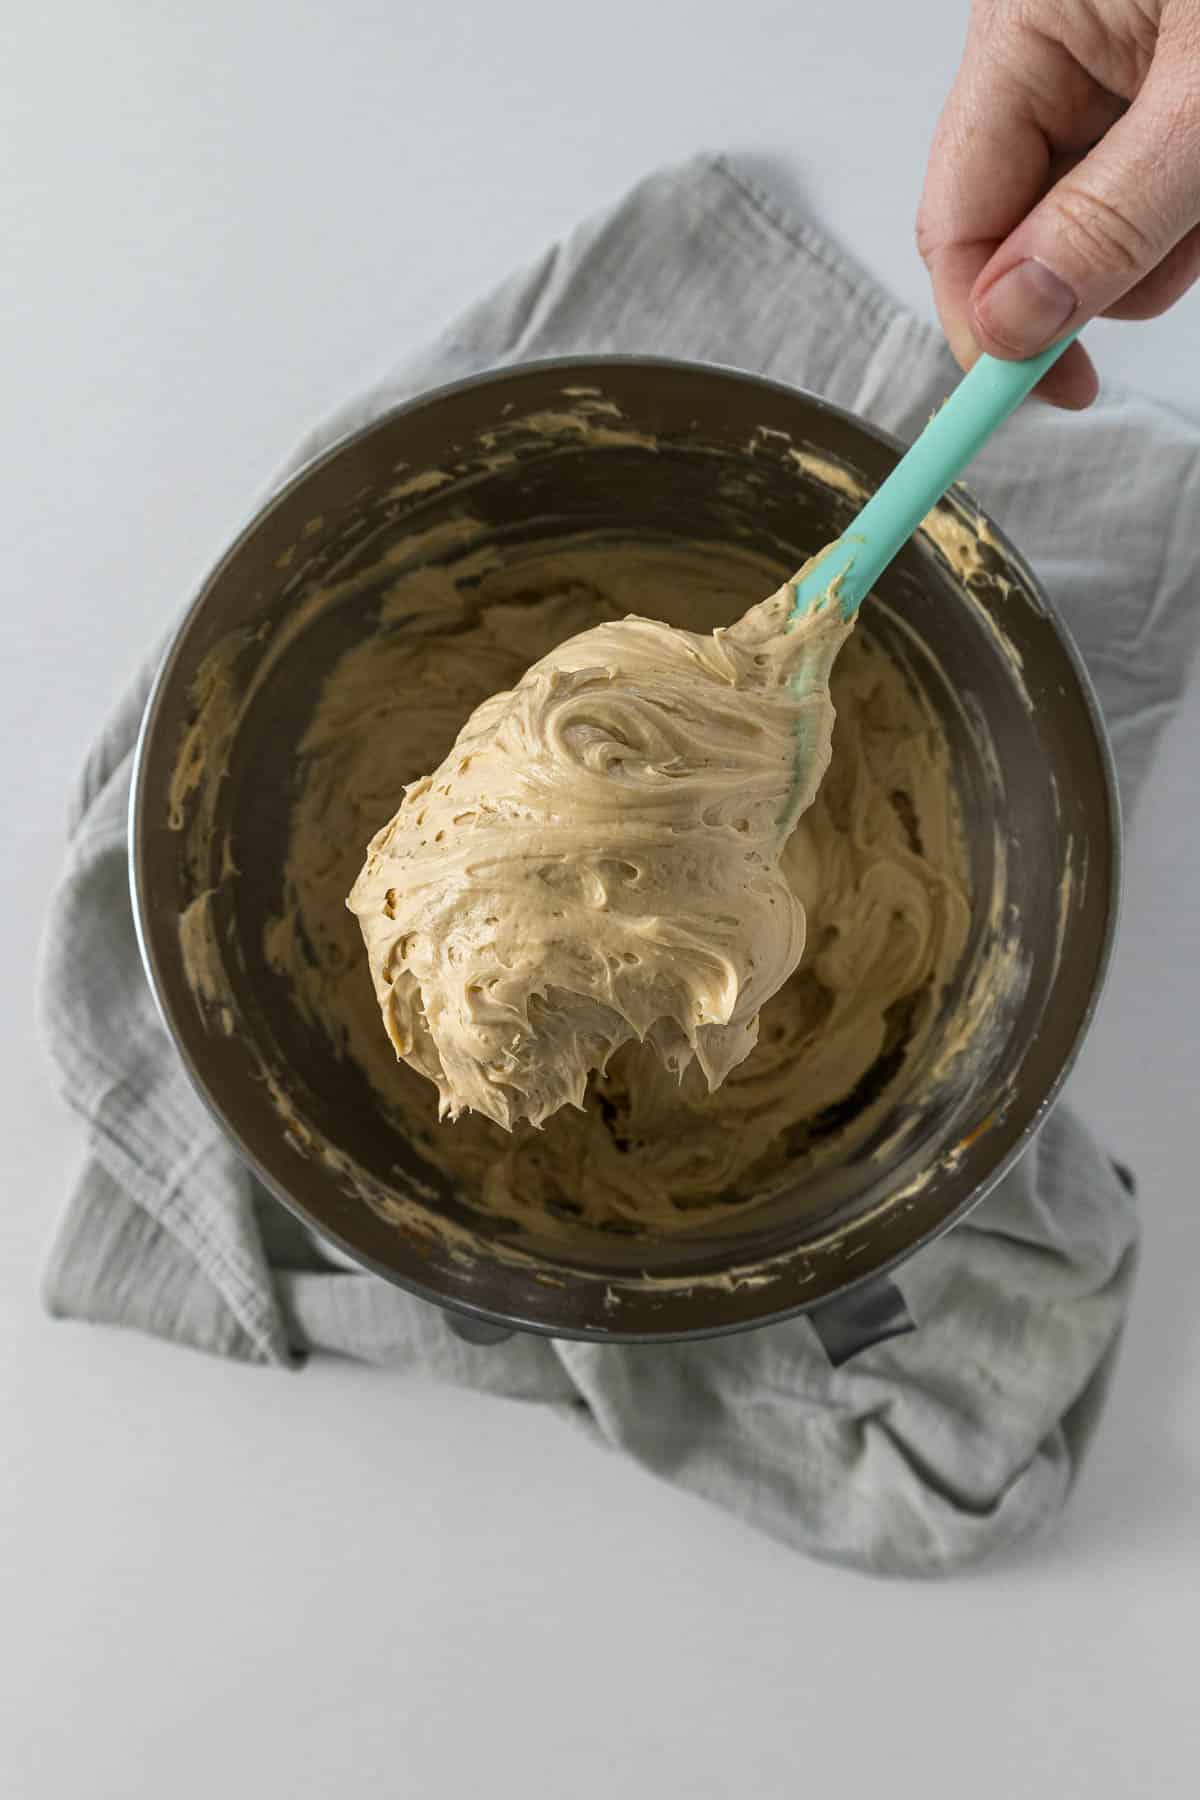
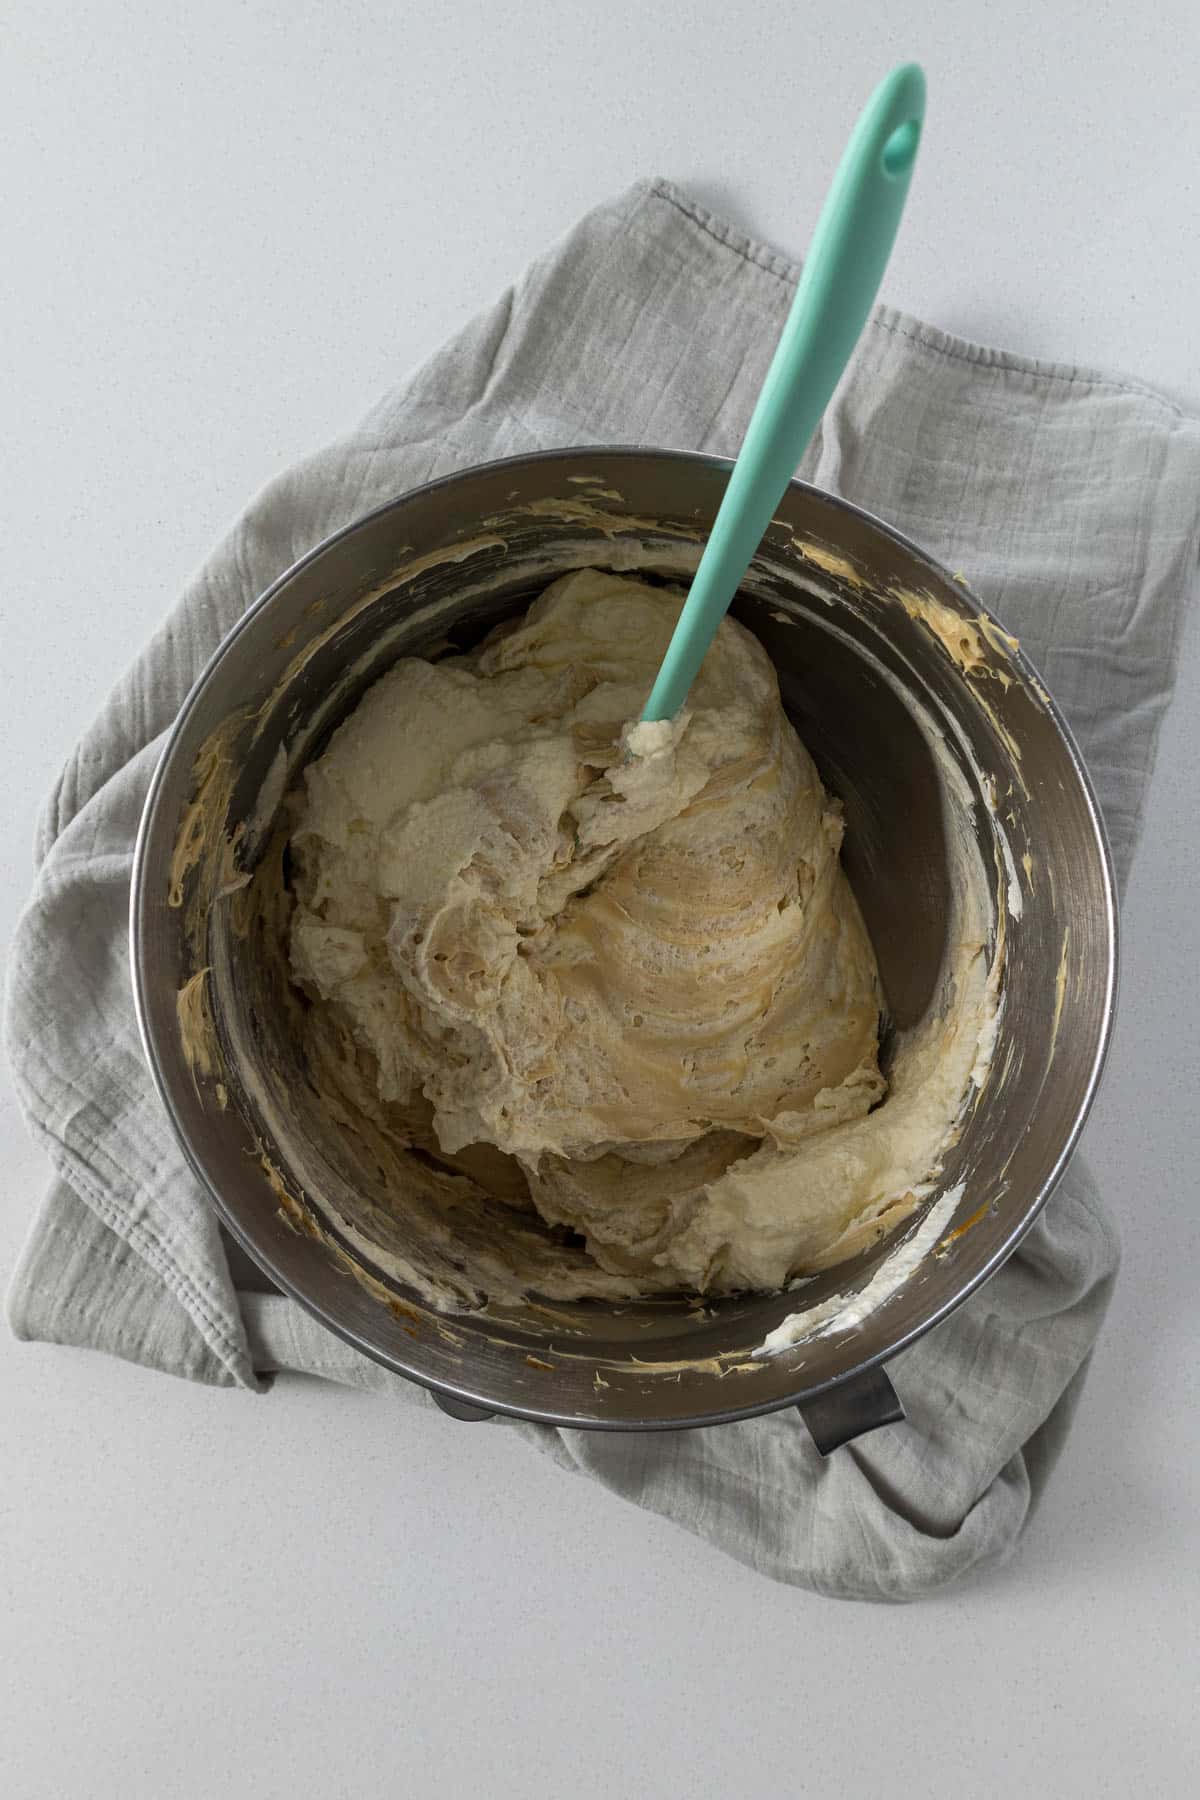
Step 7: In a large mixing bowl (the bowl of a stand mixer), place the room-temperature cream cheese, vanilla extract, lemon juice, granulated sugar, and Biscoff Spread. Beat on a medium speed (with the paddle attachment) until all the ingredients are combined and smooth. This will take 3-5 minutes. Scrape down the sides of the bowl regularly, even if using a hand mixer.
Step 8: In a separate bowl, whip the heavy cream to soft peaks (by hand or with an electric mixer). Sift in the icing sugar or powdered sugar and then beat to stiff peaks.
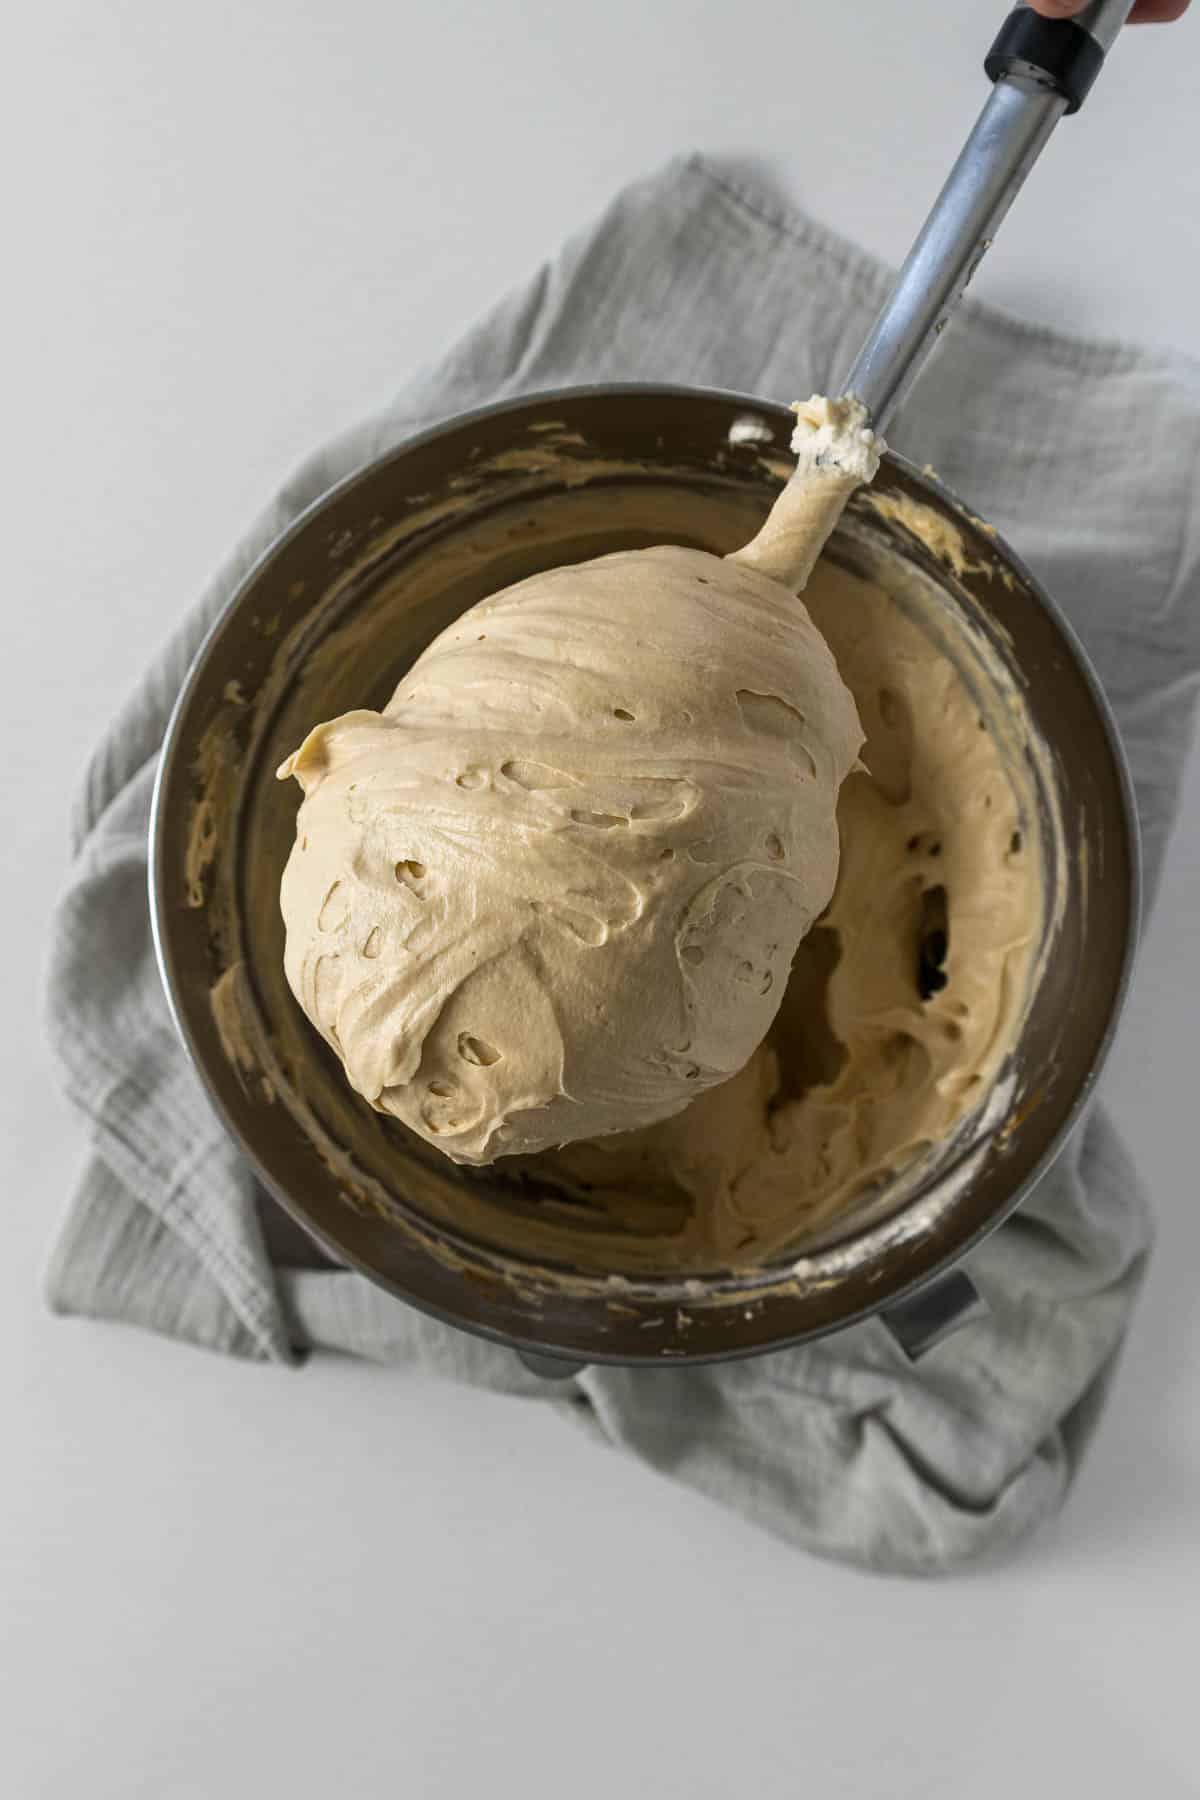
Step 9: Add the whipped cream to the cream cheese mixture. Fold the whipped cream into the cream cheese using a large metal spoon or a rubber spatula.
Step 10: Spoon the cheesecake batter into the prepared crust. Smooth into the crust. Refrigerate for at least 6-8 hours but preferably overnight.
Step 11: Melt the Biscoff spread in the microwave in 15-second increments. Then pour over the top of the chilled cheesecake and spread to the edges with an offset spatula or the back of a spoon. Crush 4-5 Biscoff biscuits and sprinkle around the edges for decoration. Allow the spread to set in the fridge for 30 minutes.
Step 12: Before popping the Biscoff cheesecake out of the springform pan, I like to gently heat the sides and bottom with a Chef's torch or a warm cloth. Slowly release the sides of the pan. If you haven't used baking paper on the bottom of your pan, work slowly around the edge to release it, then lift it off using two large spatulas. Or serve the cheesecake directly, without the base of the pan.
Step 13: Use a sharp, clean knife to slice your cheesecake. I like to clean my knife off between slices to get those sharp, clean slices.
Expert Tips for This Recipe
- You can bake the biscuit base or crust by preheating the oven to 180°C/350°F and then baking for 10 minutes. Allow the crust to cool completely before pouring in the creamy Biscoff filling.
- Lining the bottom of the springform pan with parchment paper really makes for an easy release of the finished cheesecake. To do this, take a piece of square baking paper about 2 inches or 5cm larger than the cake pan. Crinkle the paper into a ball and then place it over the base of the tin. Press the paper into the corners of the bottom of the base (you may need an extra pair of hands here), before clipping on the sides of the tin.
- Use room-temperature cream cheese.
- This is a great make-ahead dessert for any special occasion. I would recommend making it the morning or the day before an event.
- Store the no-bake cheesecake in the fridge, then slice it straight from the fridge. The longer it sits at room temperature, the softer the filling becomes.
Storage and Freezing
This Biscoff No-Bake Cheesecake can be stored in the fridge for up to a week. I would also be mindful of keeping this cheesecake in the fridge right up until you slice it. The longer the cheesecake sits at room temperatur,e the more the filling will soften up.
Leftover slices can be frozen in an airtight container for up to 30 days. Allow the slices to thaw in the fridge overnight before serving.
Lotus Biscoff Cheesecake FAQ
For this recipe, I used a 9-inch (23-cm) springform cake pan.
Yes. Cheesecake freezes really well. I like to place slices of cheesecake in an airtight freezer-safe container to freeze. This will last for up to 30 days.
Yes, you can use either the smooth or crunchy cookie butter spread.
I would advise against using the sandwich cookies. And rather go for the regular biscuits. But you can use them for the decoration of this cheesecake.
Other Recipes You May Like


Rate & Review!
If you made this recipe, please leave a star rating! It gives my readers and me helpful feedback. If you want more recipes, subscribe to my newsletter, and follow me on Instagram, Pinterest, and Facebook!
Recipe Card
Biscoff Cheesecake
Equipment
- 9 Inch Round (23cm) Springform Pan OR
- 8 Inch Round (20cm) Cake Pan
- Stand Mixer OR
- Electric hand mixer
Ingredients
Biscuit Base
- 2 cups Lotus Biscoff Biscuits 1 packet
- 1 stick butter (1 stick = 115 grams)
Cheesecake Filling
- 24 ounces cream cheese (*Note 1)
- ½ cup white granulated sugar (caster sugar)
- 2 tablespoons lemon juice (fresh or bottled)
- 2 teaspoons vanilla extract
- 1 cup Biscoff Spread
- 1 cup cream (cold, heavy or whipping cream*Note 2)
- ⅓ cup icing sugar (powdered sugar or confectioners sugar)
Glaze
- ½ cup Biscoff Spread (melted)
- 4 Lotus Biscoff biscuits (roughly crushed)
Instructions
- Allow the cream cheese to come to room temperature. This allows the cream cheese to be beaten into a nice smooth base for the dessert.
- Melt the butter and allow to cool.1 stick butter
- Crush or process the biscoff biscuits in a food processor until you have mostly fine crumbs. Add the melted butter, and stir together until all the crumbs are coated.2 cups Lotus Biscoff Biscuits
- Pour the cookie crumbs into the bottom of an 8- or 9-inch springform pan or loose-bottomed cake pan with tall sides. (*Note 3)
- Using the back of a spoon press the crumbs about an inch up the side of the pan. Then press the rest of the biscuit crumbs into the bottom of the pan. Use the bottom of a measuring cup to press the crumbs into the bottom of the pan. (*Note 4)
- Place the biscuit base into the fridge for at least 30 minutes, allowing the butter to set up.
- In a large mixing bowl (the bowl of a stand mixer), place the room-temperature cream cheese, vanilla extract, lemon juice, granulated sugar, and Biscoff Spread. Beat on a medium speed (with the paddle attachment) until all the ingredients are combined and smooth. This will take 3-5 minutes. Scrape down the sides of the bowl regularly, even if using a hand mixer.24 ounces cream cheese, ½ cup white granulated sugar, 2 tablespoons lemon juice, 2 teaspoons vanilla extract, 1 cup Biscoff Spread
- In a separate bowl, whip the heavy cream to soft peaks (this can be done by hand or with an electric mixer). Sift in the icing sugar or powdered sugar and then beat to stiff peaks.1 cup cream, ⅓ cup icing sugar
- Add the whipped cream to the cream cheese mixture. Fold the whipped cream into the cream cheese using a large metal spoon or a rubber spatula.
- Spoon the cheesecake batter into the prepared crust. Smooth into the crust. Refrigerate for at least 6-8 hours but preferably overnight.
- Melt the Biscoff spread in the microwave in 15-second increments. Then pour over the top of the chilled cheesecake and spread to the edges with an offset spatula or the back of a spoon. Crush 4-5 Biscoff biscuits and sprinkle around the edges for decoration. Allow the spread to set in the fridge for 30 minutes.½ cup Biscoff Spread, 4 Lotus Biscoff biscuits
- Before popping the Biscoff cheesecake out of the springform pan, I like to gently heat the sides and bottom with a Chef's torch, or a warm cloth. Slowly release the sides of the pan. If you haven't used baking paper on the bottom of your pan, work slowly around the edge to release the bottom and lift it off using two large spatulas. Or serve the cheesecake directly don't the pan's base.
- Use a sharp clean knife to slice your cheesecake. I like to clean my knife off between slices to get those sharp clean slices.
Notes
- I always use Philadelphia cream cheese in the block version. In the US these blocks come in 226 grams/8 ounces. However, here in New Zealand, the blocks are 250 grams or 8.8 ounces. This recipe has been developed according to the US size of the block. This recipe requires a total of 24 ounces or 680 grams of cream cheese.
- Heavy cream or whipping cream, make sure it has a fat content of at least 35%.
- You can line the bottom of your springform pan with baking paper to make sure the cheesecake releases more easily once completely chilled. When using springform pans, I like to cut a piece about 2 inches bigger than my pan, then I scrunch the paper into a ball, straighten it out, and press into the bottom of the pan before clipping the sides in place.
- Take your time when working the crumbs up the side of the pan. They may fall off a few times, or even stick to the spoon. Just be patient. A good, well-pressed biscuit base is crucial to a no-bake cheesecake.
Expert Tips for This Recipe
-
- You can bake the biscuit base or crust by preheating the oven to 180°C/350°F and then baking for 10 minutes. Allow the crust to cool completely before pouring in the creamy Biscoff filling.
-
- Lining the bottom of the springform pan with parchment paper really makes for an easy release of the finished cheesecake. To do this - take a piece of square baking paper about 2 inches or 5cm larger than the cake pan. Crinkle the paper into a ball and then place it over the base of the tin. Press the paper into the corners of the bottom of the base (you may need an extra pair of hands here), before clipping on the sides of the tin.
-
- Use room-temperature cream cheese.
-
- This is a great make-ahead dessert for any special occasion. I would recommend making it the morning or day before an event.
-
- Store the no-bake cheesecake in the fridge, and try to slice it straight out of the fridge. The longer it sits at room temperature the softer the filling becomes.
Storage and Freezing
This Biscoff No-Bake Cheesecake can be stored in the fridge for up to a week. I would also be mindful of keeping this cheesecake in the fridge right up until you slice it. The longer the cheesecake sits at room temperature the more the filling will soften up. Leftover slices can be frozen in an airtight container for up to 30 days. Allow the slices to thaw in the fridge overnight before serving.Nutrition
Nutrition information is an estimate. If scaling the recipe remember to scale your cook and bakeware accordingly. All temperatures stated are conventional, unless otherwise stated. Recipes tested in grams and at sea level.
Mary-Lou says
Thank you so much!