


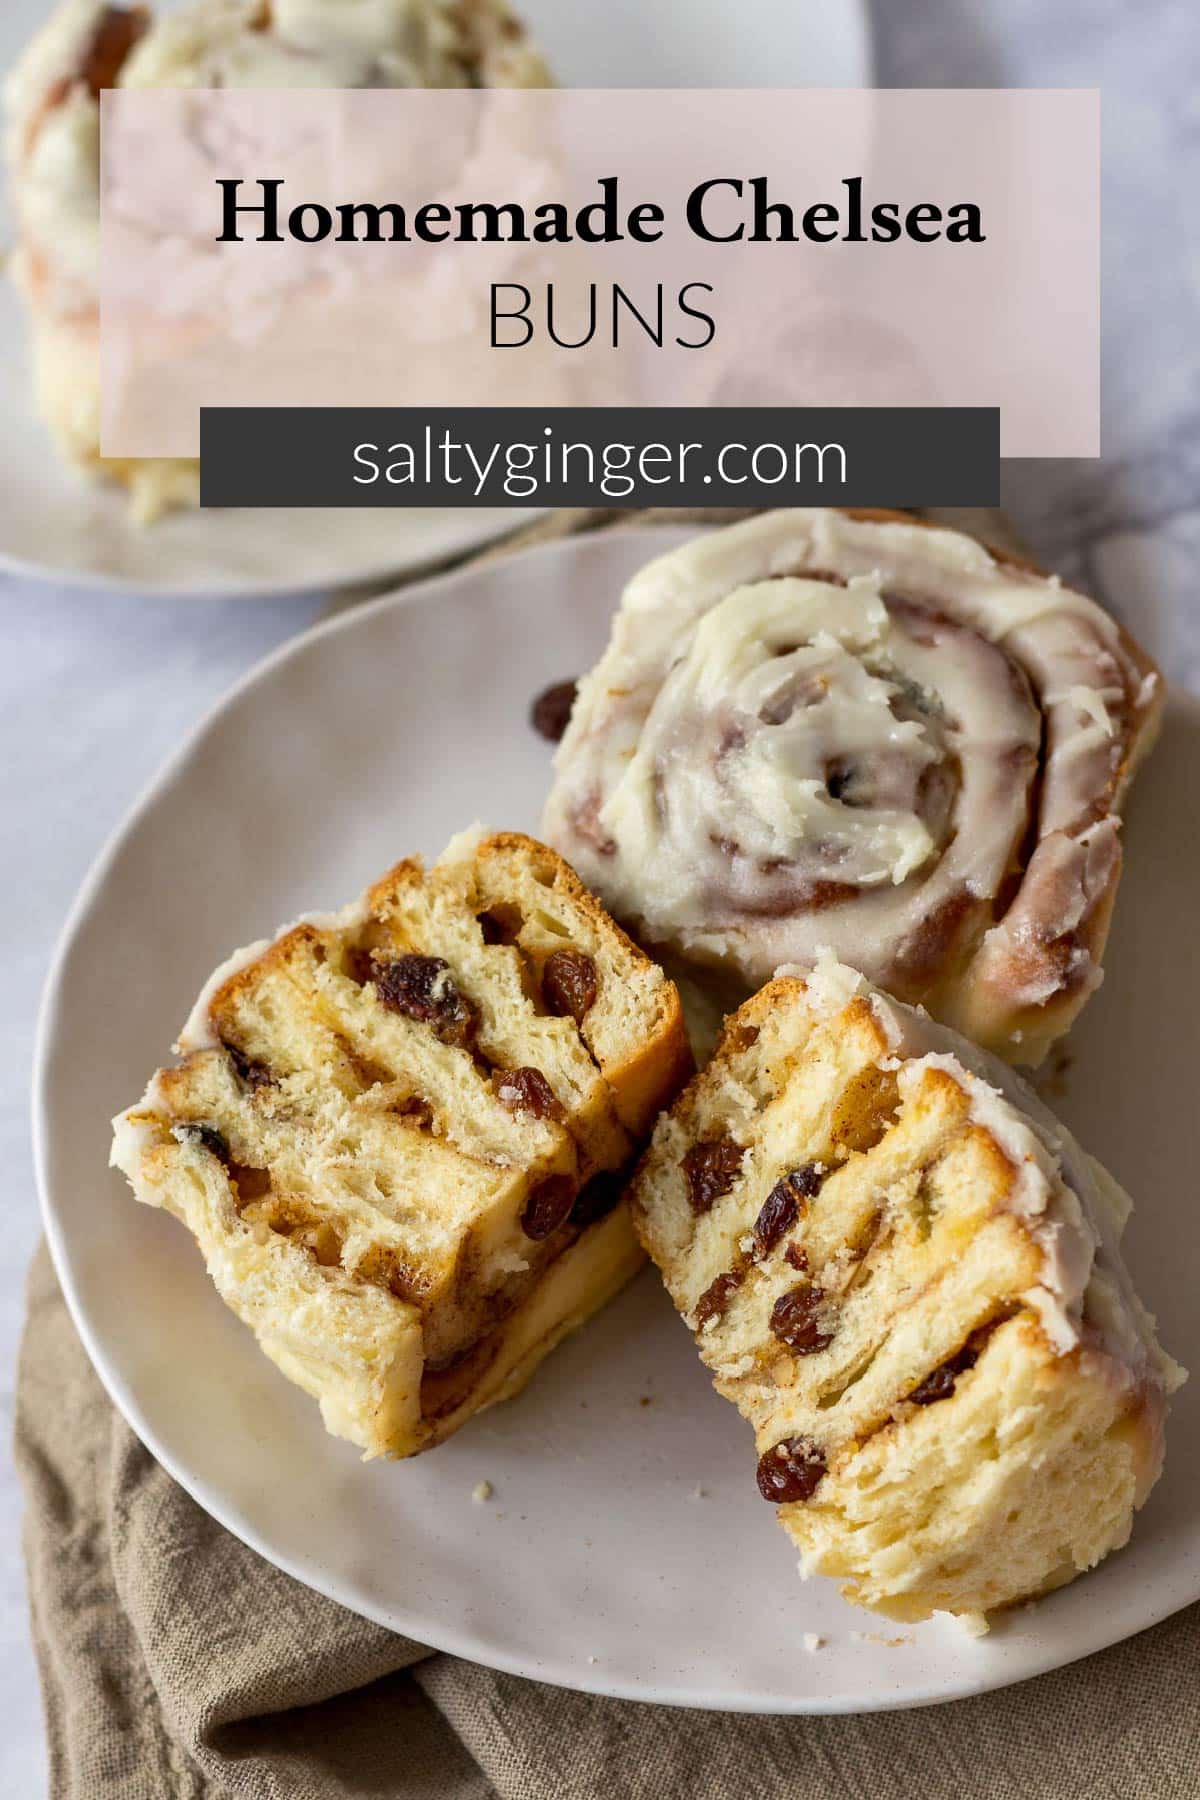
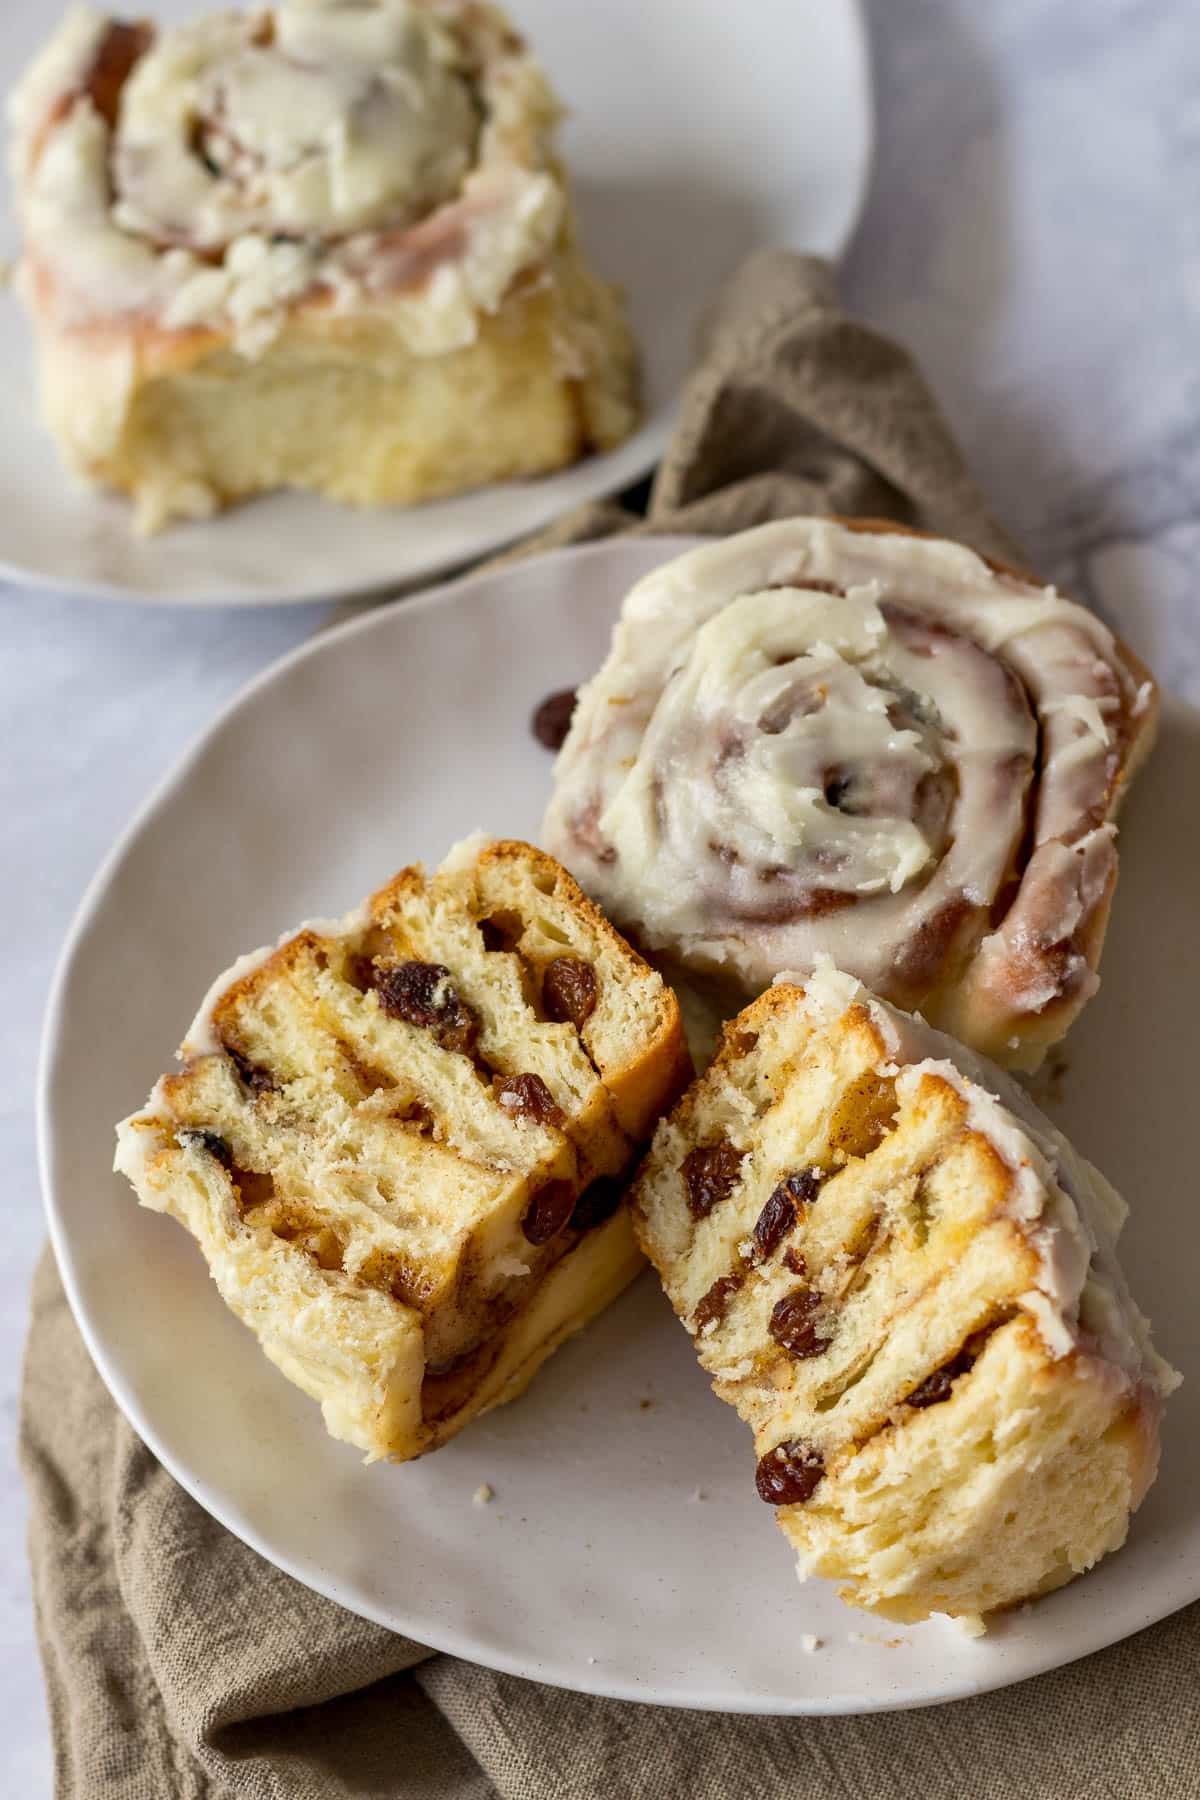
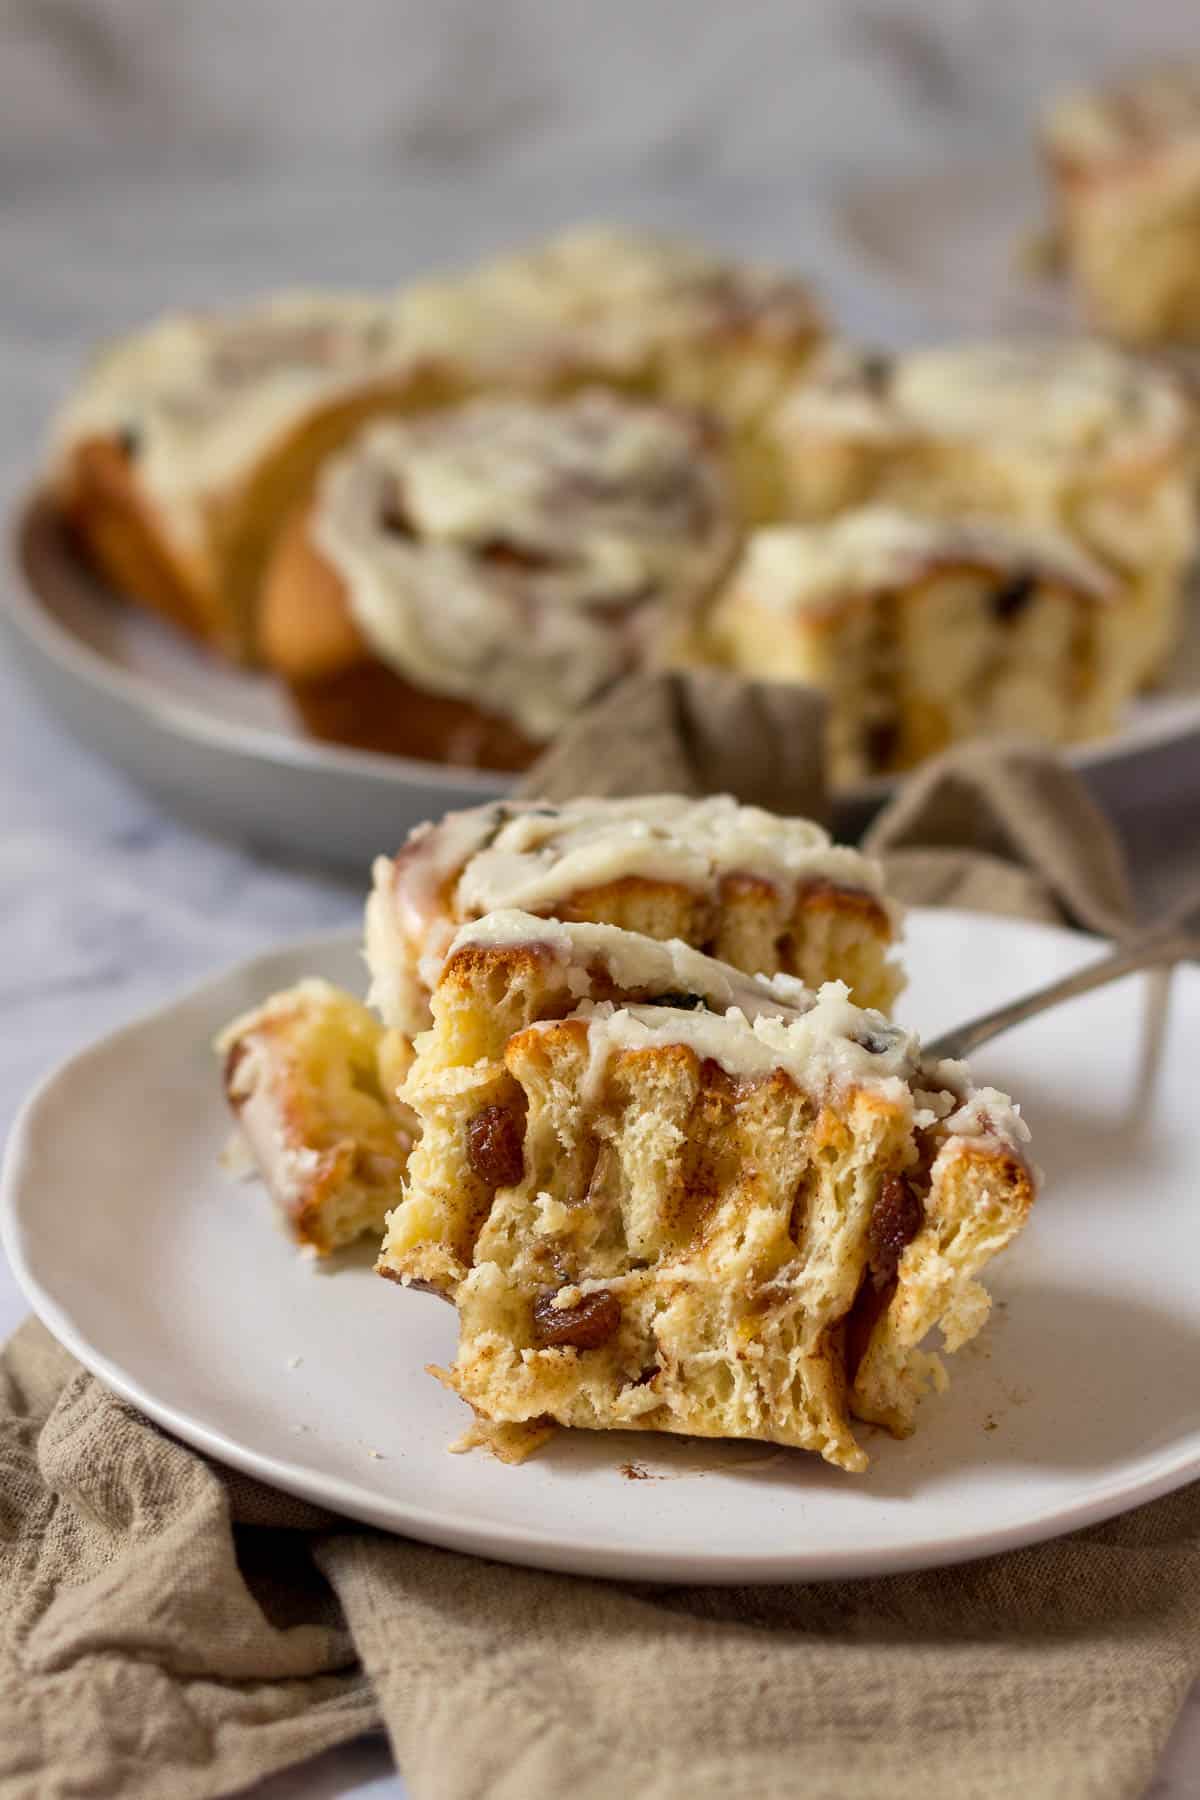
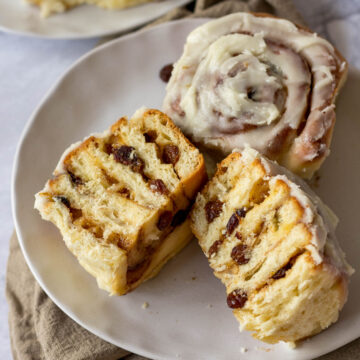
These easy, homemade Chelsea Buns are soft pillowy rolls adorned with cinnamon, raisins, and mixed peel, and topped with decadent frosting.
Jump to:
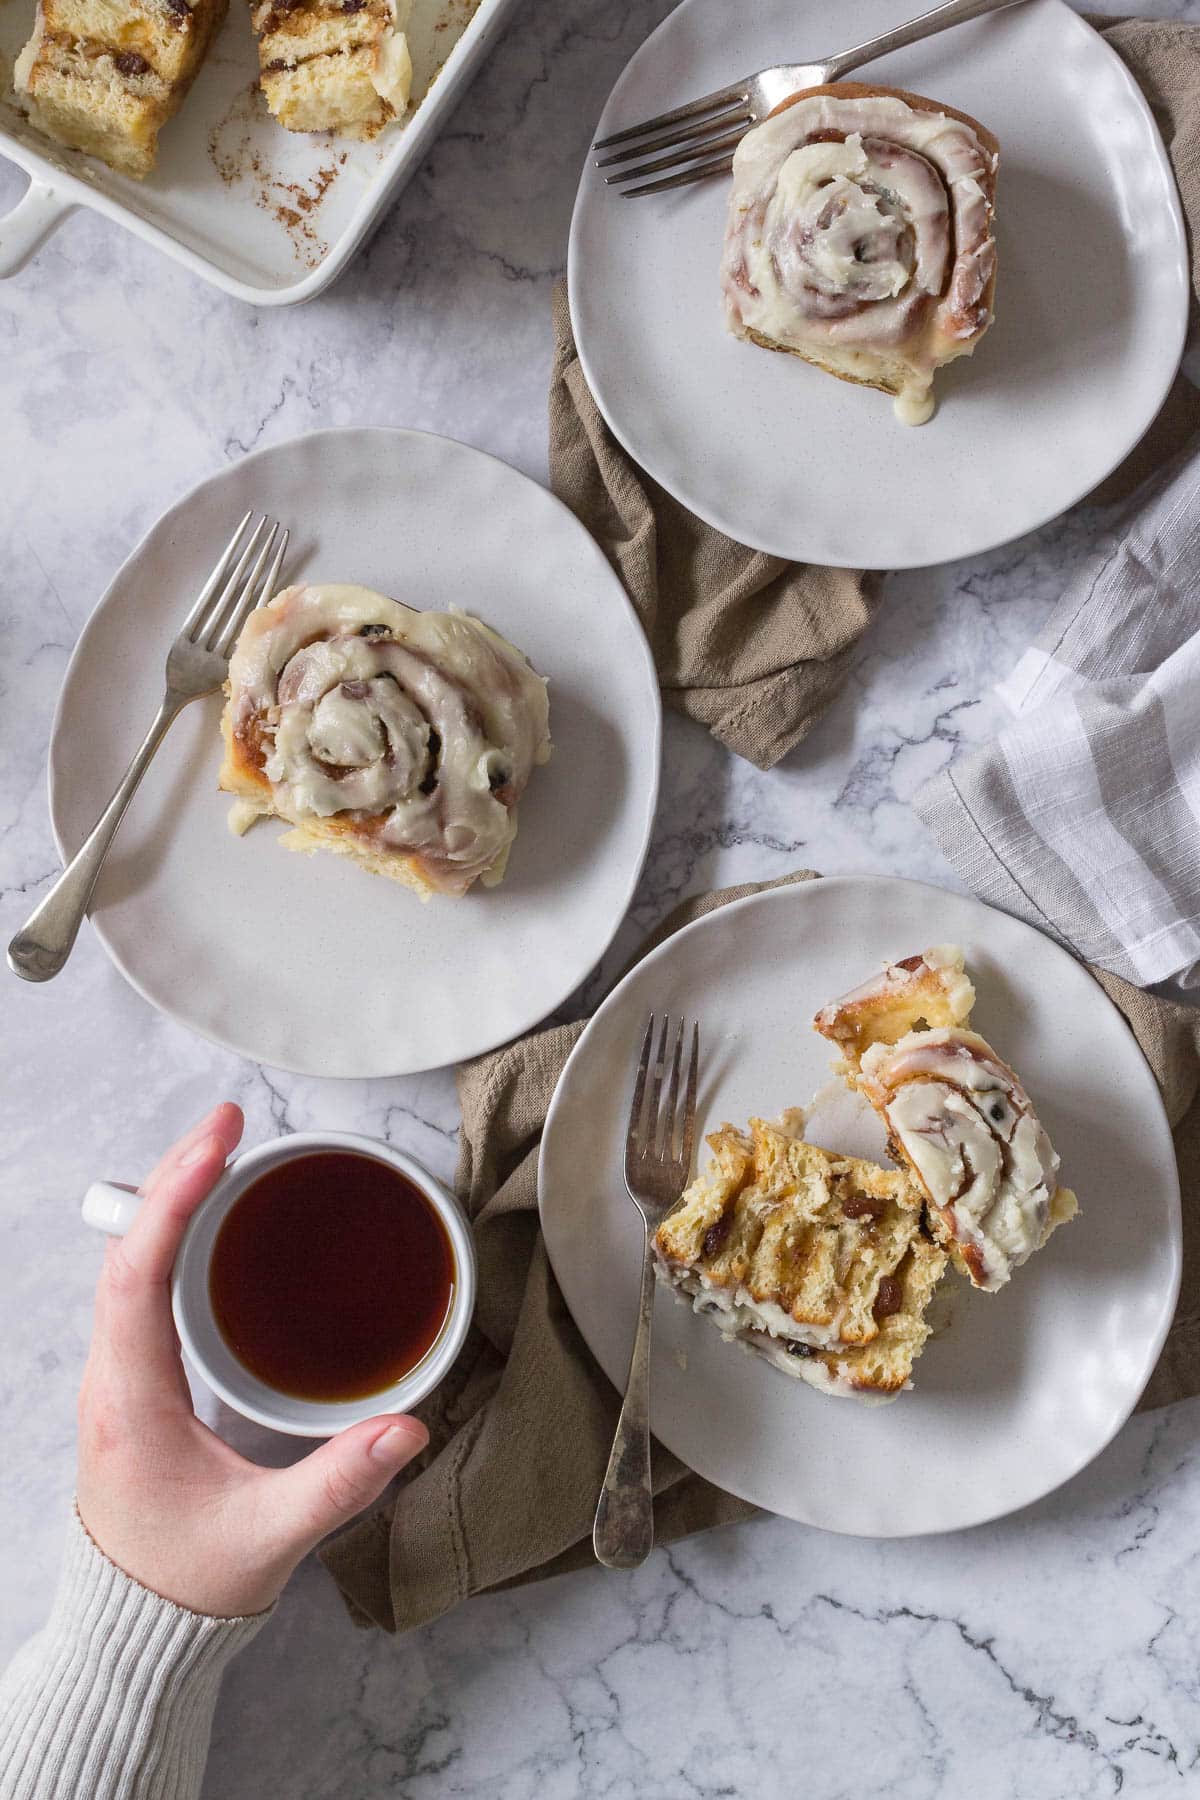
I love Chelsea buns! I grew up with them in South Africa, being a popular post-school treat that could be found in every supermarket or bakery across the country. There is something nostalgic about pulling apart sticky Chelsea buns with a hot cup of tea.
And I was really happy when I saw one of my favorite treats readily available here in New Zealand.
So I knew I needed to perfect my Chelsea buns recipe, but I also decided to ice them with a sour-cream frosting instead.
What is a Chelsea Bun?
This traditional British treat originated in Chelsea, London in the 18th century. And are similar to cinnamon rolls.
Traditional Chelsea buns consist of an enriched dough that is filled with fruit such as raisins, currants or sultanas and topped with a simple icing glaze.
Why You Will Love This Recipe
- Despite this being a bread recipe - its pretty fairly simple.
- These Chelsea buns are great for a gathering or a special occasion.
- The fruit and mix of spices is a delicious upgrade to a regular cinnamon roll.
- These buns can be topped with a delicious sour-cream frosting or a simple icing glaze - the choice is yours!
- These delightful sweet buns pair really well with a cup of tea or coffee.
Ingredients for Chelsea Buns
Here are some notes on the ingredients. Please refer to the recipe card for exact amounts.
Chelsea Bun Dough
High Grade/Strong/Bread Flour is a must when making any sort of bread. The higher protein content is essential in building gluten strands that hold the bread together and allow it to rise.
White Sugar - sugar is used both in the dough as well as in the filling. I've used caster sugar in the dough and brown sugar for the filling.
Active yeast - 4 teaspoons of active yeast may seem like a lot, but this is an enriched dough. The added butter, milk, and egg make it more difficult for the dough to rise when proofing. The additional yeast gives that little extra oomph required for soft pillowy goodness.
Butter, milk, and egg for the dough give the Chelsea bun (cinnamon roll) dough its rich flavor.
Chelsea Bun Filling
Butter, brown sugar, cinnamon, and nutmeg are the traditional ingredients in a Chelsea Bun and Cinnamon Roll Filling. You can also spice it up (pun intended) with mixed spice, ginger, pumpkin spice, or a speculoos/biscoff spice mix.
Raisins are the traditional fruit used in a Chelsea bun, particularly in South Africa.
Mixed peel - this is an optional extra. I love mixed peel, and always have some on hand, in case I need to make a batch of Hot Cross Buns.
Salt is crucial in bread, even in sweeter bread. Many people will be tempted to decrease the salt within the recipe, but the bread just won’t taste as good. Also, keep in mind to NOT mix the salt directly with the yeast. It will kill the yeast. Keep them socially distanced, only being allowed to meet up in the dough.
Sour Cream Frosting
A sour cream frosting – if you like cream cheese frosting, sour cream frosting is a must-try. Just a little less tangy, but oh so delicious. The sour cream frosting is made from sour cream, butter, icing sugar, and lemon juice.
Weighing & Measuring Ingredients
Weighing ingredients with a kitchen scale is more accurate than using measuring cups. All my recipes are developed and tested using grams only.
However, I have activated the metric-to-cup conversions. Simply click on "cups" or "metric" for your preferred measurements. For these conversions, cups are equal to 240 millilitres/8 fluid ounces, tablespoons are 15 milliliters and teaspoons are 5mL.
Step-by-Step Instructions
Step 1 - Place the water, butter, and milk in a heat-proof bowl or jug and heat until the butter is melted. Allow the mixture to cool until it is lukewarm.
Step 2 - Add the egg, sugar, and salt to the butter mixture and whisk to combine.
Step 3 - Combine 600g of flour and the yeast in a large mixing bowl. Add the liquids to the dry ingredients and mix using a fork or spoon until most of the flour is mixed into the liquids. Let this mixture then rest for 15 minutes, allowing the flour to become hydrated.
Step 4 - Using your additional cup of flour, flour the surface you are going to knead your dough on. Place the dough on the counter and toss the rest of the flour over your dough. Knead for about 10 minutes until the dough is soft, pliable, and forms a smooth ball.
NOTE - This step can be completed with a stand mixer. Just add all the flour to the bowl of a stand mixer before you start kneading on a low speed for about 8 minutes.
Step 5 - Grease or oil a large mixing bowl. Put the soft dough into the bowl and cover with a tea towel, in a warm place to rise for about an hour.
Step 6 - While the dough is rising, make the filling by combining the brown sugar, spices, and butter in a heat-proof bowl and microwave until the butter has melted. Whisk until the sugar is dissolved and the mixture is smooth and shiny. Set aside and allow to cool.
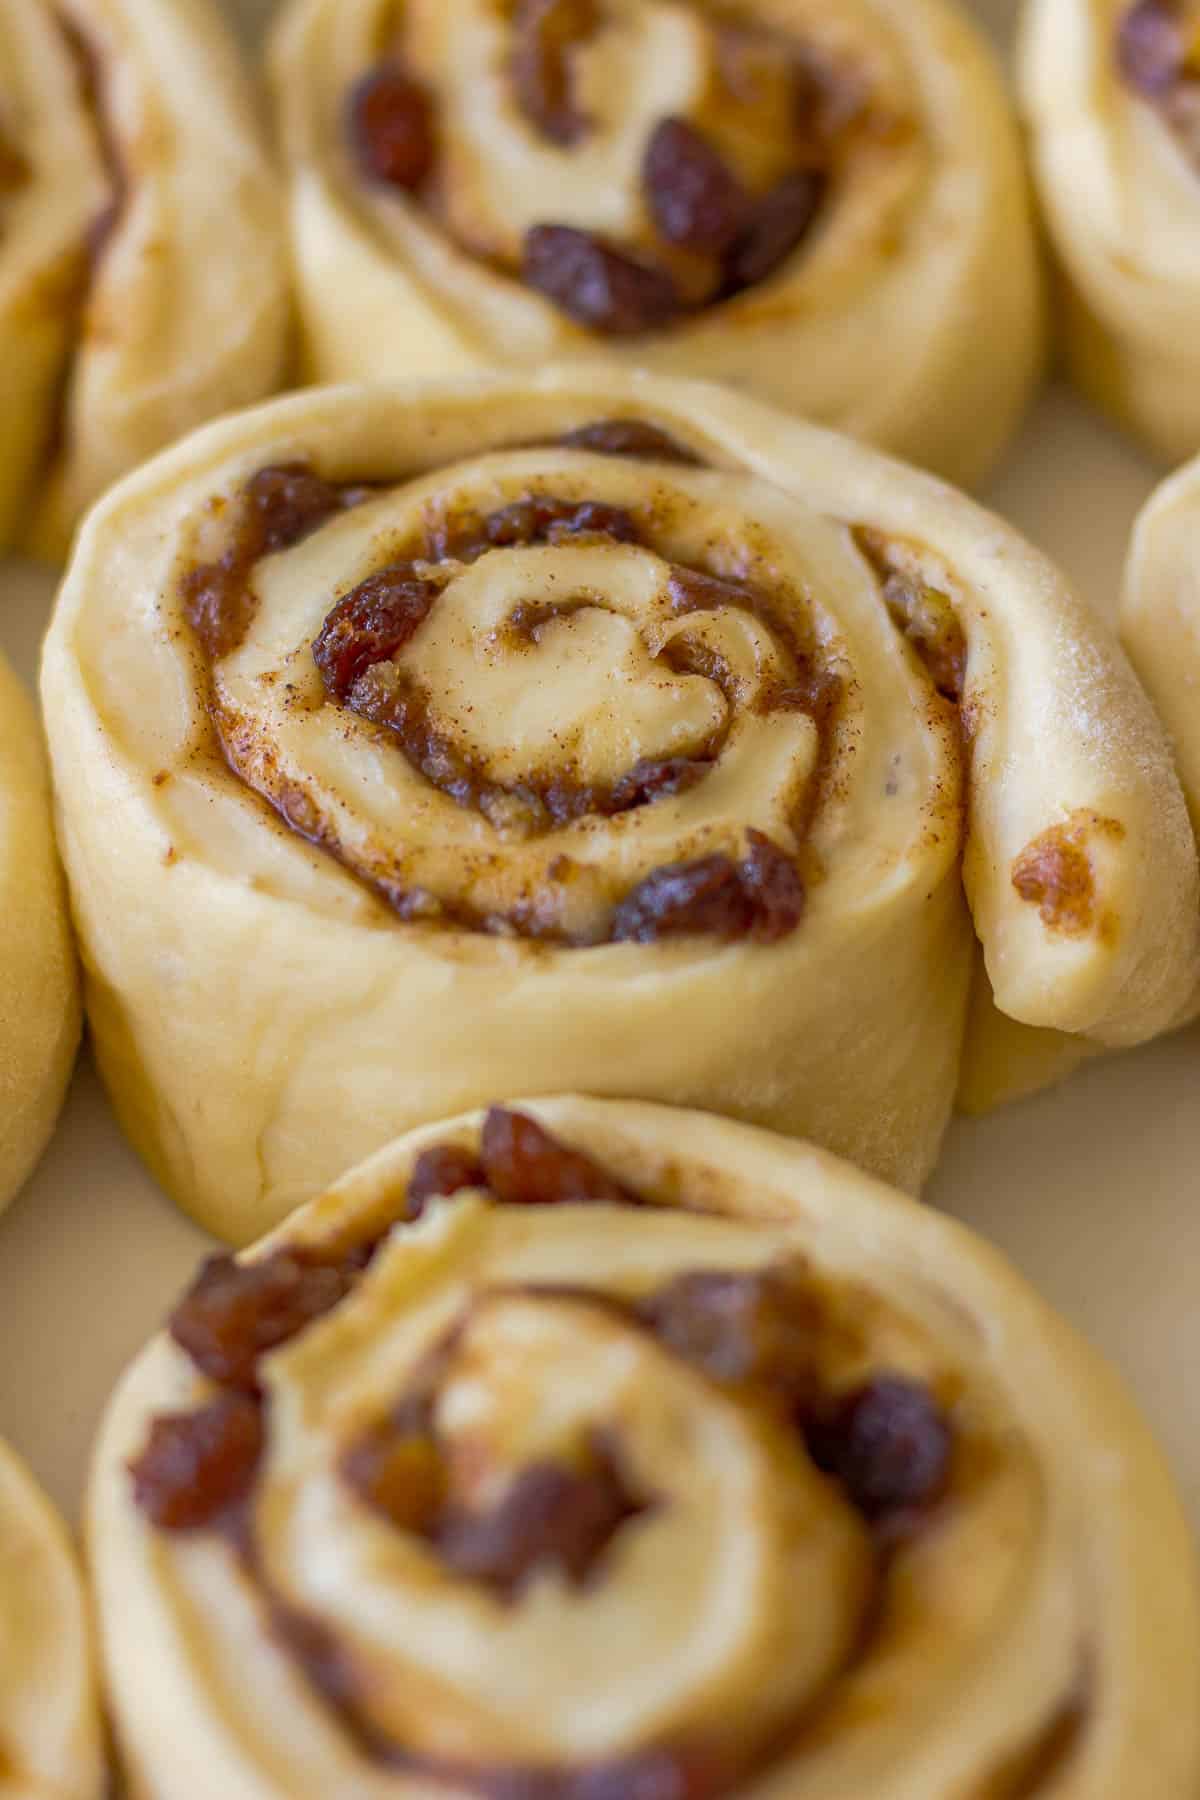
Step 7 - When the dough has almost doubled in size, roll it out on a lightly floured work surface in a rectangle about 40cm long and 25 cm wide. Spread the filling over the dough using a spatula or the back of a spoon. Sprinkle the filling with the raisins and mixed peel.
Step 8 - Beginning on the long edge of the dough, roll the dough up tightly. Pinch the seams together to seal in the filling along the length of the dough. Cut the roll into 12 equal portions using a sharp knife, or bench scraper.
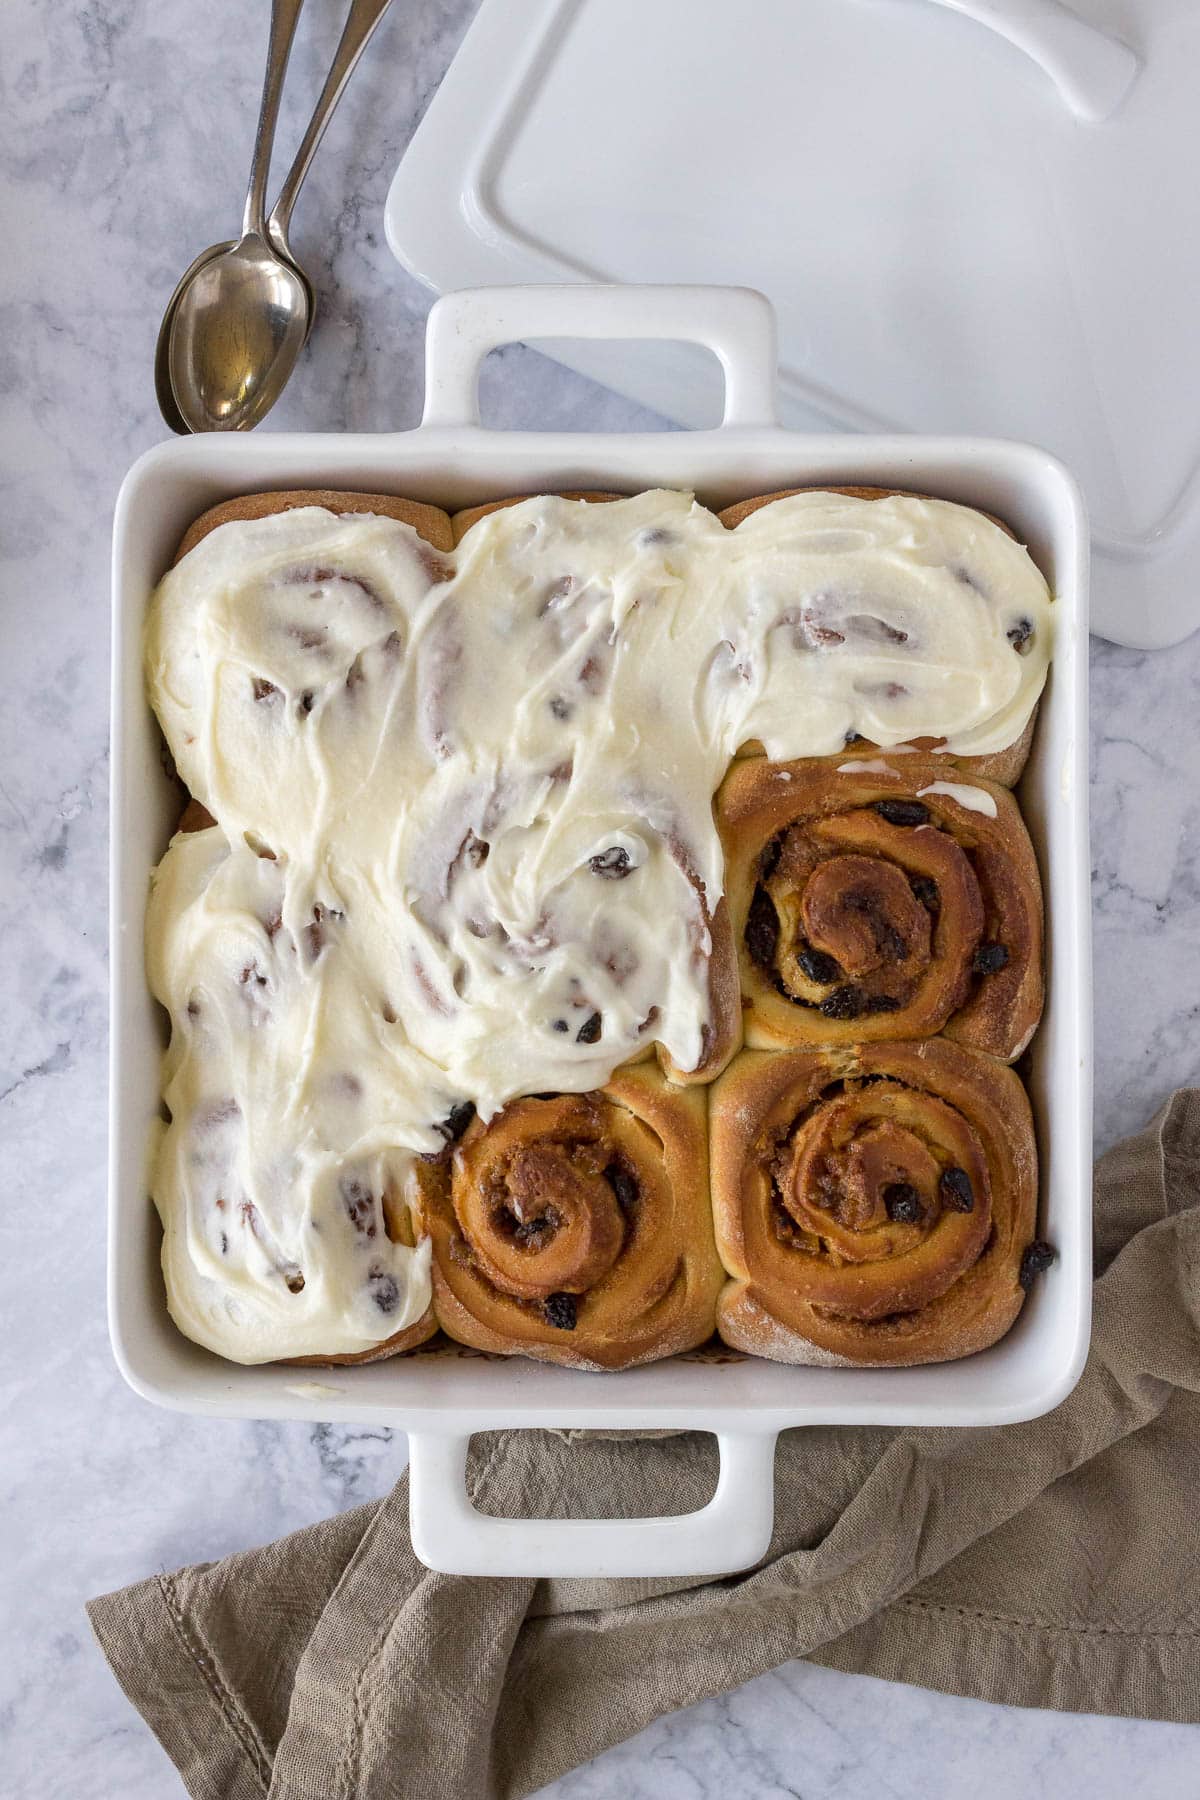
Step 9 - Place the rolls cut side down into your baking dish (9x13inch) leaving about 2 - 3 cm of space between the rolls to allow them to rise.
Step 10 - Cover the rolls with a tea towel and allow to rise for about an hour. Preheat the oven to 180°C/355F. Then bake the rolls for 25-30 minutes.
Step 11 - While the buns are baking, let the butter and sour cream come to room temperature, you may need to pop them into the microwave for 10 seconds if they are too cold for creaming.
Step 12 - Add the icing sugar and lemon juice to the butter and sour cream and whip until well combined using either a stand mixer, electric mixer, or whisk. You can frost the buns as soon as they come out of the oven, or you can allow them to cool a bit first.
Pro-Tips for This Recipe
Autolyse – this recipe calls for a resting stage before adding the final flour and kneading. This allows the flour to absorb all the water, stimulating gluten development. Leaving the dough to rest for 15 to 30 minutes cuts down the kneading time.
Trust the recipe. You may be tempted to add more flour than the recipe calls for because the dough feels sticky and it's just a plain mess. But keep kneading, work that gluten and before you know it you will have a beautiful cohesive smooth ball of dough. Adding too much flour to this recipe may result in dry buns, nobody wants a dry bun.
Kneading can be done by combining the ingredients as per the steps in the bowl of a stand mixer. Mix the dough on a low speed for about 8 minutes. I actually highly recommend using a stand mixer for kneading doughs, especially enriched doughs, but it can be done with a bit of patience and some elbow grease.
Poke Test
The poke-proof test is a simple test to determine whether your dough is finished proofing.
- You poke and the dough pops back immediately: under proofed.
- You poke and the dough doesn’t pop back at all: over-proofed.
- You poke and the dough pops back but still leaves an indentation: perfectly proofed.
Ovens and Air-Fryers
The temperatures stated are for conventional ovens. For convection, fan-forced, fan-assisted, or air-fryers, the temperature must be reduced by 20°C/25°F.
For baking, make sure the oven is fully preheated, and that the rack is in the middle of the oven. Open the oven as little as possible. For best baking results use an oven thermometer.
Remember that all ovens work slightly differently and bake times may need to be adjusted for your specific oven.
Storage
These rolls can be stored in an airtight container for up to 2 days, then transfer to the fridge for up to a week. Reheat Chelsea buns by popping them in the microwave for 15-30 seconds.
Rate & Review!
If you made this recipe, please leave a star rating! It gives my readers and me helpful feedback. If you want more recipes, subscribe to my newsletter, and follow me on Instagram, Pinterest, and Facebook!
Recipe Card
Chelsea Buns
Equipment
- Rectangular Cake Pan (13x9 Inch/33cmx23cm)
Ingredients
Chelsea Bun Dough
- 250 grams water
- 90 grams butter
- 4 teaspoon instant yeast
- 125 grams milk
- 1 egg
- 1 teaspoon table salt
- 750 grams bread flour (strong/high-grade)
- 80 grams white granulated sugar (caster/granulated)
Chelsea Bun Filling
- 60 grams butter
- 100 grams light brown sugar
- 2 teaspoon ground cinnamon
- ¼ teaspoon ground nutmeg
- ¾ cup raisins
- ¼ cup mixed peel
Sour Cream Frosting
- 300 grams icing sugar (powdered/confectioner's)
- 40 grams butter
- 60 grams sour cream
- 2 teaspoon lemon juice
Instructions
- Place the water, butter, and milk in a heat-proof bowl or jug and heat until the butter is melted. Allow the mixture to cool until it is lukewarm.250 grams water, 4 teaspoon instant yeast, 125 grams milk, 90 grams butter
- Add the egg, sugar, and salt to the butter mixture and whisk to combine.1 egg, 80 grams white granulated sugar, 1 teaspoon table salt
- Combine 600g of flour and the yeast in a large mixing bowl. Add the liquids to the dry ingredients and mix using a fork or spoon until most of the flour is mixed into the liquids. Let this mixture then rest for 15 minutes, allowing the flour to become hydrated.750 grams bread flour
- Using your additional cup of flour, flour the surface you are going to knead your dough on. Place the dough on the counter and toss the rest of the flour over your dough. Knead for about 10 minutes until the dough is soft, pliable, and forms a smooth ball. *Note 1
- Grease or oil a large mixing bowl. Put the soft dough into the bowl and cover with a tea towel, in a warm place to rise for about an hour.
- While the dough is rising, make the filling by combining the brown sugar, spices, and butter in a heat-proof bowl and microwave until the butter has melted. Whisk until the sugar is dissolved and the mixture is smooth and shiny. Set aside and allow to cool.100 grams light brown sugar, 2 teaspoon ground cinnamon, ¼ teaspoon ground nutmeg, 60 grams butter
- When the dough has almost doubled in size, roll it out on a lightly floured work surface in a rectangle about 40cm long and 25 cm wide. Spread the filling over the dough using a spatula or the back of a spoon. Sprinkle the filling with the raisins and mixed peel.¼ cup mixed peel, ¾ cup raisins
- Beginning on the long edge of the dough, roll the dough up tightly. Pinch the seams together to seal in the filling along the length of the dough. Cut the roll into 12 equal portions using a sharp knife, or bench scraper.
- Place the rolls cut side down into your baking dish (9x13inch) leaving about 2 - 3 cm of space between the rolls to allow them to rise.
- Cover the rolls with a tea towel and allow to rise for about an hour. Preheat the oven to 180°C/355F. Then bake the rolls for 25-30 minutes.
- While the buns are baking, let the butter and sour cream come to room temperature, you may need to pop them into the microwave for 10 seconds if they are too cold for creaming.
- Add the icing sugar and lemon juice to the butter and sour cream and whip until well combined using either a stand mixer, electric mixer, or whisk. You can frost the buns as soon as they come out of the oven, or you can allow them to cool a bit first.300 grams icing sugar, 40 grams butter, 60 grams sour cream, 2 teaspoon lemon juice
- Chelsea buns can be served warm or at room temperature. Enjoy!
Notes
- This step can be completed with a stand mixer. Just add all the flour to the bowl of a stand mixer before you start kneading on a low speed for about 8 minutes.
- For a simple glaze, combine 2 cups of icing sugar (250 grams) with 1 teaspoon of vanilla extract and 2-4 tablespoons of milk, then drizzle over the buns.
Poke Test
- You poke and the dough pops back immediately: under proofed
- You poke and the dough doesn’t pop back at all: over-proofed
- You poke and the dough pops back but still leaves an indentation: perfectly proofed
Storage
These rolls can be stored in an airtight container for up to 2 days, then transfer to the fridge for up to a week. Reheat Chelsea buns by popping them in the microwave for 15-30 seconds.Nutrition
Nutrition information is an estimate. If scaling the recipe remember to scale your cook and bakeware accordingly. All temperatures stated are conventional, unless otherwise stated. Recipes tested in grams and at sea level.
Comments
No Comments