


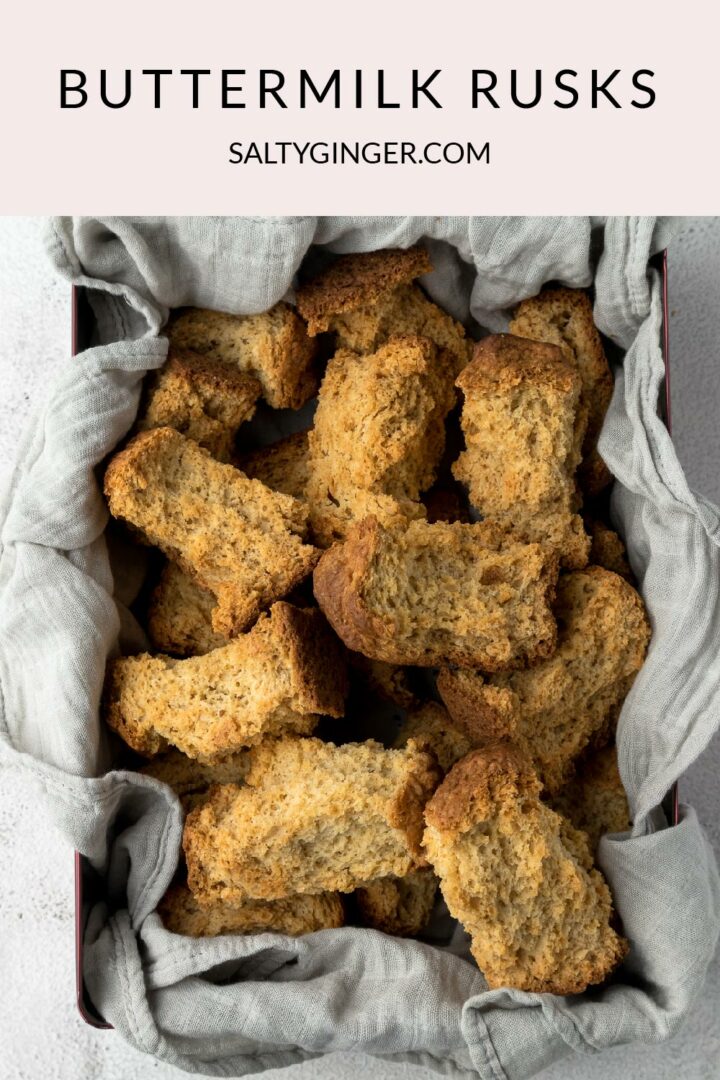
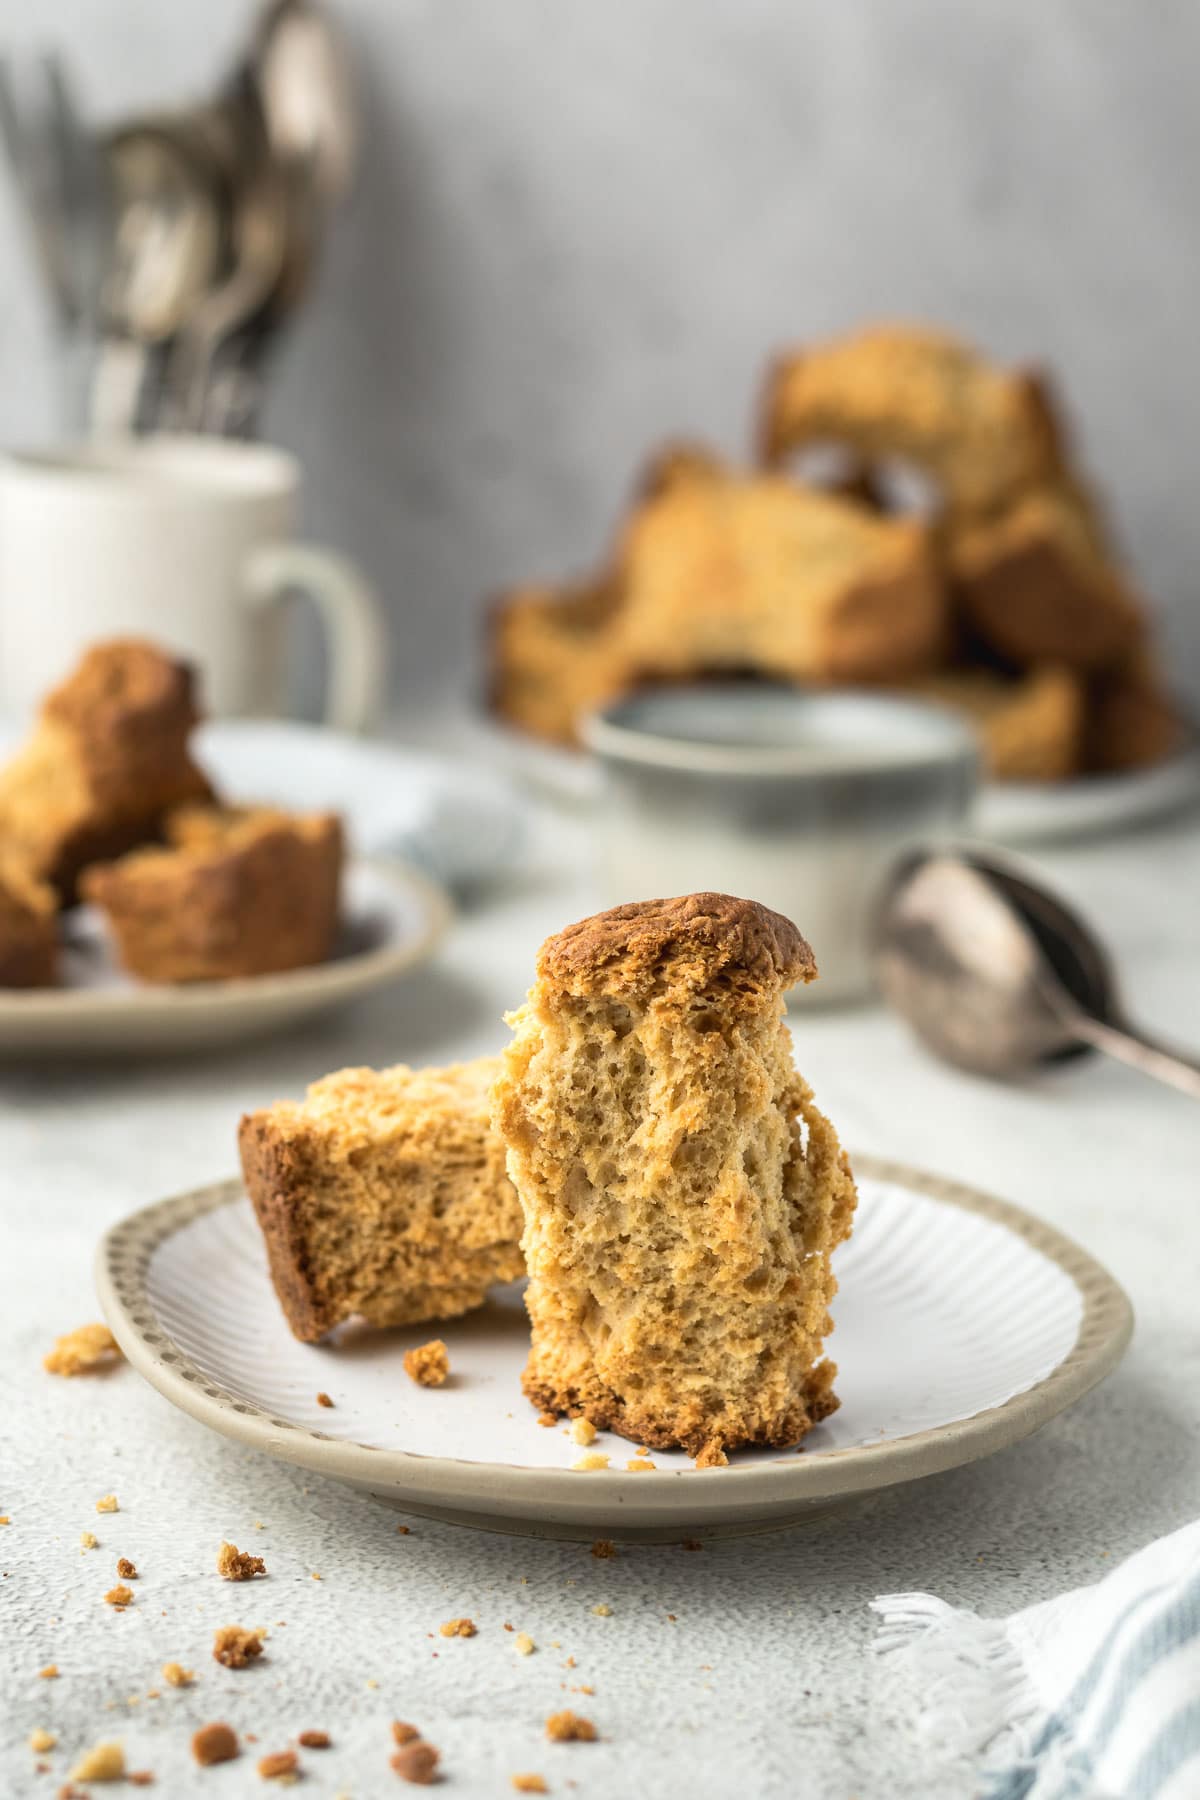
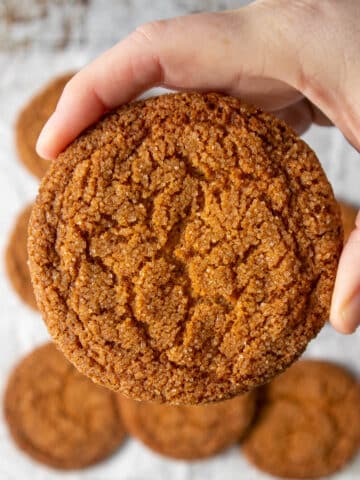
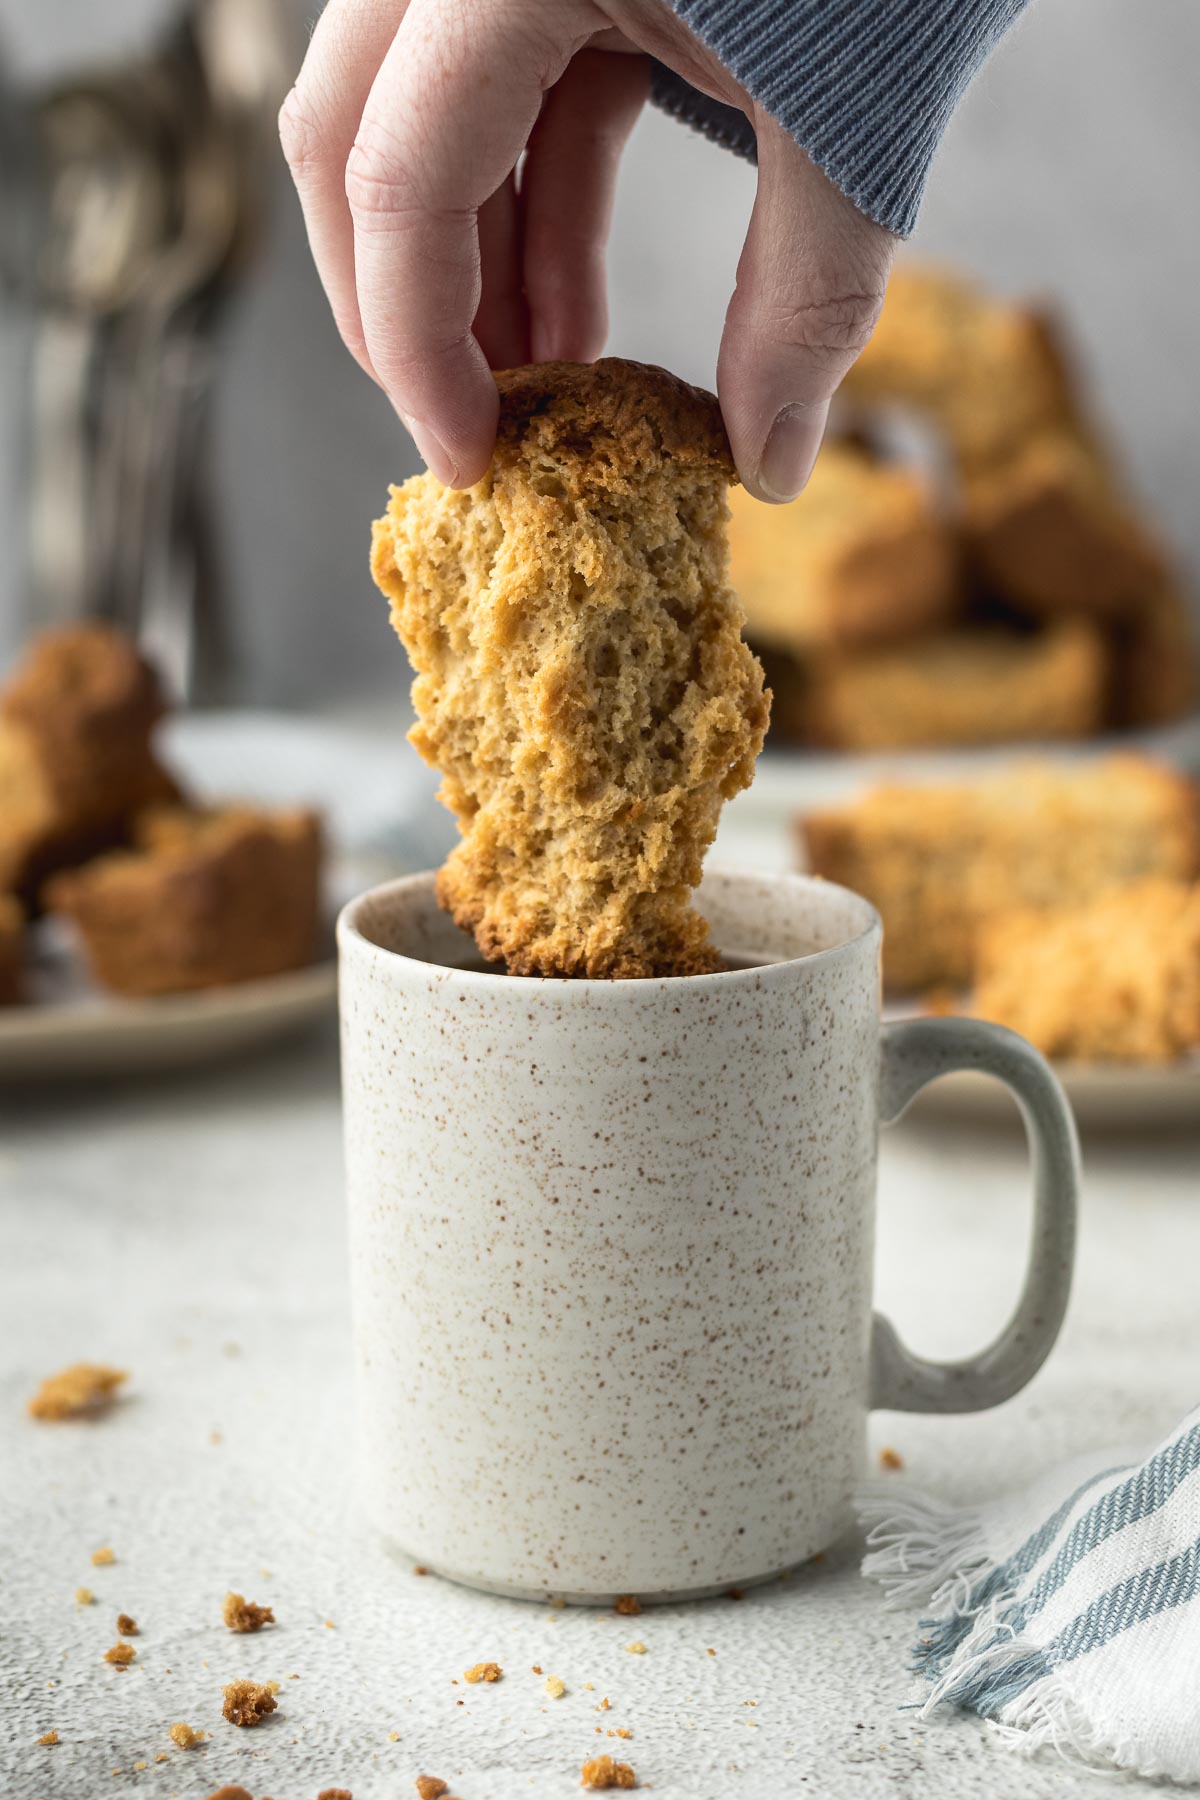
These rich, tasty homemade buttermilk rusks (karringmelk beskuit) are easy to make and well worth the effort. Dunk them into coffee, tea, or even hot chocolate for a quick breakfast, or afternoon snack.
One of life's great pleasures is dipping a delicious buttermilk rusk into a hot cup of coffee, especially on a winter's day!
Jump to:
- What are buttermilk rusks and where do they come from?
- What You Need for this Recipe
- Substitutions/Variations
- Small-Batch
- Making Buttermilk Rusks
- Baking Buttermilk Rusks
- Pro Tips for this Recipe
- Buttermilk Rusks (Karringmelk Beskuit) FAQ
- Other South African Recipes You May Like
- How do you like your buttermilk rusks?
- Recipe Card
- Community Comments
What are buttermilk rusks and where do they come from?
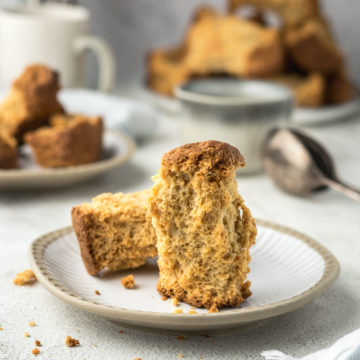
A rusk is a hard twice-baked biscuit that can be made from bread, cake or quick bread type doughs. Once the bread, cake or rusk dough has baked, it is then pulled apart (to make chunky rusks) or sliced and baked again until all the moisture has been driven off. Varieties of rusks can be found across the globe.
Buttermilk rusks, in particular, originated in South Africa, as the quick-rising version of the traditional rusks that were made using sourdough or yeast to rise the sweetened bread. Buttermilk rusks are a popular breakfast and snack item.
Rusks are sold across the country, varying from commercially made rusks (the most famous being Ouma rusks) to more homemade-style in shops across the country.
South African Rusks
South African Rusks have been around since the 1690s. Drying out bread and making rusks was a method of preserving bread by removing residual moisture. Originally rusks were basically double-baked bread. There are still recipes that call the baking and drying of store-bought bread dough.
Over time, plenty of varieties of rusks have emerged. Some are made with yeast, some with sourdough, and others are made with baking soda and baking powder. They are made with varying levels of sugar for sweetness, some are crammed with nuts, seeds, and fruits. Perhaps the most famous of all rusk varieties is that of buttermilk rusks or karringmelk beskuit.
One of my favorites is condensed milk rusks.
What You Need for this Recipe
Equipment
This recipe requires mixing bowls, loaf, or cake tins, as well as some roasting pans or cookie sheets for drying the rusks in the oven.
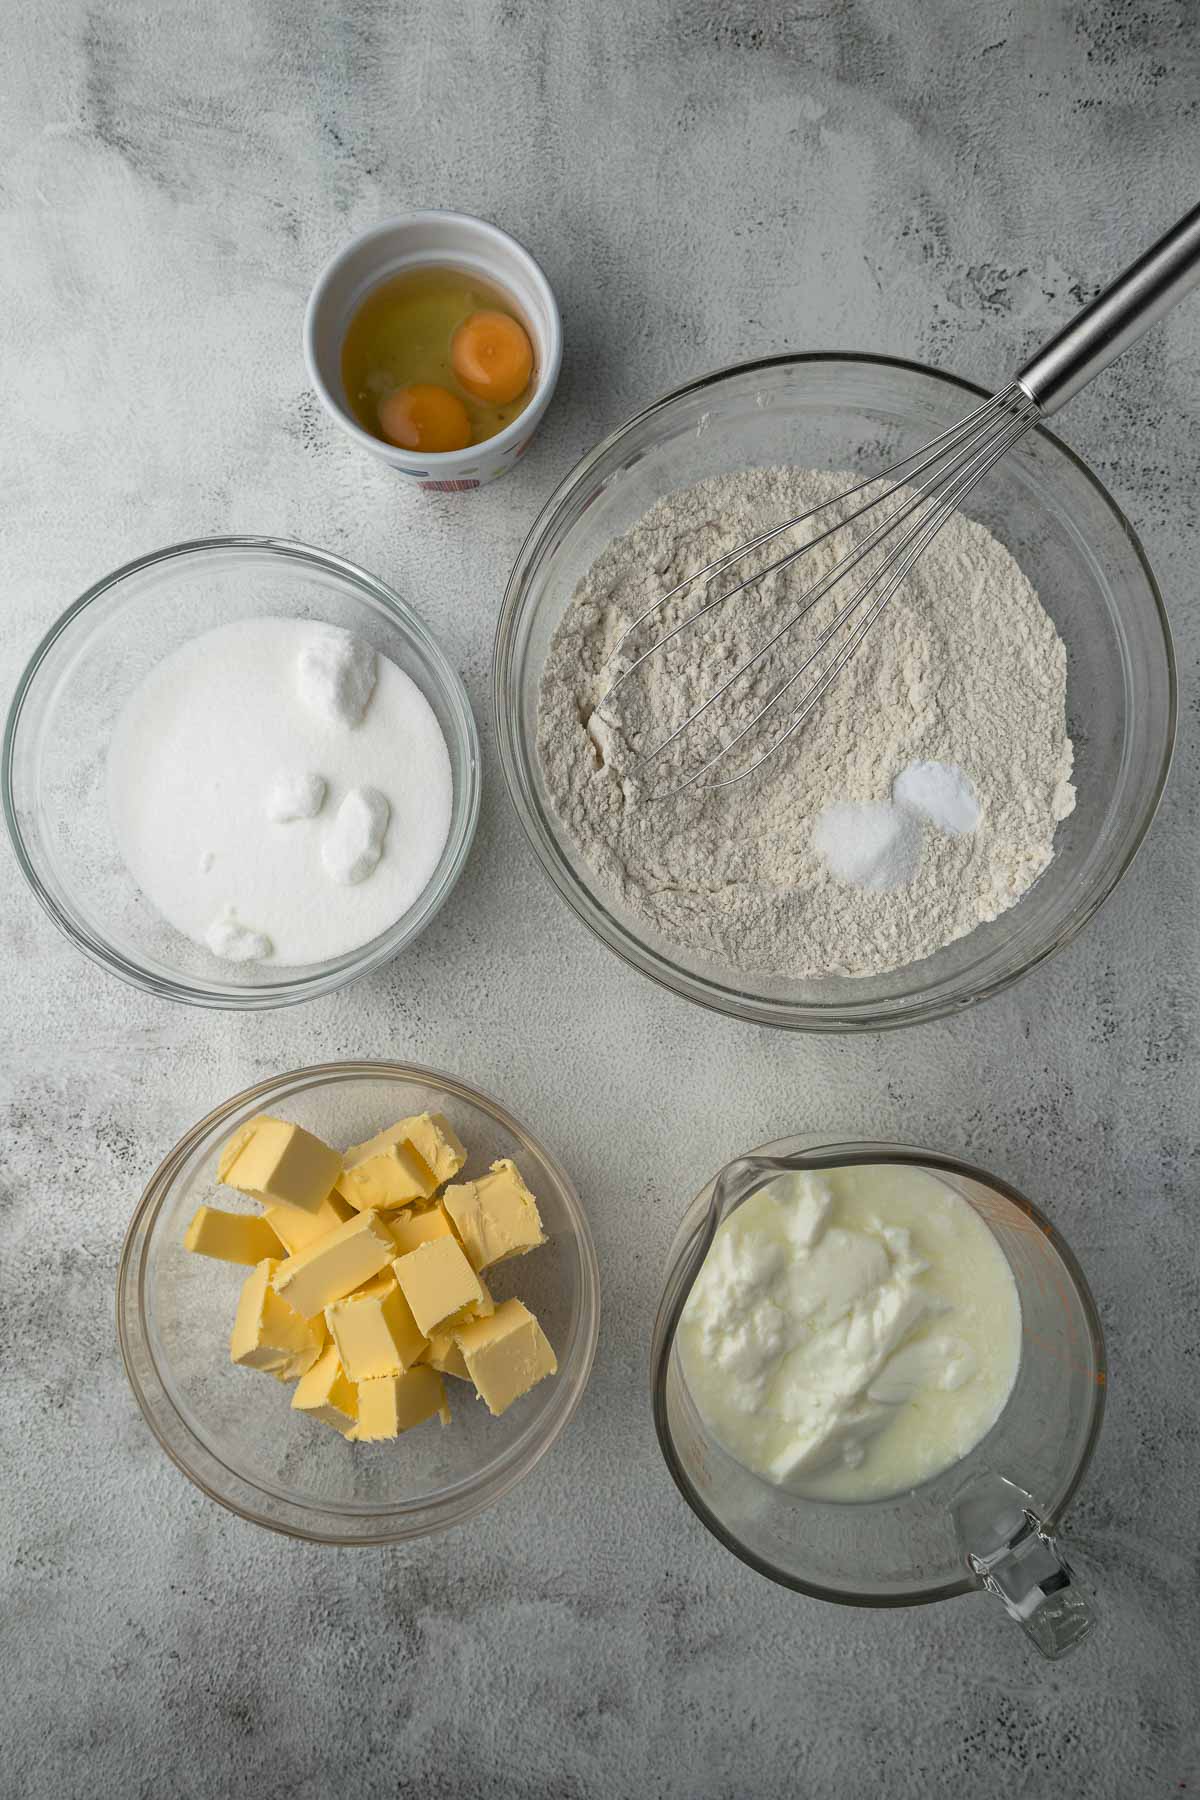
Ingredients
- Flour - most buttermilk rusk recipes call for self-raising/self-rising flour. This is basically plain, standard grade or cake flour (South Africa) that already contains baking powder. See notes for a plain flour substitute under substitutions/variations.
- Salt brings out the flavor of the flour and balances the sweetness.
- Sugar - I used caster sugar in this recipe because it tends to melt and incorporate more easily into the batter. However, you can use granulated white sugar.
- Buttermilk gives these rusks their flavor.
- Baking soda (bicarbonate of soda or bread soda) is added to the flour to give a bit more lift because we do knead this dough a little bit. Baking soda reacts with the acidity of the buttermilk.
- Butter adds to the depth of flavor. You can substitute butter with a vegan baking alternative if you so wish.
- Eggs help bind everything together and also add a nice rich flavour to the dough.
Substitutions/Variations
To make buttermilk rusks without self-raising/self-rising flour:
- for chunky bolletjie rusks add 10 level teaspoons of baking powder to plain flour
- for sliced rusks add 7 level teaspoons of baking powder to plain flour
NOTE - for this recipe, my original recipe called for 10 teaspoons of baking powder per 1kg of flour (which falls in line with typically home-made self-raising flour ratios), however, one of my readers was having an issue. After some questions about how baking powder was measured on their end, retesting my recipe on my end (full amount of baking powder for chunky rusks and less baking powder for sliced rusks), and doing extensive reading on chemical leaveners, measuring spoons vs regular teaspoons, and altitude I have made a few suggestions as can be seen above.
To make these rusks without buttermilk, you can make a buttermilk substitute for rusks by adding 1 tablespoon of lemon juice to one cup of milk and letting it stand for about 10 minutes. The milk will curdle and you have a buttermilk substitute. For this recipe in particular you will need 2 cups (500ml) of milk and 2 tablespoons of lemon juice.
Small-Batch
If you don't want to make a full batch of rusks, simply half the recipe by clicking on the "½" button on the recipe card, and follow the instructions as is.
Making Buttermilk Rusks
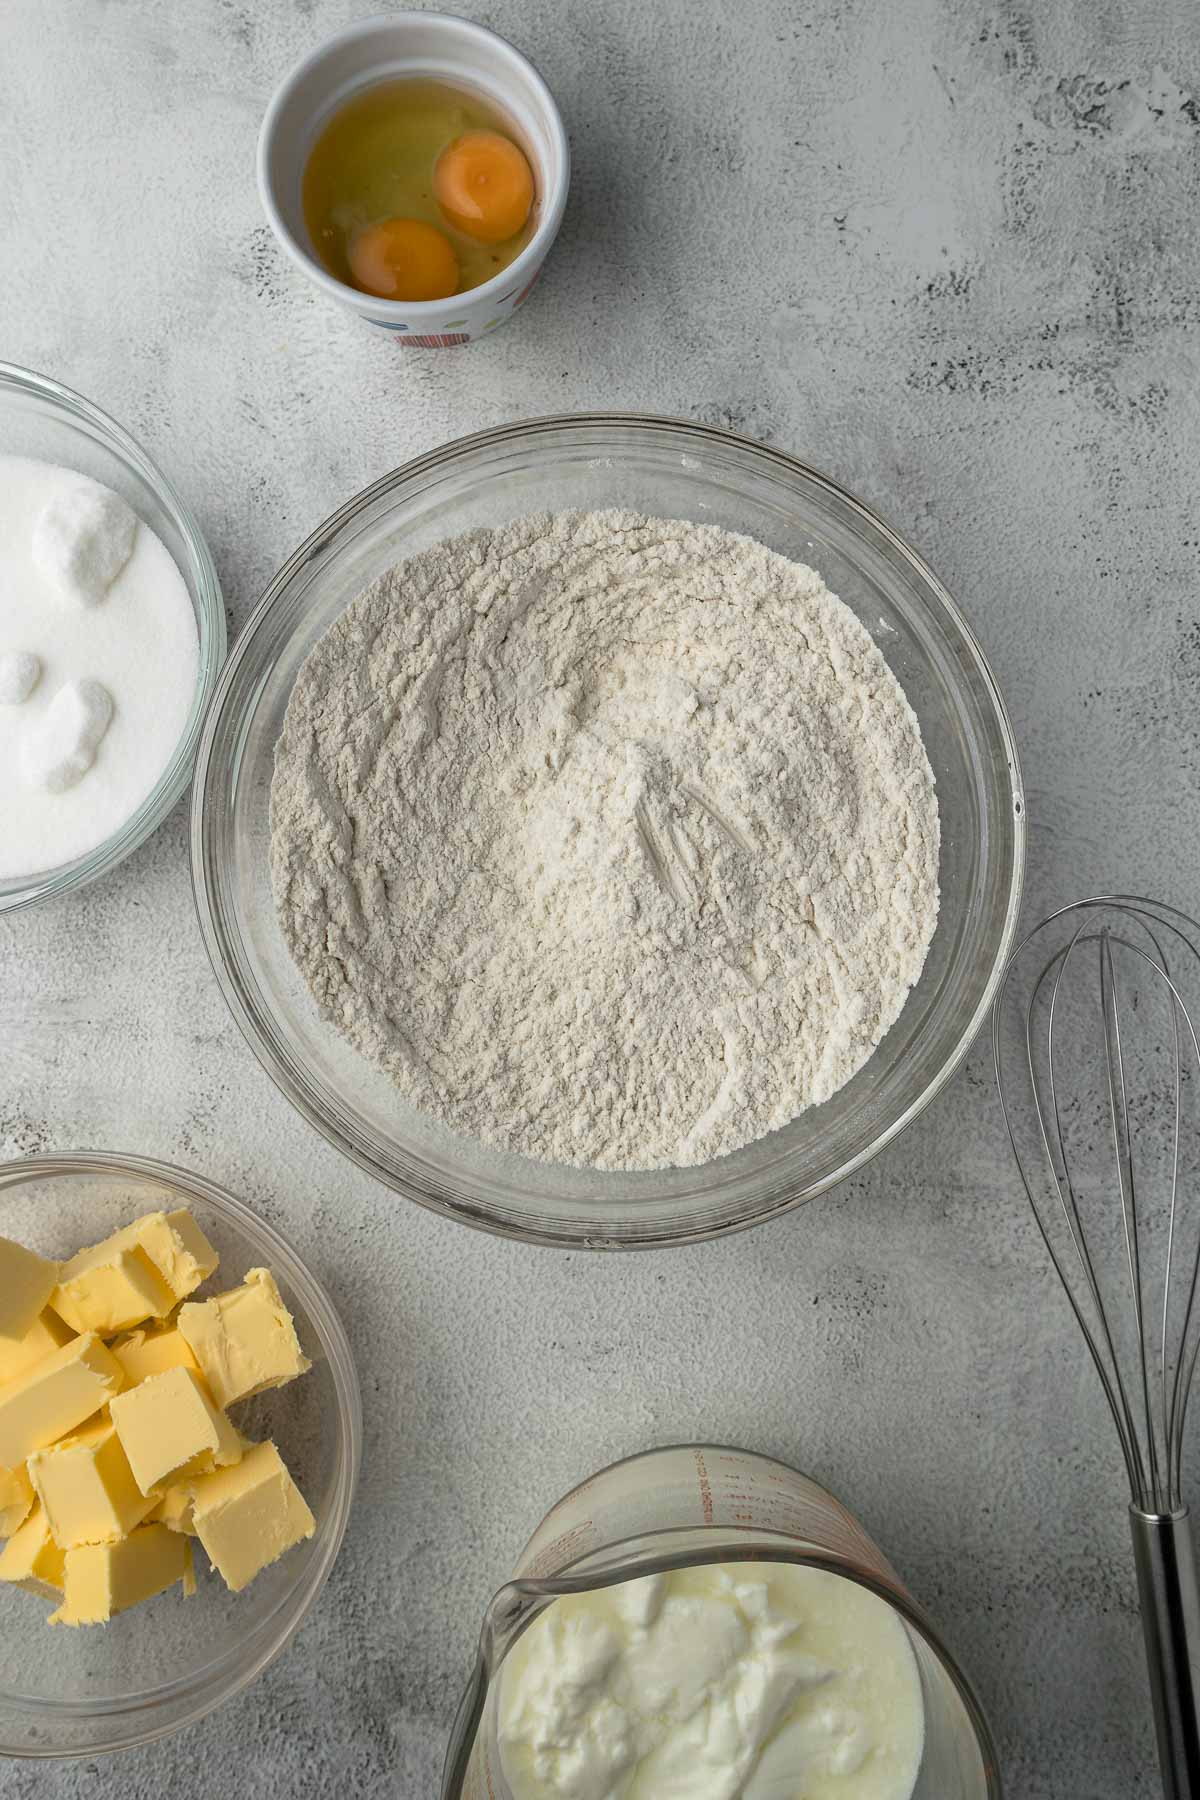
Step 1 - Into a large mixing bowl, weigh out the flour, add in the salt and baking soda. Whisk through thoroughly to remove any lumps and to distribute the salt, baking soda and inherent leaveners throughout the flour. Preheat the oven to 200°C or 180°C fans assisted.
Step 2 - Melt the butter in the microwave or on the stove-top. Add in the sugar and whisk until the sugar is completely dissolved and the butter has thickened and is smooth and shiny. You may need to heat the butter in the microwave with the sugar for 20 seconds or keep it on the stove for 20 seconds to gain the correct consistency. Allow the butter to cool.
NOTE - many buttermilk rusk recipes will require the butter to be rubbed into the flour, then the sugar, eggs, and buttermilk are added. If you want, you can still rub the butter into the flour. Both methods result in really tasty buttermilk rusks.
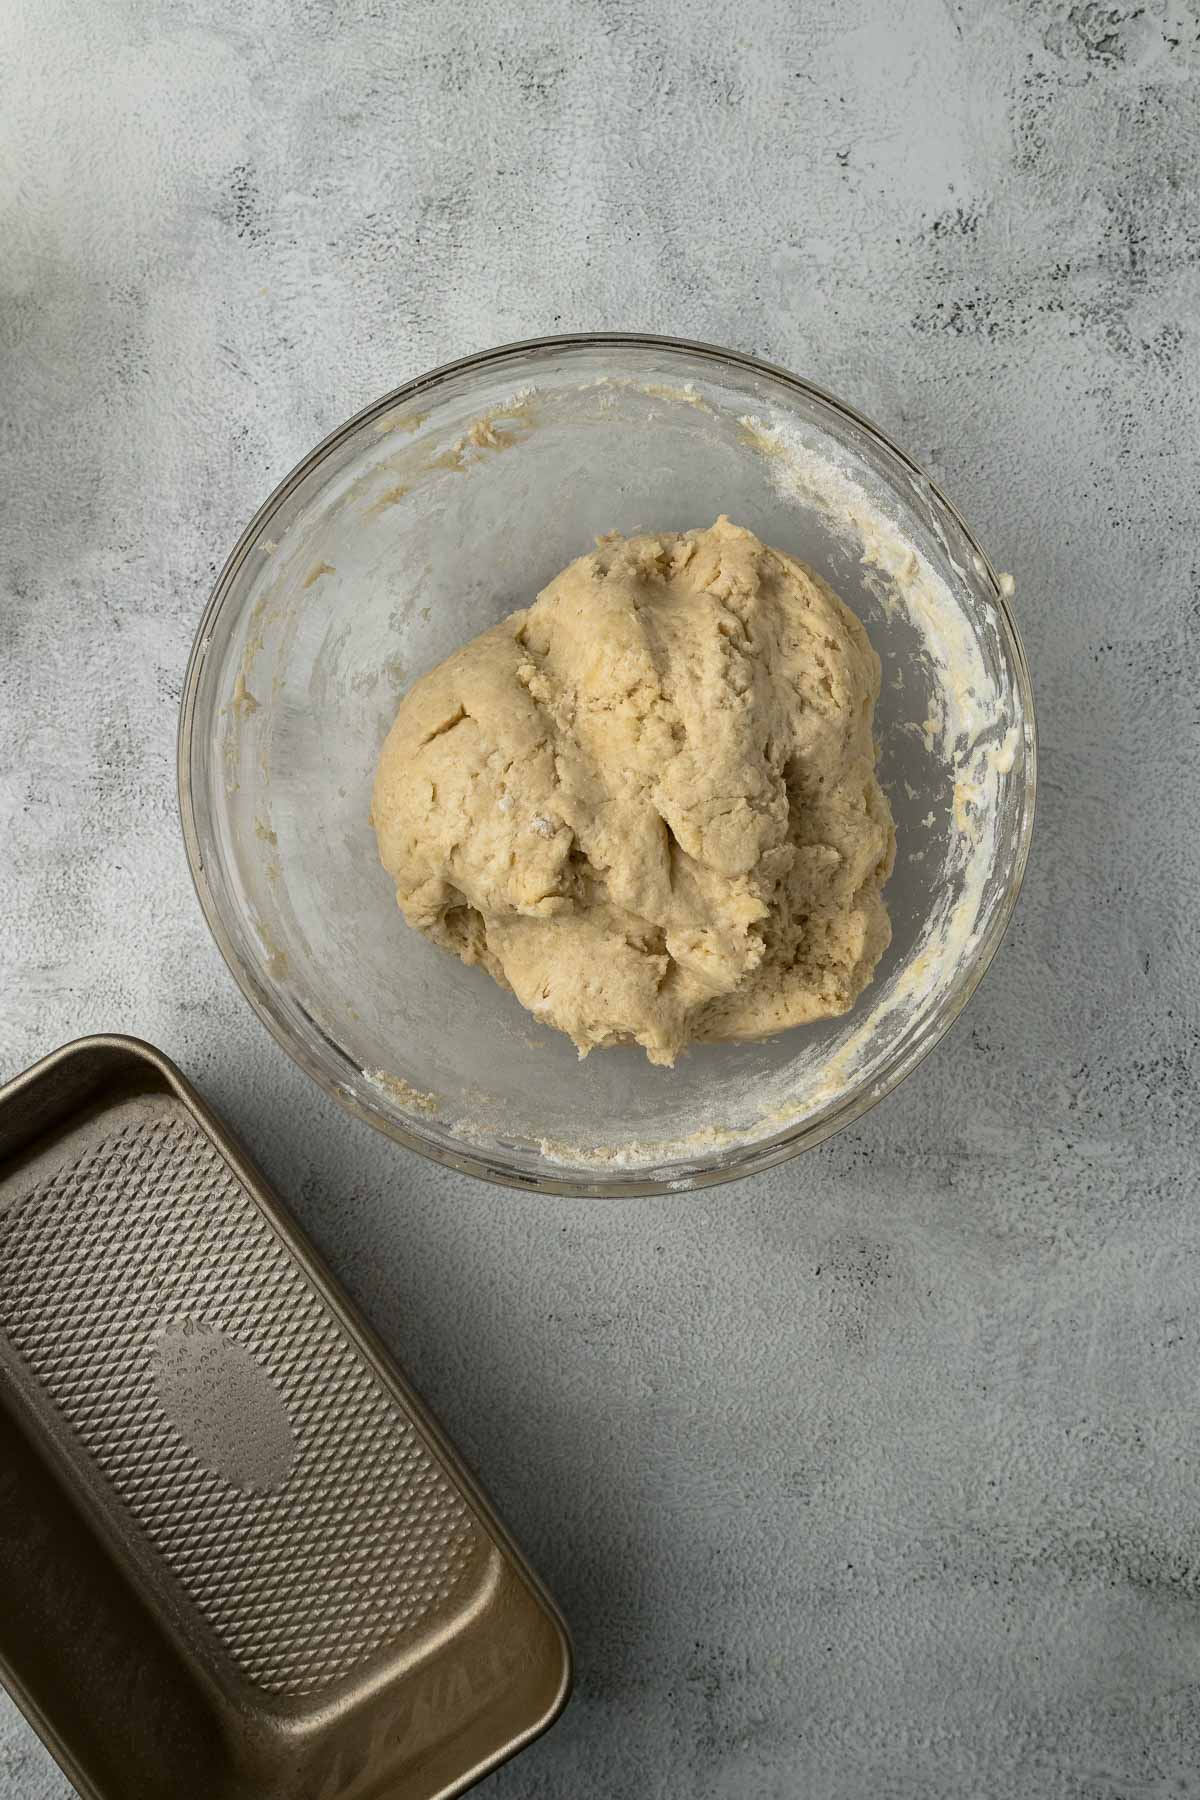
Step 3 - Whisk together the eggs and buttermilk. Add the eggs, buttermilk, and butter mixture to the flour and mix using a wooden spoon or silicone spatula. Once a shaggy dough has been achieved, knead the dough a few times using your hands until you have a smooth-ish dough. Some gluten development is wanted, but we aren't going for bread dough.
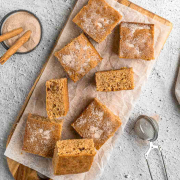
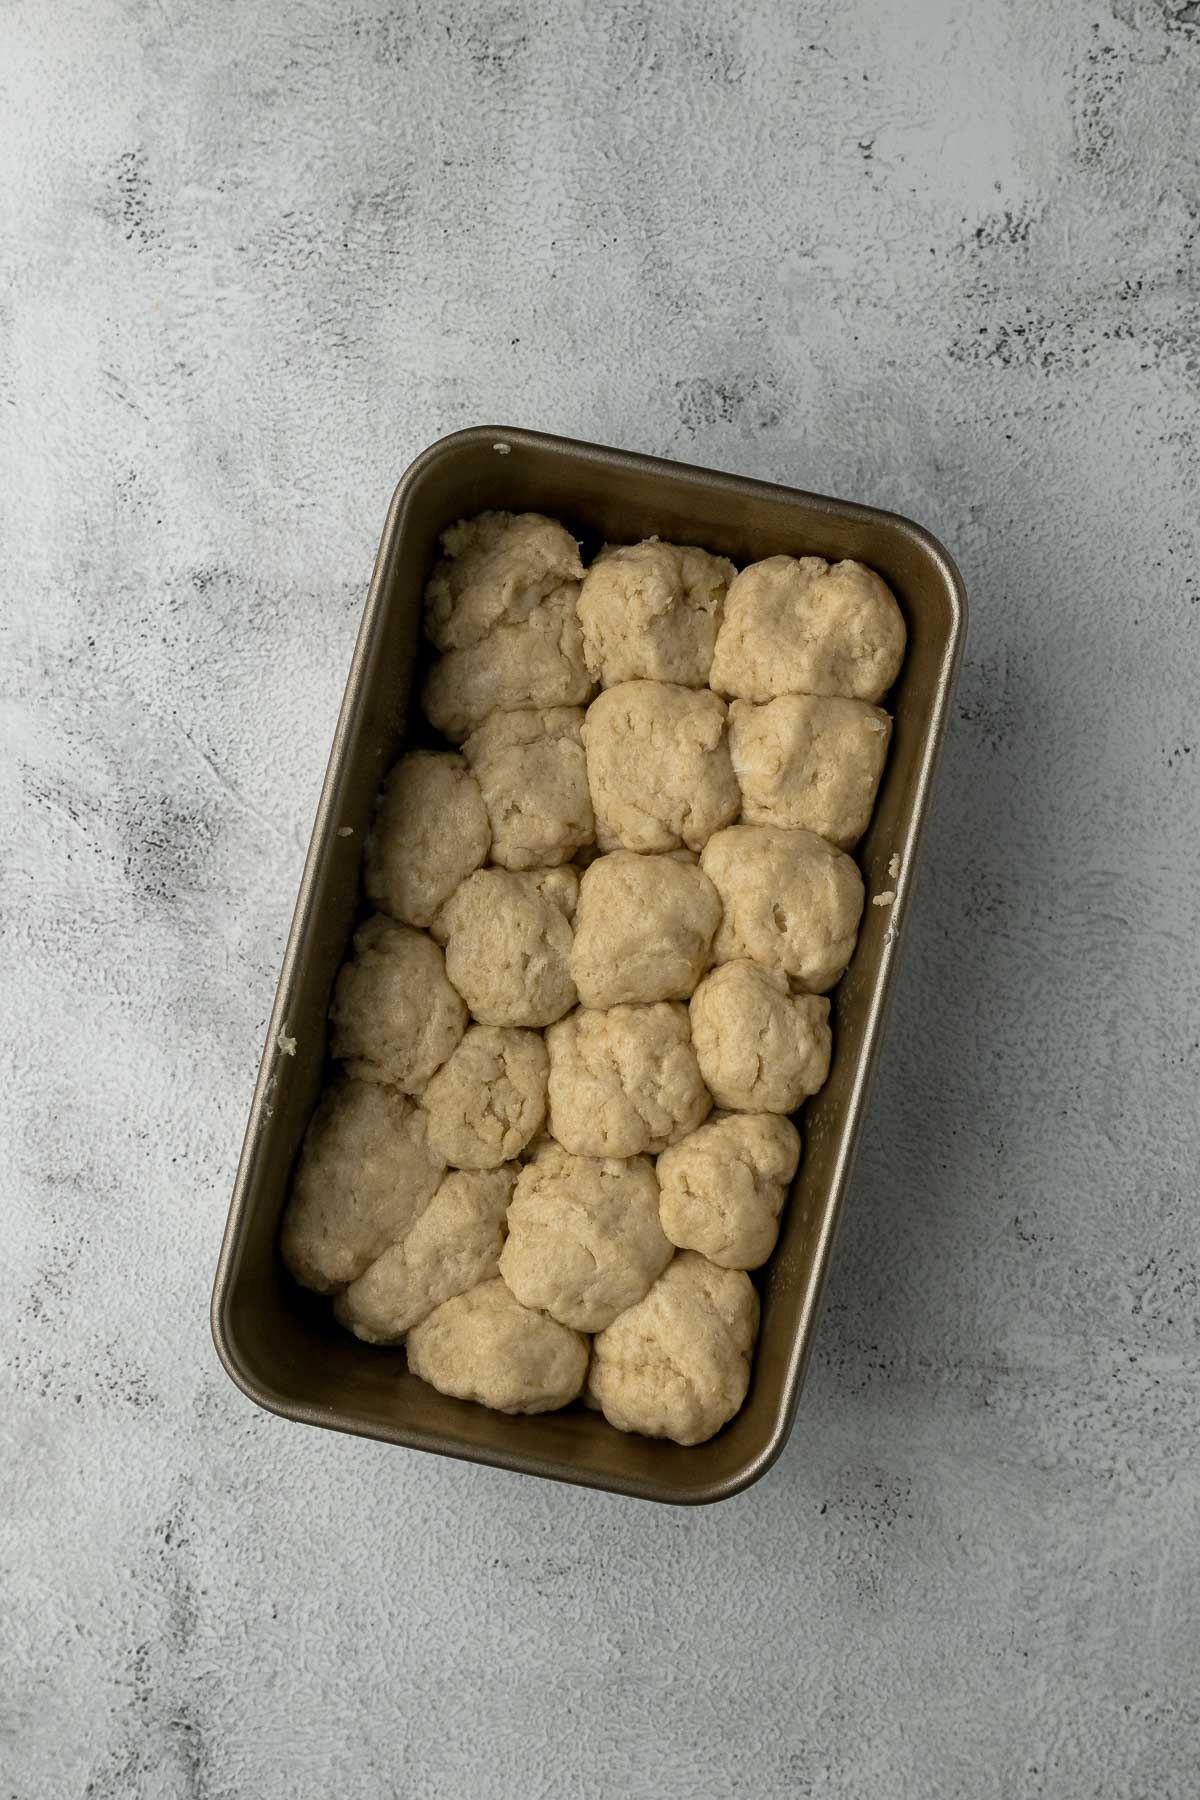
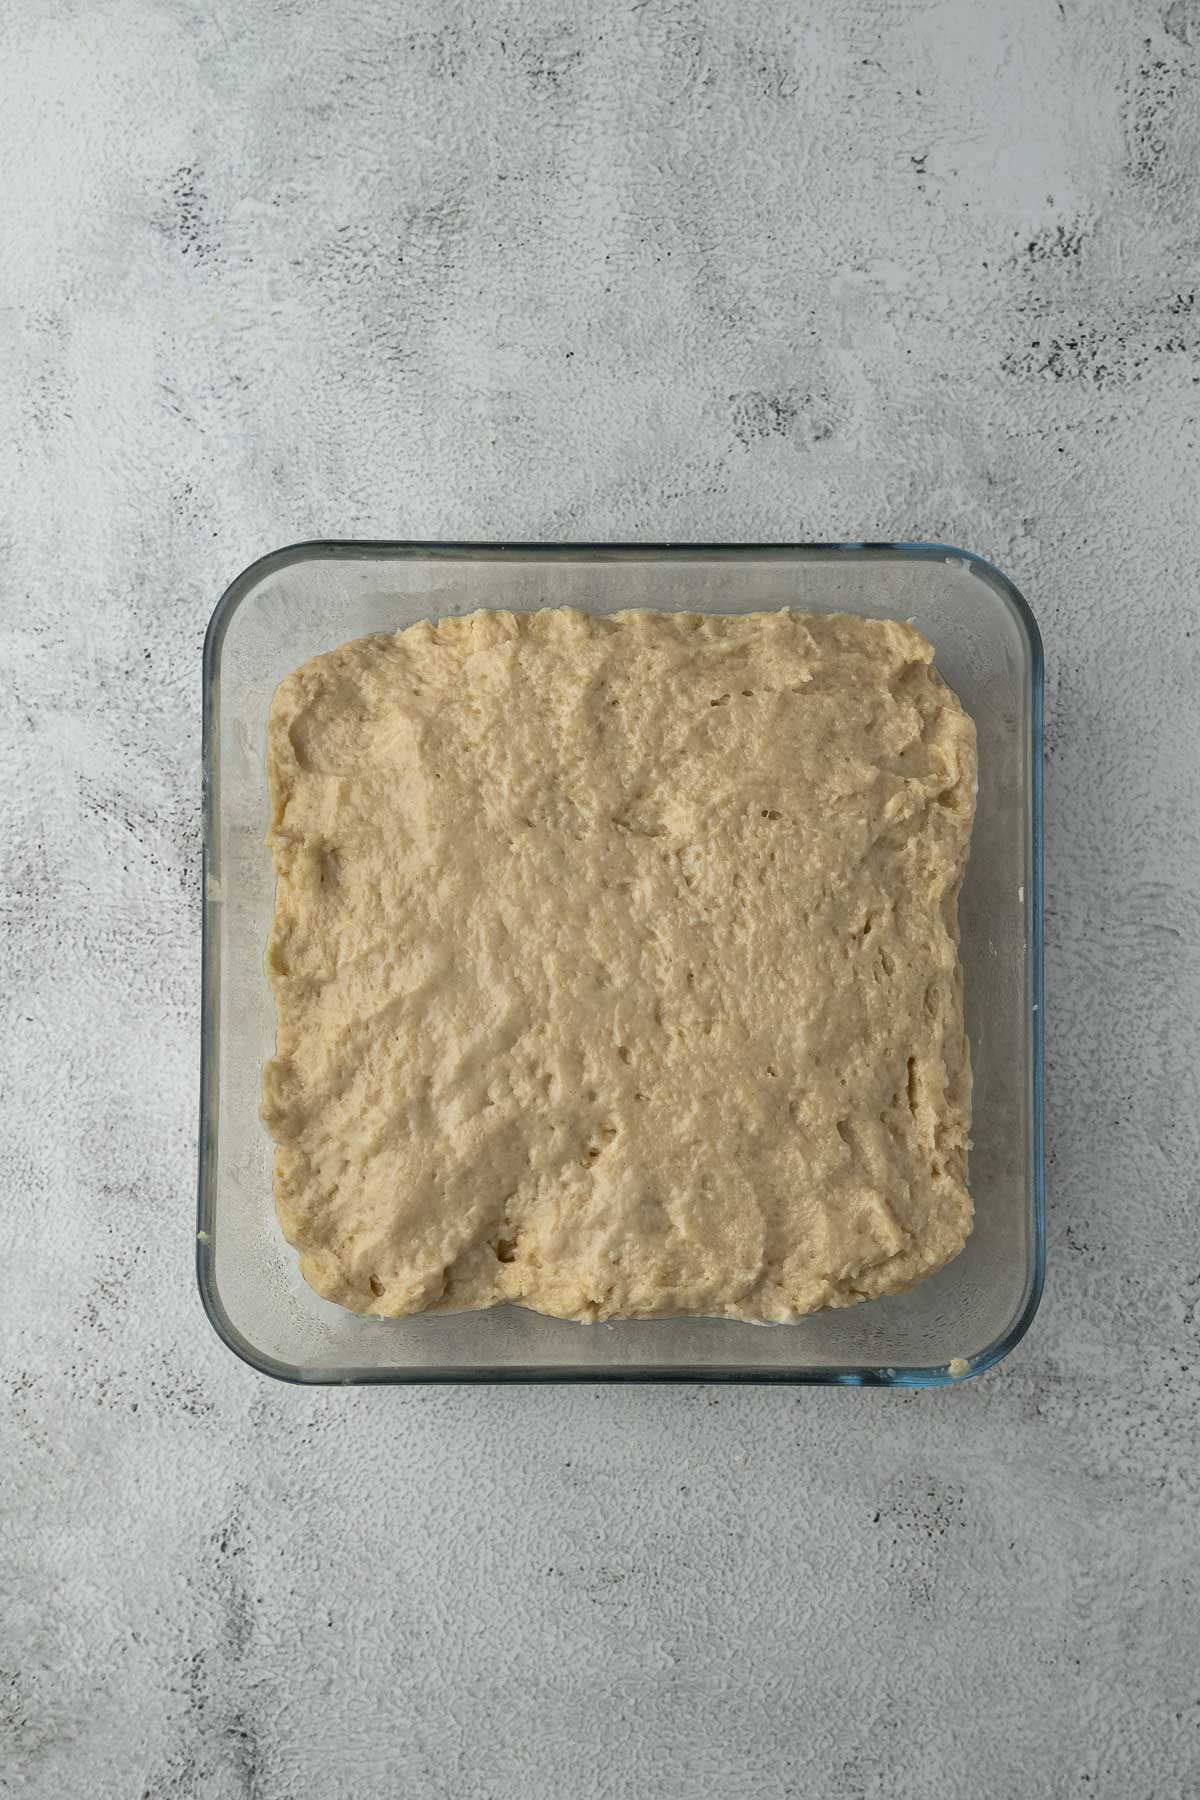
Step 4 - To make chunky buttermilk rusks roll out golf-ball-sized pieces of dough and place them in the loaf tins, with their sides touching. To make sliced buttermilk rusks, divide the dough between your loaf tins and press into place. When making sliced buttermilk rusks, you can use a square cake tin or a roasting dish to bake your dough.
Baking Buttermilk Rusks
Step 5 - Bake the buttermilk rusks at 200°C or 180°C fans assisted for 45 to 60 minutes, or until a cake tester comes out clean from the center of the rusks. The rusks will at least double in size while baking.
TIP - if the rusks are browning too quickly in the oven, cover them with foil for the rest of the baking.
TIP - when I bake the balls or bolletjies of dough in a loaf tin it takes about 45 minutes to bake, while a large slice takes about 45 to 60 minutes to bake. Because all ovens are different, check the loaves at the 30, 45 and 60-minute mark.
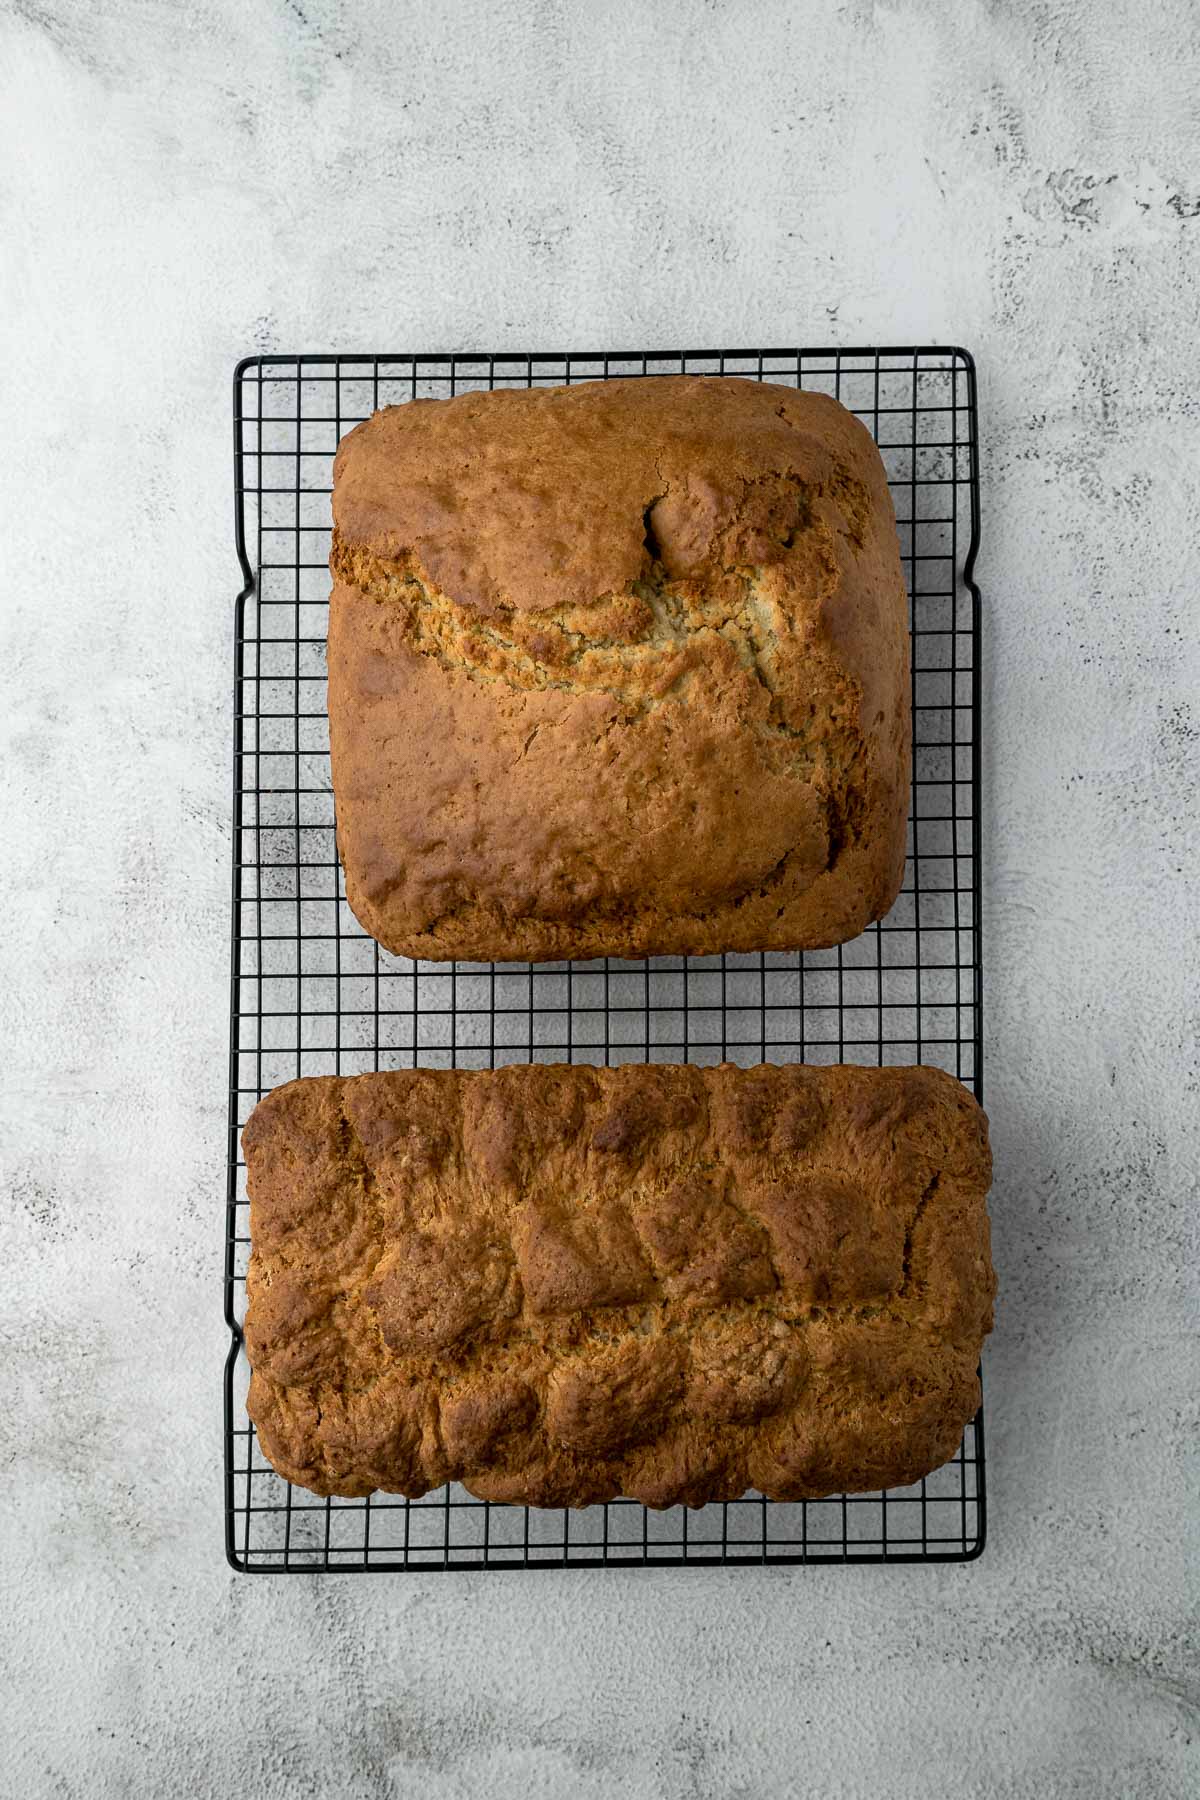
Step 6 - Allow the rusk to cool for 10-15 minutes before turning out onto a wire cooling rack to cool completely. Once completely cooled, you can carefully tear apart the rusks if started with balls of dough, or slice the rusk using a serrated knife. Place the sliced. Place the rusks on a baking sheet, in a single layer, set your oven to a maximum of 110 degrees Celsius (cool oven), preferably with the fan on to dry the rusks out. This process can take anywhere from 3 to 6 hours, usually dependent on the thickness of your rusks.
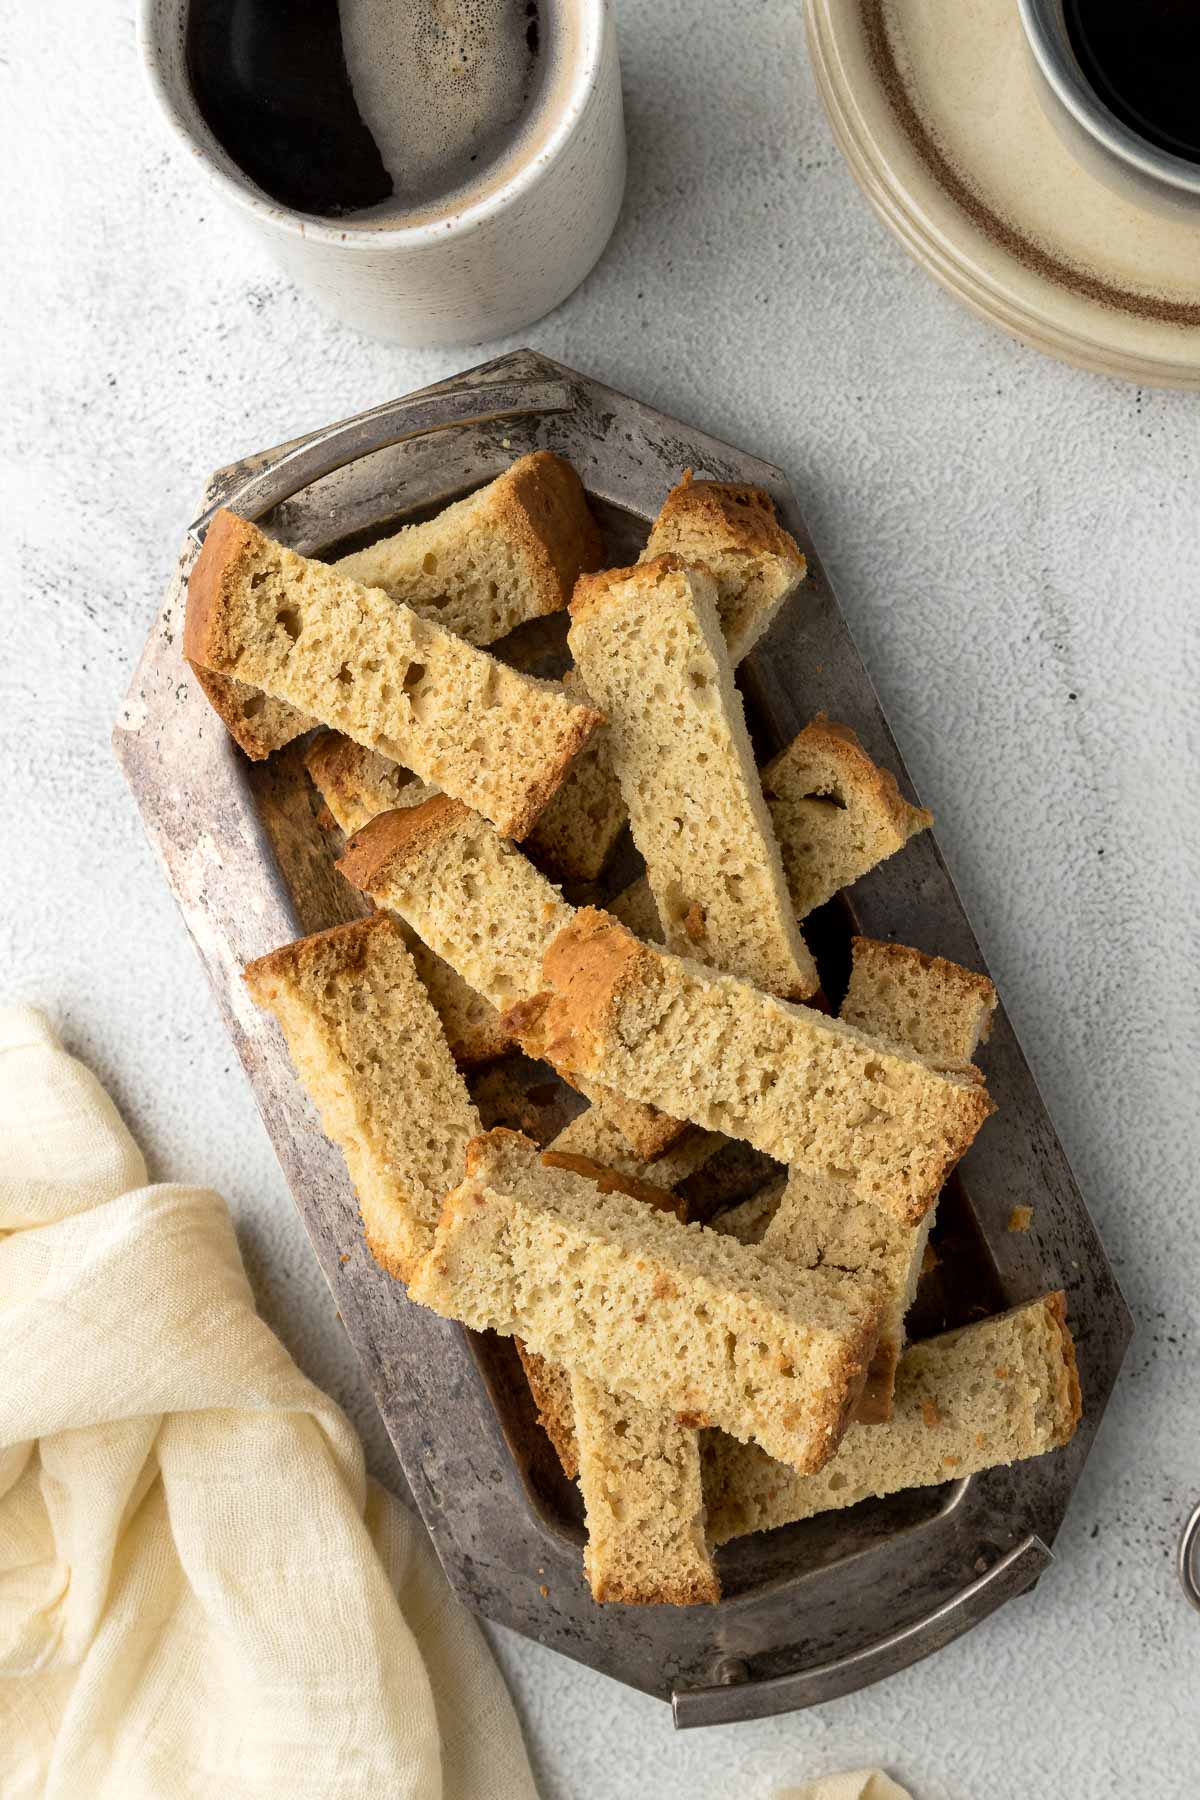
Step 7 - When the rusks are dry, store them in an airtight container, at room temperature, for up to a month. Rusks are meant to be dunked into tea or coffee, so serve them with a hot cuppa!
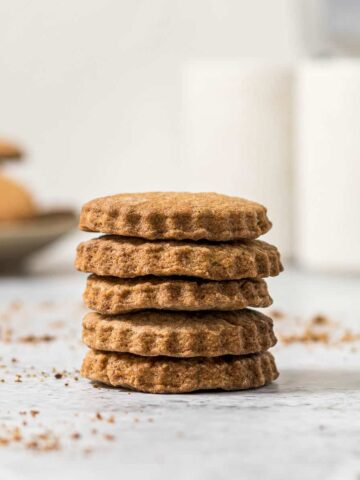
NOTE - I like skinny sliced rusks, similar to the size of biscotti, so I like to keep the thickness of the rusk about 2-3cm by 2-3cm big. However, this is a personal choice, you can cut the rusks as thick as you want them. Slice with the soul.
Pro Tips for this Recipe
TOP TIP - a food dehydrator is also a great way to dry out the rusks!
Weighing & Measuring Ingredients
Weighing ingredients with a kitchen scale is more accurate than using measuring cups. All my recipes are developed and tested using grams only.
However, I have activated the metric-to-cup conversions. Simply click on "cups" or "metric" for your preferred measurements. For these conversions, cups are equal to 240 millilitres/8 fluid ounces, tablespoons are 15 milliliters and teaspoons are 5mL.
Ovens: Fan-forced or fan-assisted oven temperature must be decreased by 20°C/25F. Using an oven thermometer is the best way to determine an accurate temperature.
All my recipes are tested at sea level. All teaspoon measures are equal to 5ml, tablespoons to 15ml.
Storage and Freezing
These rusks can be kept at room temperature in an airtight container or biscuit tin for a month because the moisture has been driven off the biscuits.
Buttermilk Rusks (Karringmelk Beskuit) FAQ
Buttermilk rusks (or any South African rusks) are usually dunked into a cup of coffee, tea or even hot chocolate. They are fairly sturdy, dry biscuits that can withstand a good dunking into a good cup of coffee.
Rusks or beskuit have been made in South Africa since the 1690s. However, twice-baked bread, biscuits and cakes exist in many different cuisines across the globe.
To make these rusks without buttermilk, you can make a buttermilk substitute for rusks by adding 1 tablespoon of lemon juice to one cup of milk and letting it stand for about 10 minutes. The milk will curdle and you have a buttermilk substitute. For this recipe in particular you will need 2 cups (500ml) of milk and 2 tablespoons of lemon juice.
Other South African Recipes You May Like
How do you like your buttermilk rusks?
I love dunking my rusks in a steaming cup of coffee, or if I'm feeling a bit adventurous - a cup of hot chocolate. If you have never had a rusk before, dunking it is a must. It's a tradition. But, I must admit, sometimes I will nibble on the rusk without dunking it in anything at all!
If you made this recipe, please leave a star rating! It gives my readers and me helpful feedback. If you want more recipes you can subscribe to my newsletter, and follow me on Instagram, Pinterest, and Facebook!
Recipe Card
Buttermilk Rusks (Karringmelk Beskuit)
Ingredients
- 1 kg self-raising flour
- 2 teaspoon table salt
- 2 teaspoon baking soda (bicarb/bread soda)
- 600 grams buttermilk
- 2 eggs (large)
- 330 grams white granulated sugar (caster or granulated)
- 250 grams butter
Instructions
- Preheat the oven to 180°C/355F and grease two loaf tins, or vessels of your choice for the rusks. See notes.
- Weigh out the flour, then add in the salt and baking soda. Whisk these ingredients to remove any lumps from the flour and to distribute the salt, baking soda and inherent leaveners throughout the flour.1 kg self-raising flour, 2 teaspoon baking soda, 2 teaspoon table salt
- Melt the butter in the microwave or on the stove-top. Add in the sugar and whisk vigoursly until the sugar is completely dissolved and the butter has thickened and is smooth and shiny. (this may take a minute or two). The butter and sugar may need to be heated for an additional 20 seconds or so to gain the correct consistency. Allow the butter to cool.250 grams butter, 330 grams white granulated sugar
- Whisk together the eggs and buttermilk.600 grams buttermilk, 2 eggs
- Add the butter and buttermilk mixtures to the flour and mix through with a wooden spoon or silicone spatula until combined. Then using your hands, knead the dough together a few times until you have a nice smooth-ish dough. We want a bit of gluten development but don't want bread dough.
- To make chunky buttermilk rusks roll out golf-ball-sized pieces of dough and place in the loaf tins. To make sliced buttermilk rusks, divide the dough between your loaf tins and press into place. When making sliced buttermilk rusks, you can use a square cake tin or large roasting dish to bake your dough.
- Bake the rusks - the balls or bolletjies or dough in a loaf tin take approximately 30 to 45 minutes to bake, while the large slice takes about 45 to 60 minutes to bake. But all ovens are different, the best bet would be to check the rusk using a toothpick or cake tester at the 30, 45, and 60-minute mark. When they come out clean, the rusk's first bake is complete.
- Allow the rusks to cool before tearing apart or slicing them. When slicing rusks, I like to keep them about 2-3cm x 2-3cm big. Place the sliced or chunky rusks on the oven racks in the oven, and set your oven to a maximum of 110 degrees Celsius (cool oven), preferably with the fan on to dry the rusks out. This drying process can take anywhere from 2 to 5 hours depending on the thickness of your rusk. Rusks that are about 2-3cm x 2-3cm big tend to take about 2 hours to dry out while the chunky rusks take between 4 and 5 hours to dry out.
Notes
Nutrition
Nutrition information is an estimate. If scaling the recipe remember to scale your cook and bakeware accordingly. All temperatures stated are conventional, unless otherwise stated. Recipes tested in grams and at sea level.
Sheena Bagshawe says
I was told I can’t eat gluten about four months ago and every gluten free rusk I’ve bought so far has been disappointing. I subbed the wheat flour for gluten free flour and these are amazing, thank you so much for this recipe.
Jan says
The best buttermilk rusk recipe ever! Family loved them.
Miriam says
Fell in love with South African Rusks while working in Uganda where we would occasionally find them at the grocery store. We then stocked up on a visit to South Africa. Now that we are back in Canada, I am happy to be able to bake it myself. The rusks turned out great. I added some sultanas and pumpkin seeds as well.