


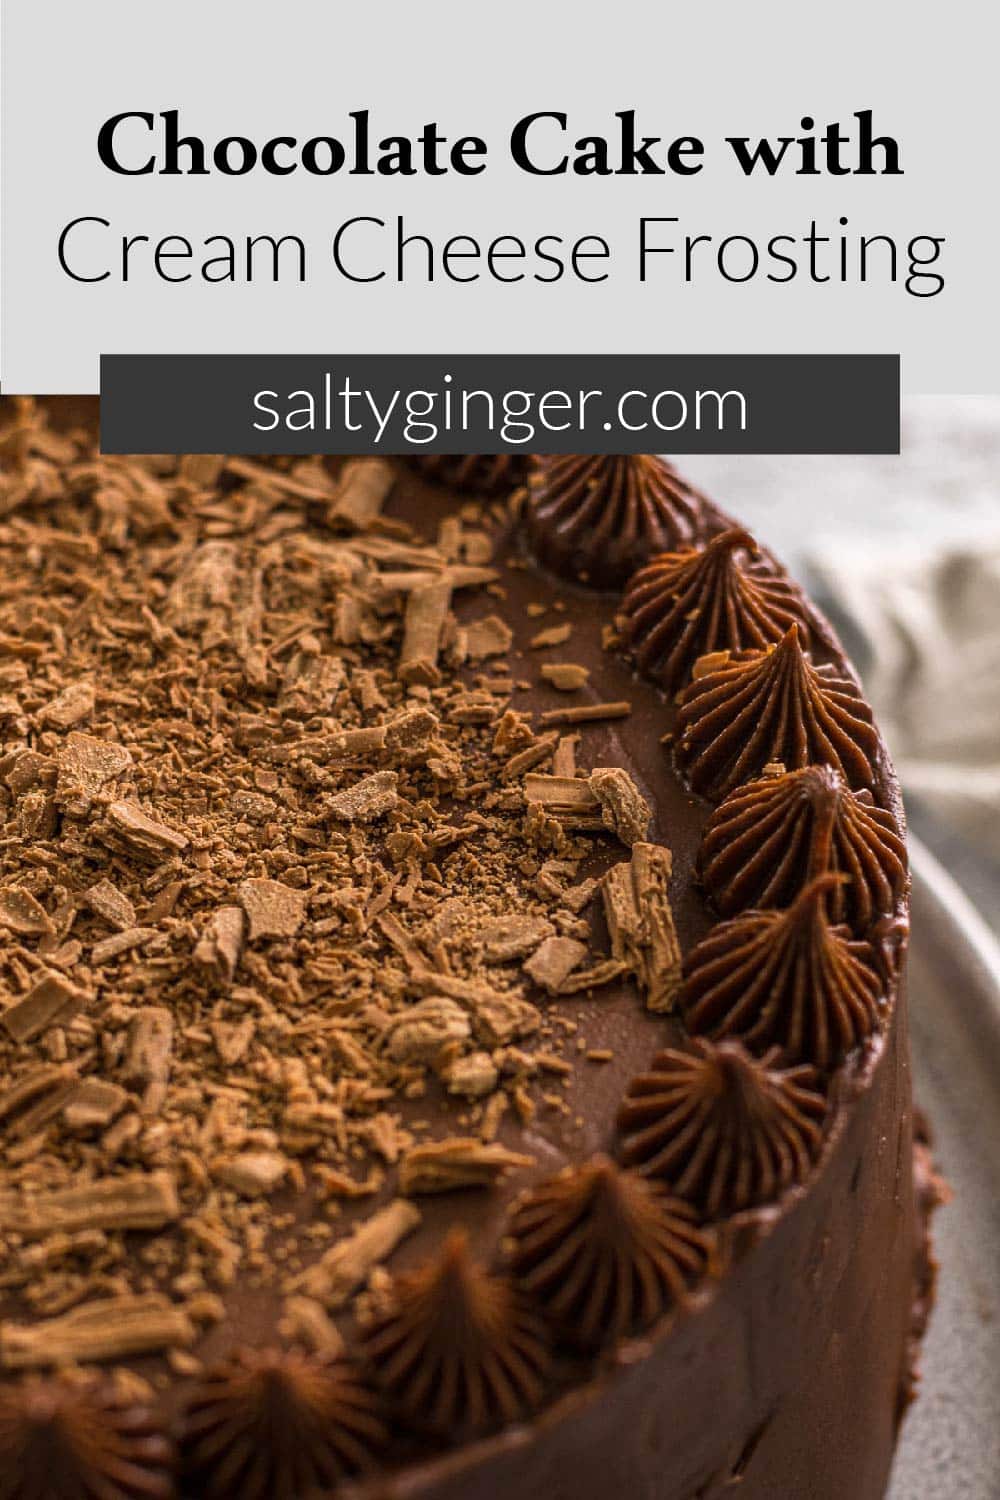
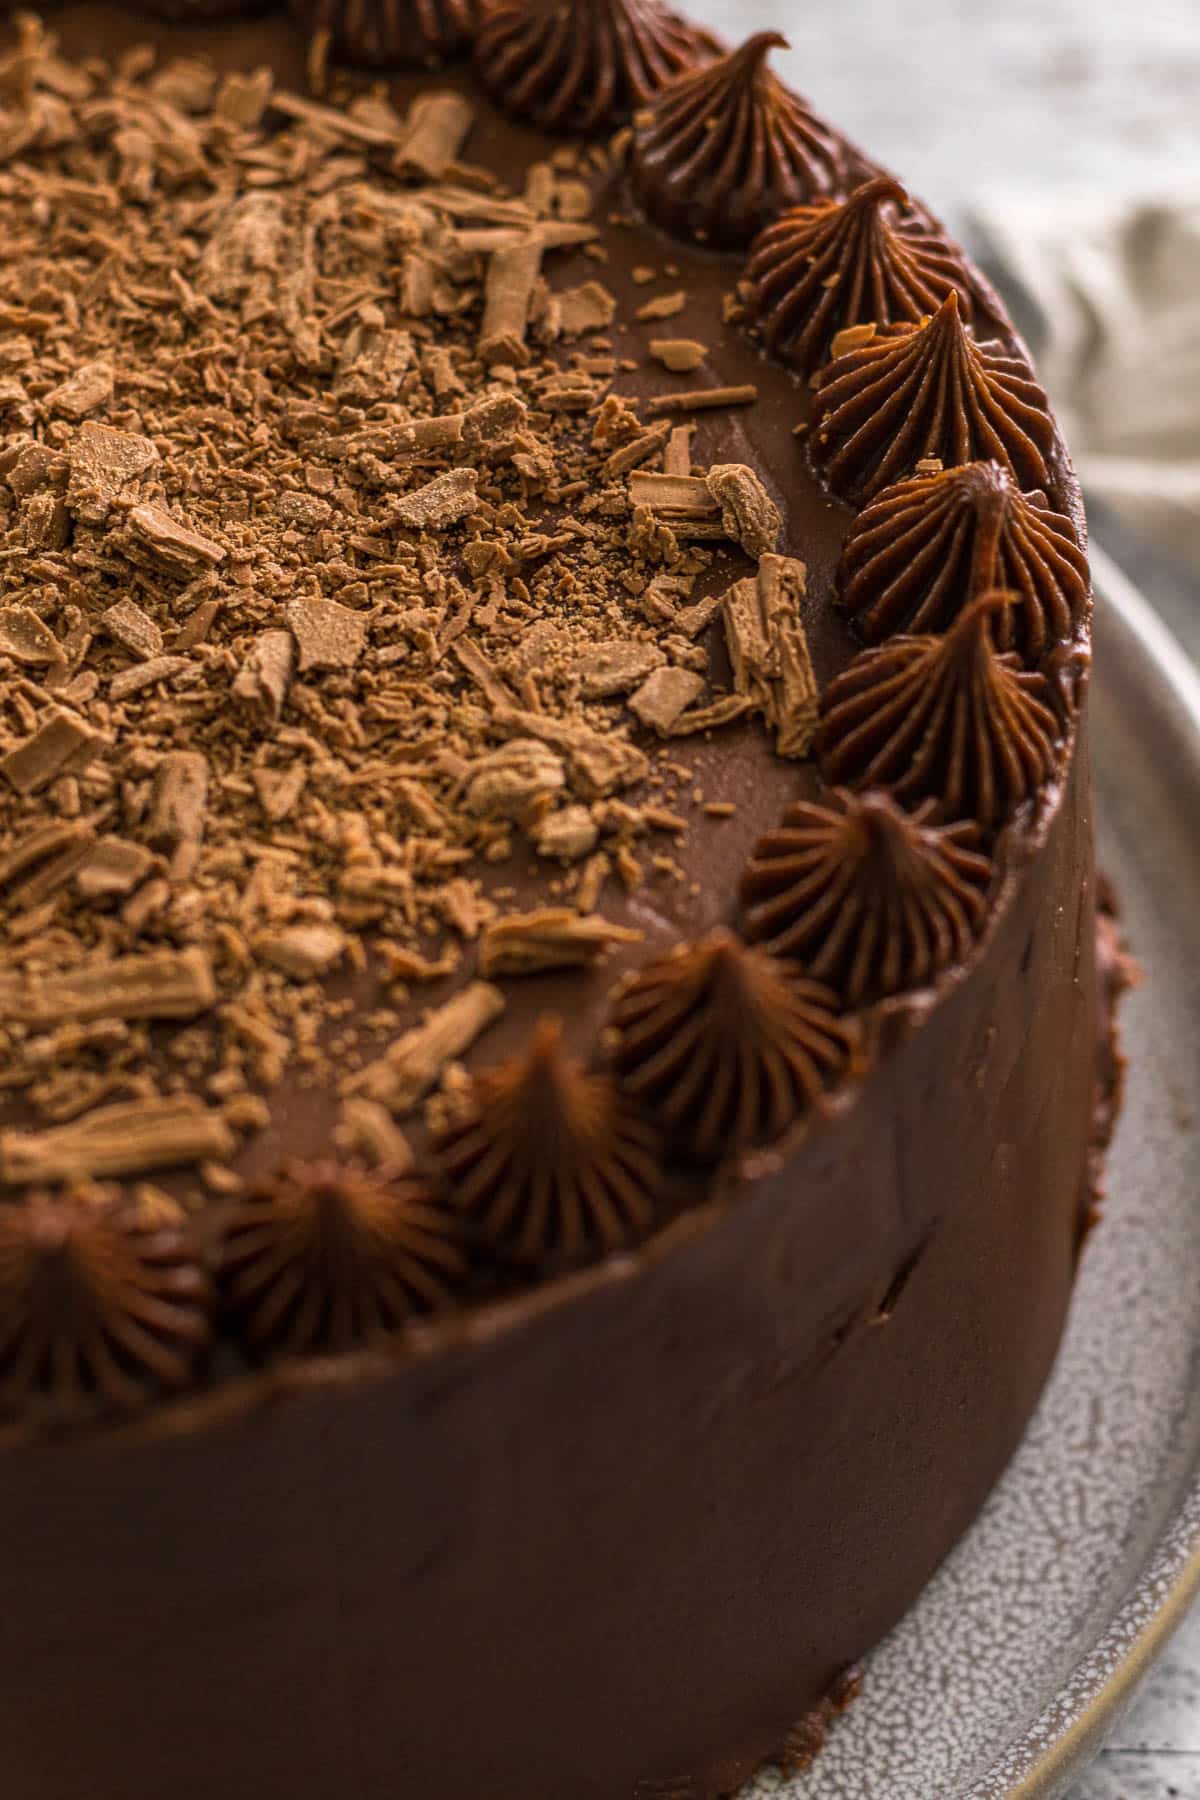
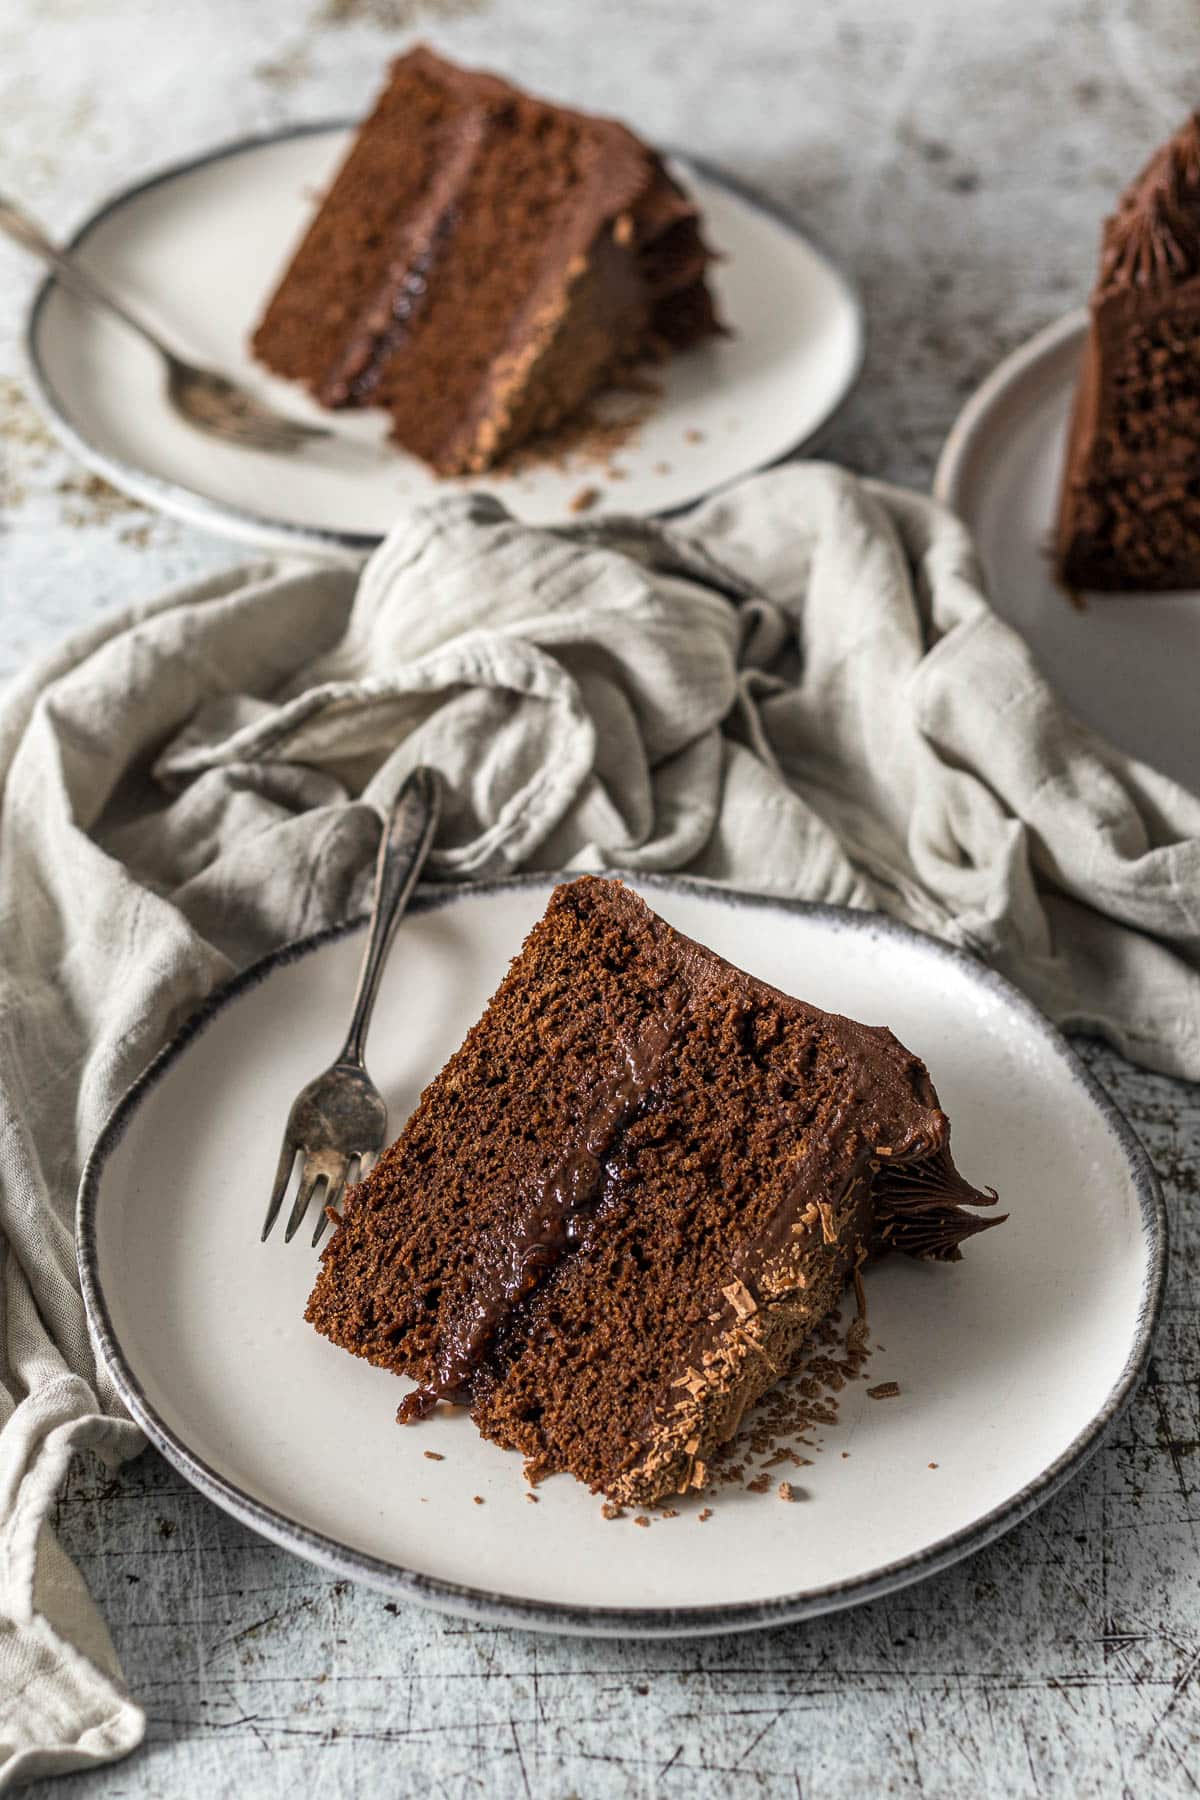
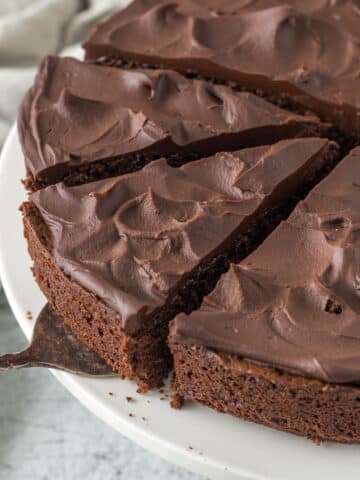
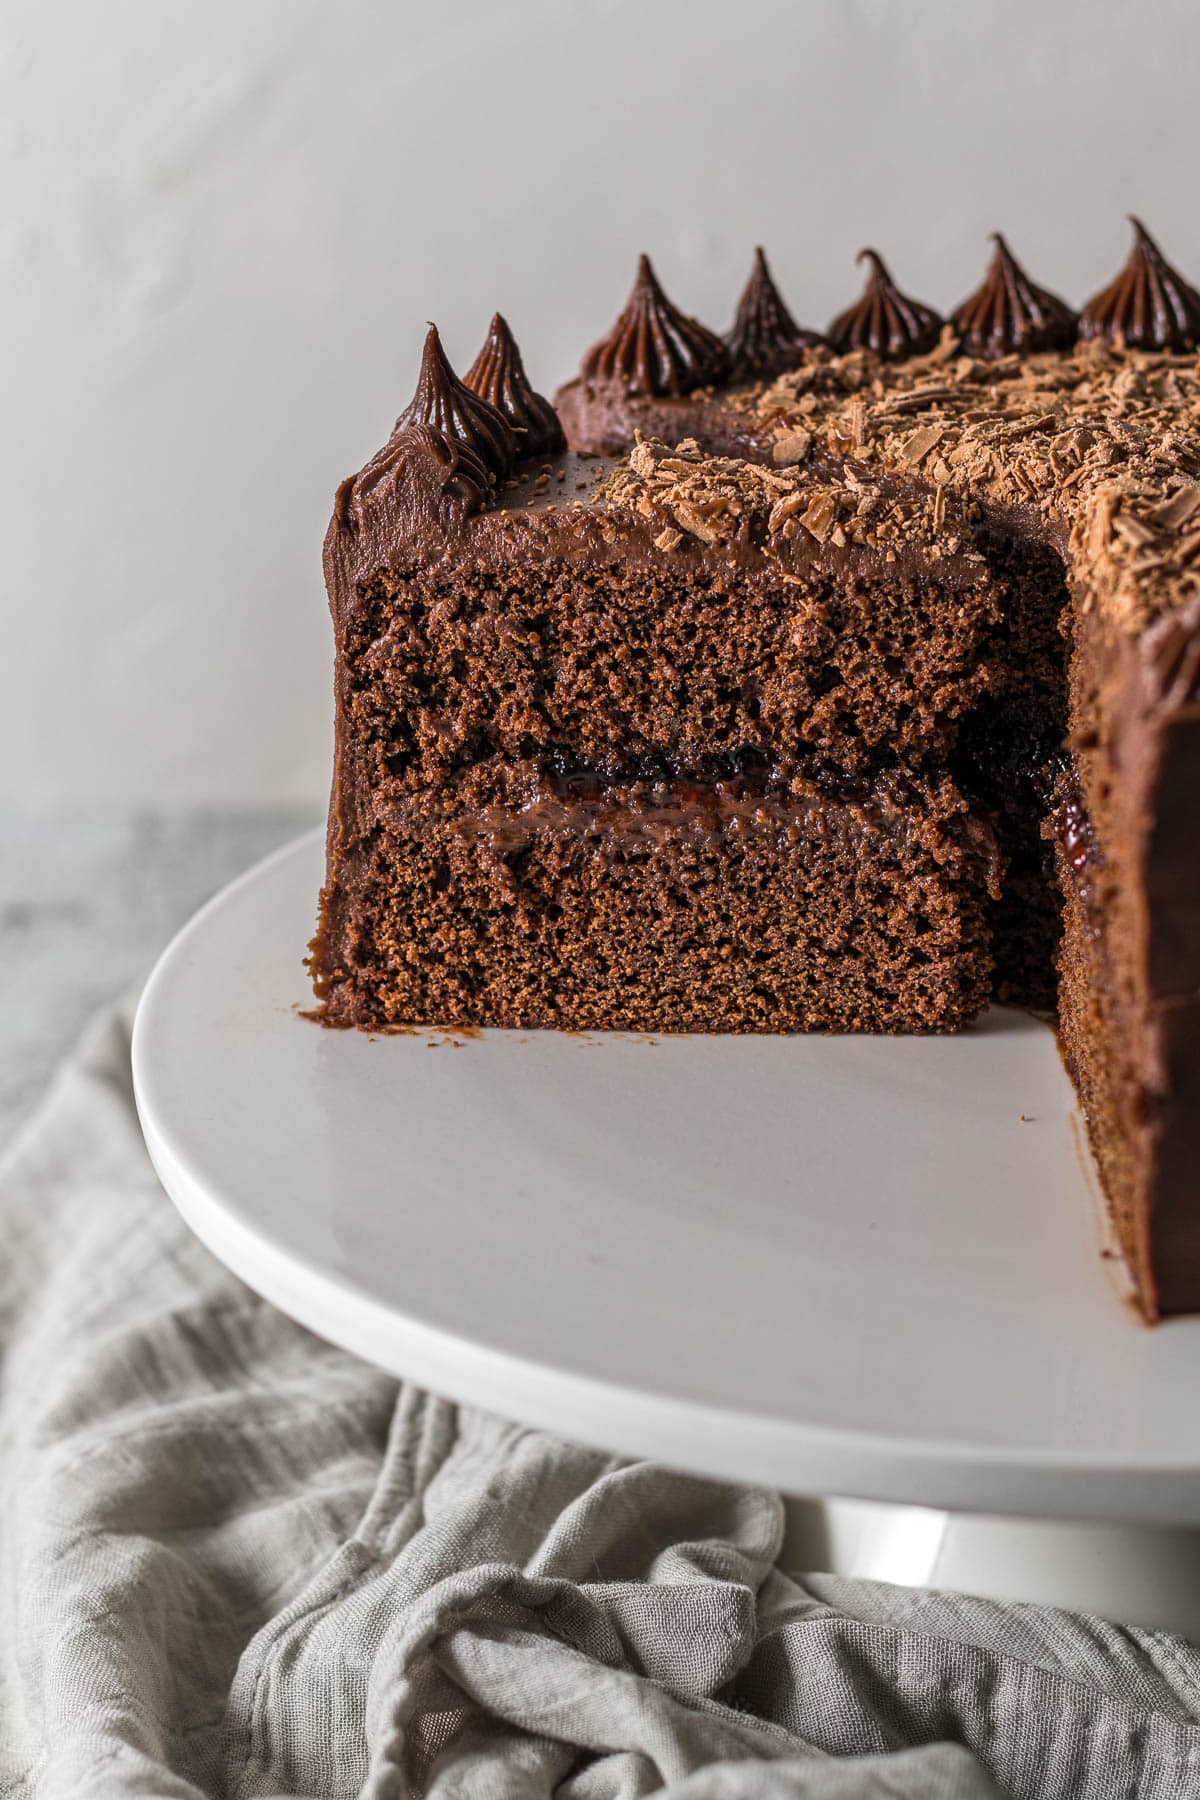
Indulge in this simple, homemade, and delicious chocolate cake with cream cheese frosting.
This basic from-scratch two-layer chocolate cake is perfectly paired with chocolate cream cheese frosting. A fantastic cake for any celebration or anniversary!
Jump to:
- Why You Will Love This Recipe
- Ingredients
- Variations
- Reduced-Sugar Variation
- Two-Layer Chocolate Cake Instructions
- Chocolate Cream Cheese Frosting Instructions Method
- Cake Decorating Instructions
- Expert Tips for this Recipe
- Storage and Freezing
- Other Recipes You May Like
- Rate & Review!
- Recipe Card
- Community Comments
I realized that I don't have a simple chocolate layer cake on the site, so I decided that I needed to perfect my recipe. This recipe is based on my chocolate cupcakes and chocolate tray bake recipes.
And because I already have a kick-ass buttercream frosting recipe, I knew I needed to really work on perfecting my cream cheese frosting. Which I have done and am debuting on this recipe.
Why You Will Love This Recipe
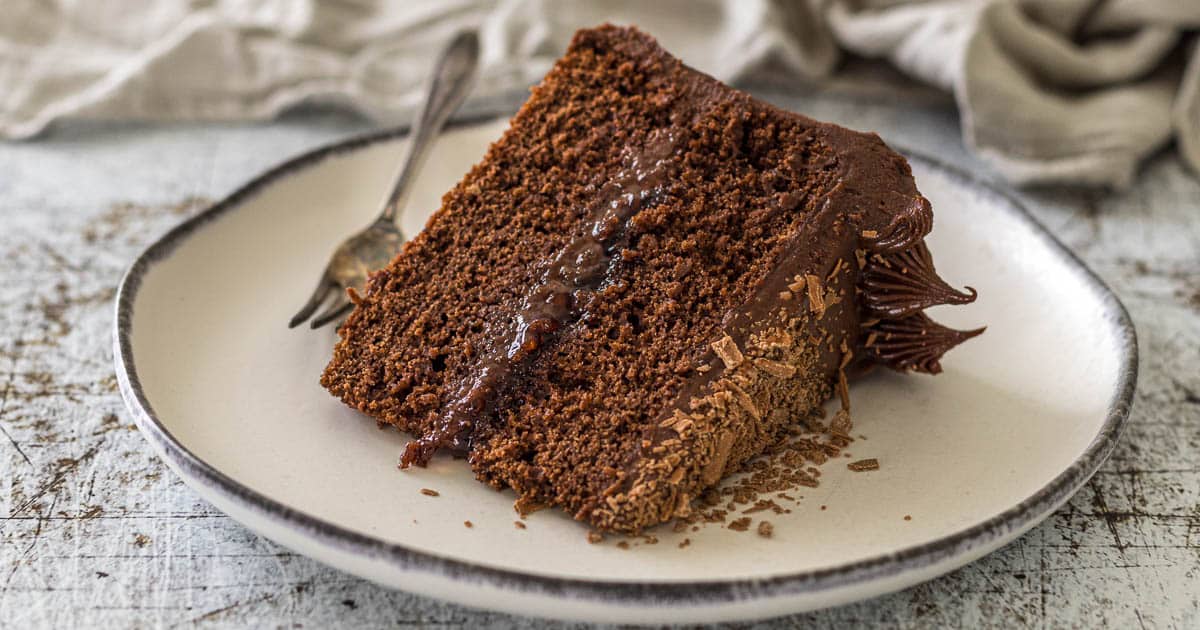
- This foolproof chocolate cake recipe makes two 8-inch layers that are about 3.5cm tall (after trimming the slight dome), which is, in my opinion, the perfect size for a general family celebration cake.
- This recipe can also be used to make slightly thinner two 9-inch layers.
- The chocolate cream cheese frosting is a delicious filling and topping to this cake.
- A chocolate cake with cream cheese frosting is a fantastic combination of flavors.
Ingredients
Here are some notes on the ingredients used in this recipe. Please see the recipe card for quantities.
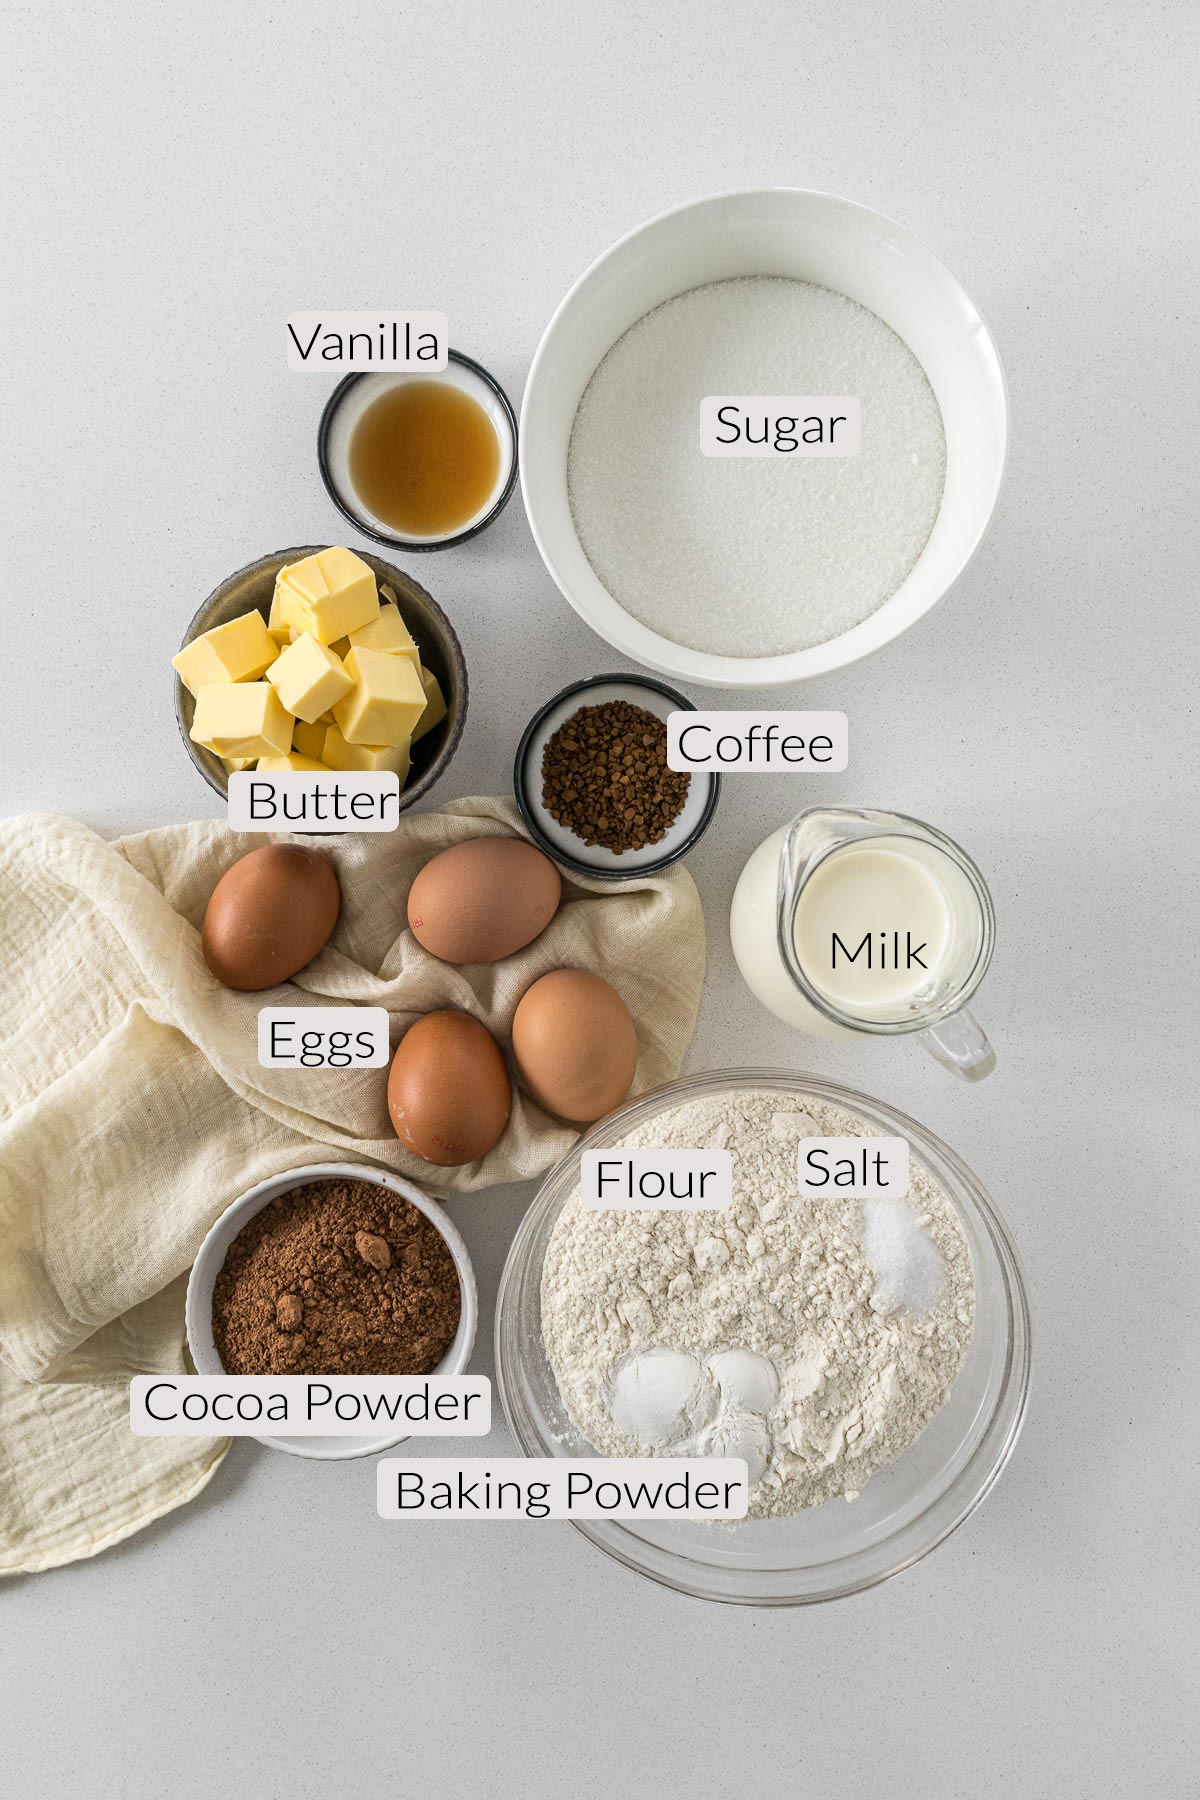
Butter adds flavor, softness, and moisture and sometimes aids in the leavening of baked goods. I use New Zealand butter in my recipes, which has approximately 82% butterfat and can be very yellow (similar to European or Irish butter). Butter cannot be substituted with butter or margarine spreads, but it can be substituted with baking margarine.
Milk - whole or full cream milk is what I usually use when baking. However, these can be substituted with lower-fat varieties. The best plant-based milk to use if needed is soy milk.
Vanilla extract enhances the flavors of the other ingredients in the recipe and is a cornerstone ingredient in baked goods and desserts containing eggs.
Cocoa powder adds that delicious chocolate flavor. I recommend using a Dutch-processed cocoa powder for general homemaking. I use Cadbury Bournville cocoa powder.
Eggs - I use a New Zealand size 6 egg, which is around the same size as Australian and South African Large Eggs, but closer to a US/Europe Medium sized egg.
White sugar (granulated or caster sugar) adds sweetness without really impacting additional flavors in baked goods. Sugar doesn't only add sweetness, it adds moisture, slows down gluten formation, enhances other flavors, and acts as a leavening agent in this recipe. I would not decrease the sugar content in the actual cake.
If you really want to decrease the sugar then I would decrease it by no more than ¼ cup (50 grams).
Salt is a crucial ingredient in all baked goods. I use table salt in all my recipes. One teaspoon of table salt equals 1.5 teaspoons of Morton Kosher Salt equals 2 teaspoons of Diamond Crystal.
Make sure your baking powder is fresh (especially if you haven't bought some in a while) by placing a ½ teaspoon into a cup or bowl. Pour about a ¼ cup of boiling water over the baking powder. If it foams and bubbles it is still fresh.
Plain flour (all-purpose flour/standard grade flour) refers to flour that has a protein content of approximately 9.5-12%.
Plain/all-purpose/standard grade flour can be substituted on a 1-to-1 basis for recipes that have ½ to 1 teaspoon of baking powder per 125 grams/1 cup of flour. For this recipe, a direct substitution should work fine. Self-raising/rising flours may already contain salt so this may need to be omitted from the recipe as well.
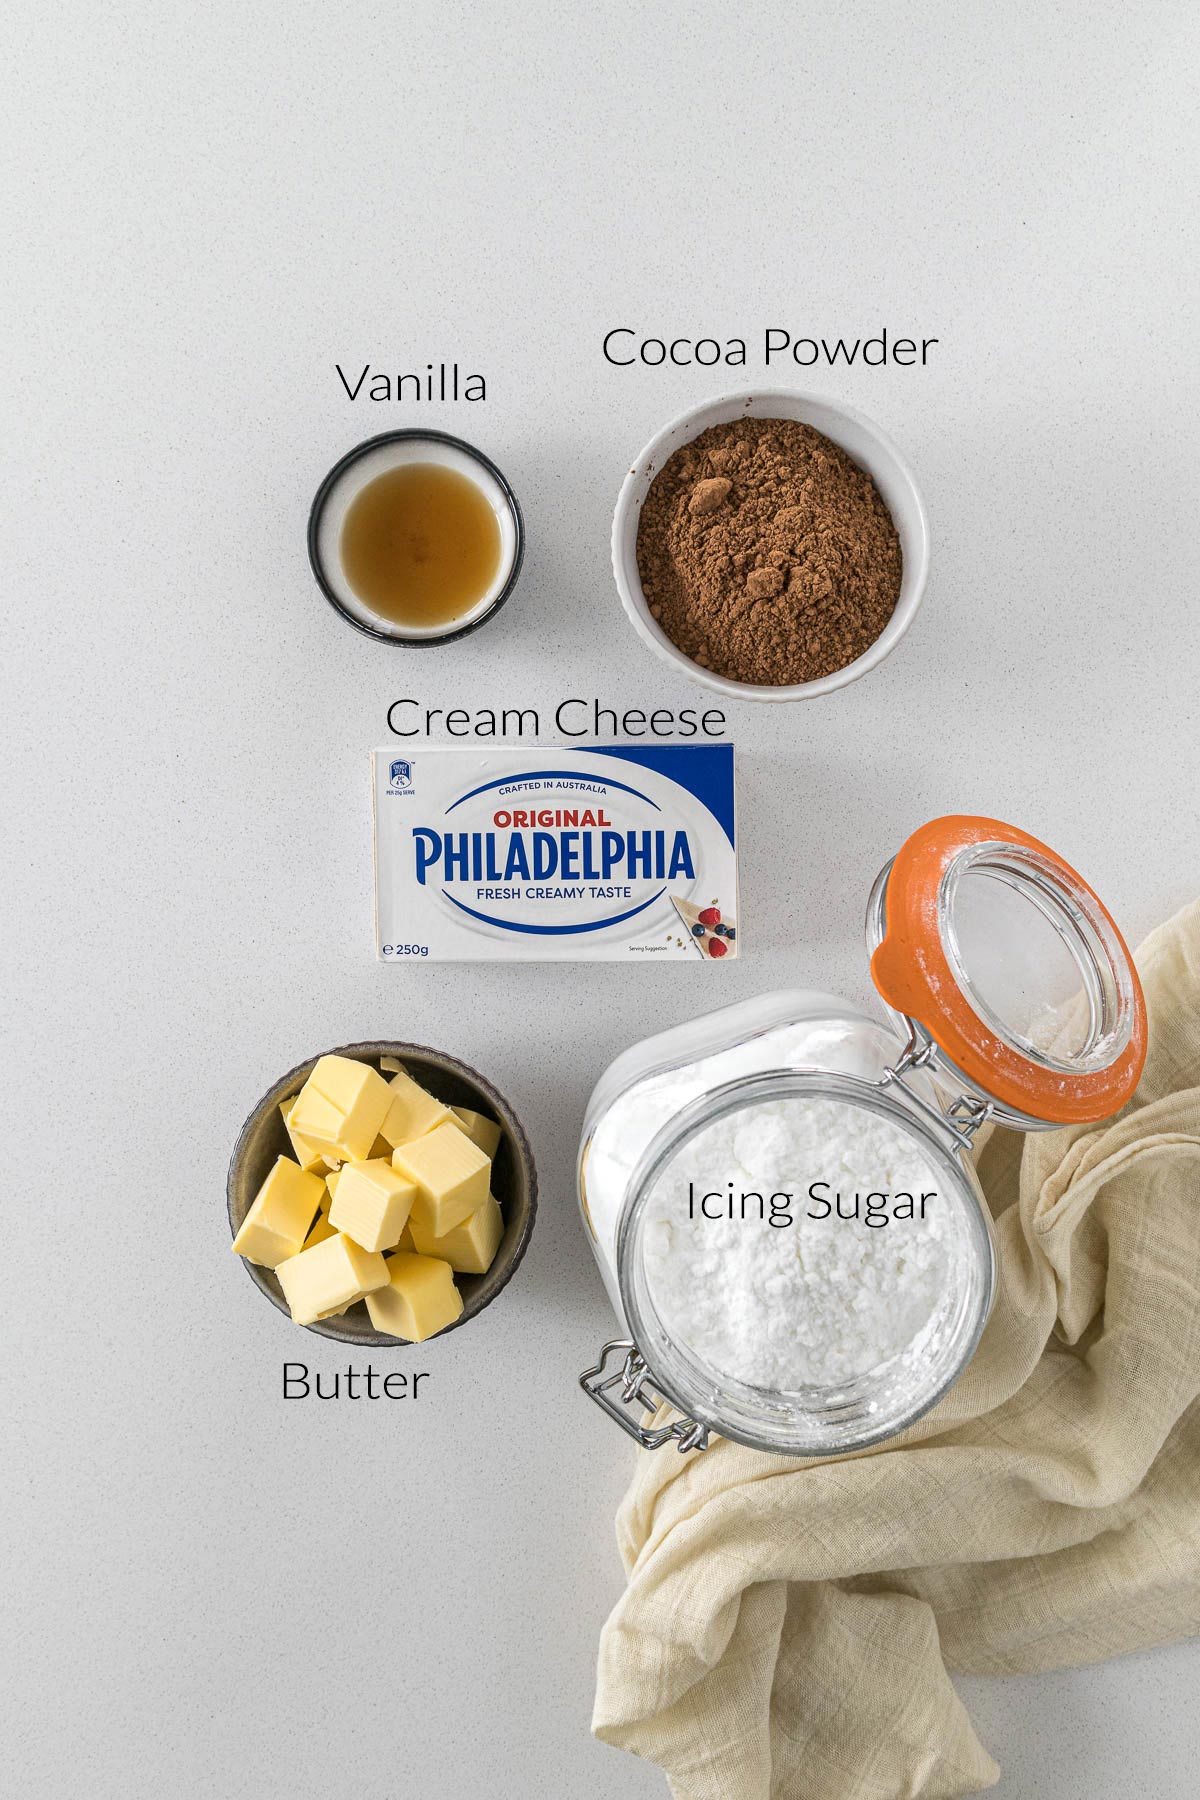
Cream cheese - I always use Philidelphia cream cheese in the block form for all baking and frosting requirements.
Icing sugar (powdered or confectioner's sugar) for the cream cheese icing.
Strawberry jam for a delicious filling to the center of this two-layer chocolate cake. This is an optional extra. Any fruit jam or even Nutella would be great for a plain chocolate cake.
Room Temperature Ingredients
Use room-temperature ingredients! Using room temperature ingredients ensures that ingredients in the batter or dough will incorporate easier. Take note that room temperature refers to around 20°C/68F.
- To bring eggs to room temperature quickly, place them into warm water for about 10 to 15 minutes.
- To bring butter to room temperature quickly, cut the butter into cubes and zap it in the microwave at 20% power in 10-second intervals. Or place the cubes in a bowl over warm water (such as with a double boiler) over low heat for 1 minute!
- Milk, buttermilk, and cream can be brought to room temperature by zapping in the microwave at 20% power in 10-second intervals. Or on low heat for a minute or two swirling every 10-15 seconds.
- If the butter is too warm/soft for baking - pop it into the fridge for 20-30 minutes.
Weighing & Measuring Ingredients
Weighing ingredients with a kitchen scale is more accurate than using measuring cups. All my recipes are developed and tested using grams only.
However, I have activated the metric-to-cup conversions. Simply click on "cups" or "metric" for your preferred measurements. For these conversions, cups are equal to 240 millilitres/8 fluid ounces, tablespoons are 15 milliliters and teaspoons are 5mL.
Variations
For a chocolate layer cake with delicious whipped buttercream frosting - make this cake as per the instructions and use my buttercream frosting.
If you prefer a vanilla cream cheese frosting, simply skip the addition of cocoa powder to the frosting.
Up the flavor by adding 4-5 tablespoon of your favorite fruit jam or Nutella in between the two layers.
Reduced-Sugar Variation
Skip the filling. And cut back on the amount of frosting.
If cutting down to 2 cups of frosting (½ the recipe), place about ¾ cup in the middle, and the rest on the top and sides.
If you want to cut back the sugar in the actual cake itself, I would not cut it down by more than ¼ cup (50 grams) of sugar.
Two-Layer Chocolate Cake Instructions
Step 1 - Preheat the oven to 180°C/355°F/gas mark 4. Grease and line two 8 or 9-inch round cake pans.
Tip - If you have dark cake pans, either use bake-even strips or wrap the sides of the pan with a few strips of foil. This will help the cake to rise up the sides of the pan for even layers.
Tip - place the rack in the middle of the oven.
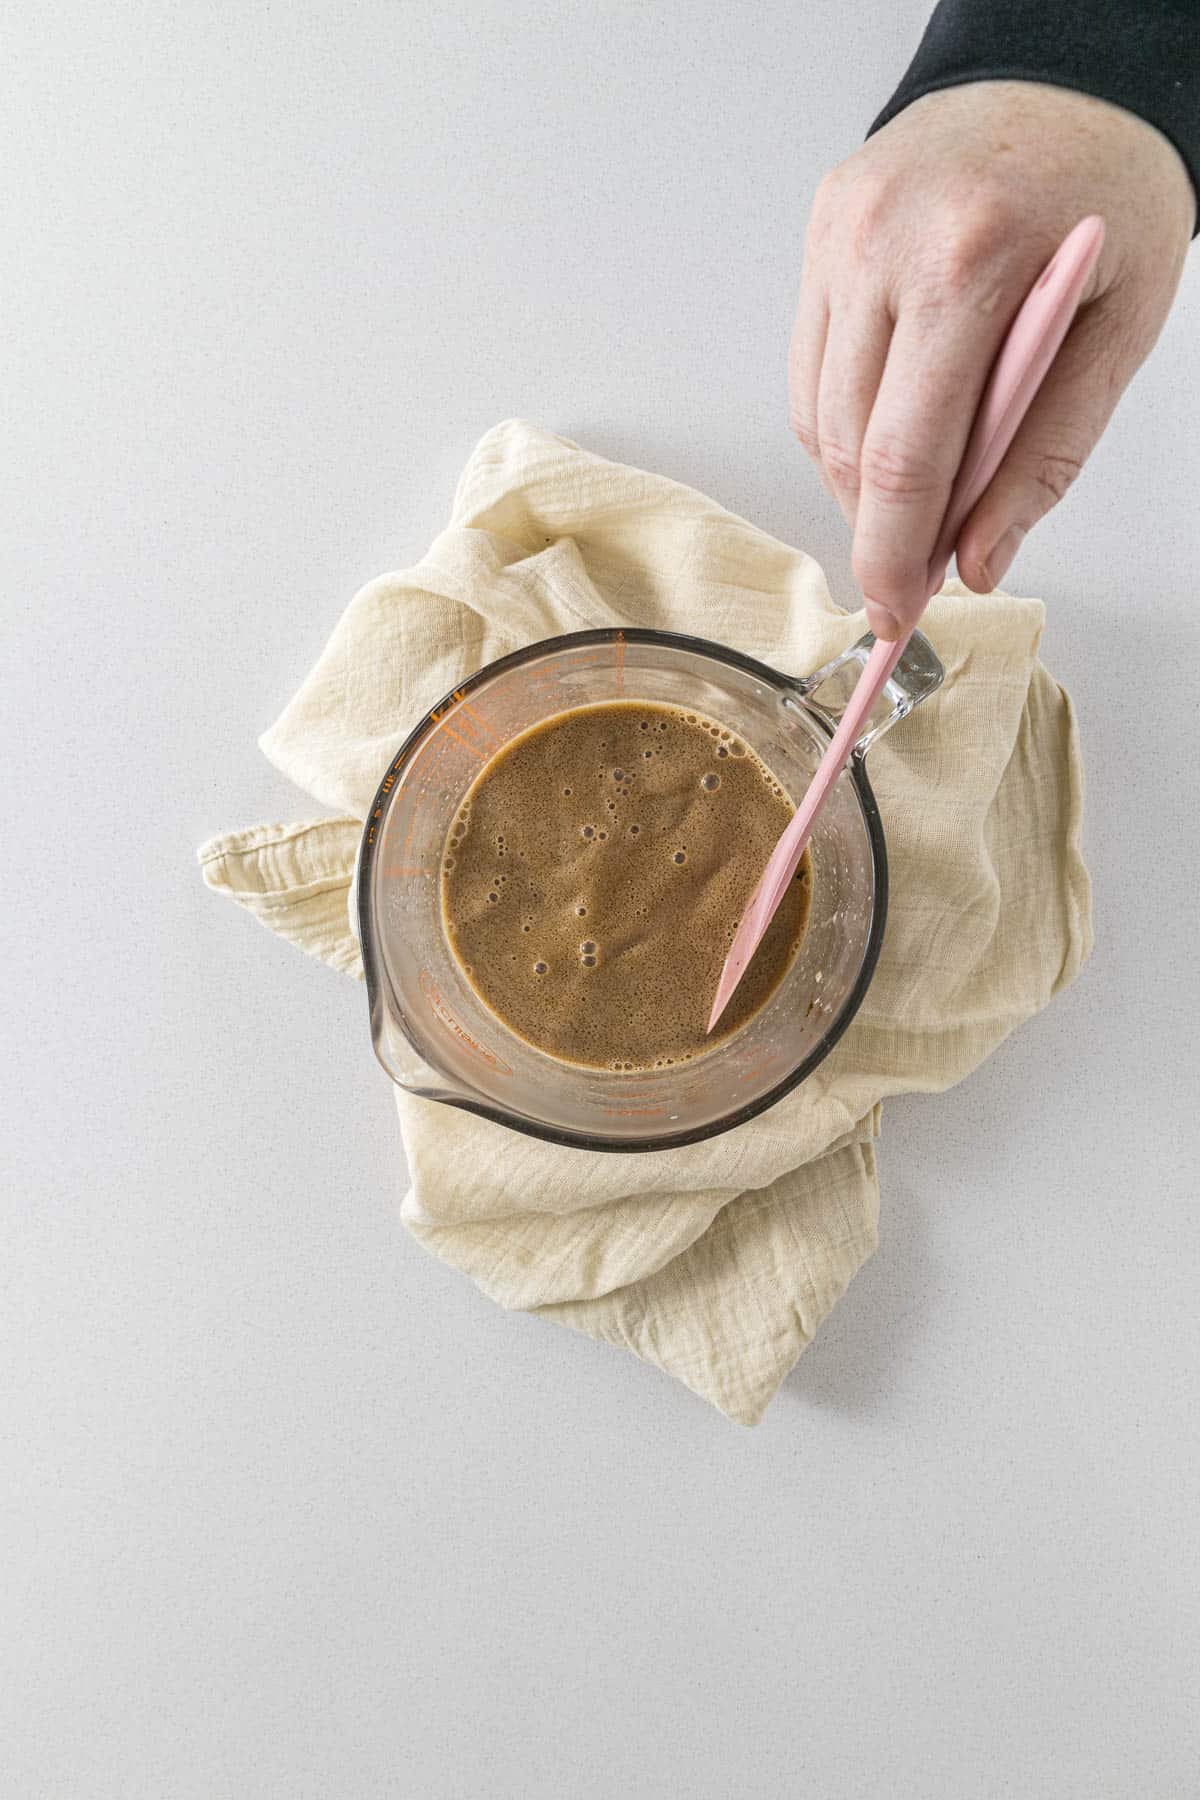
Step 2 - Melt the butter and milk together, either in the microwave or on the stovetop on low heat.
Step 3 - Add the vanilla and coffee to the butter/milk mixture and stir through until most of the coffee is dissolved. Set aside.
Step 4 - In a large mixing bowl, beat together the eggs and sugar either with an electric hand mixer or with a stand mixer for 3- 5 minutes. The egg mixture will lighten to a pale yellow and almost triple in volume when done.
Step 5 - With the beaters running, slowly add the butter/milk mixture to the eggs.
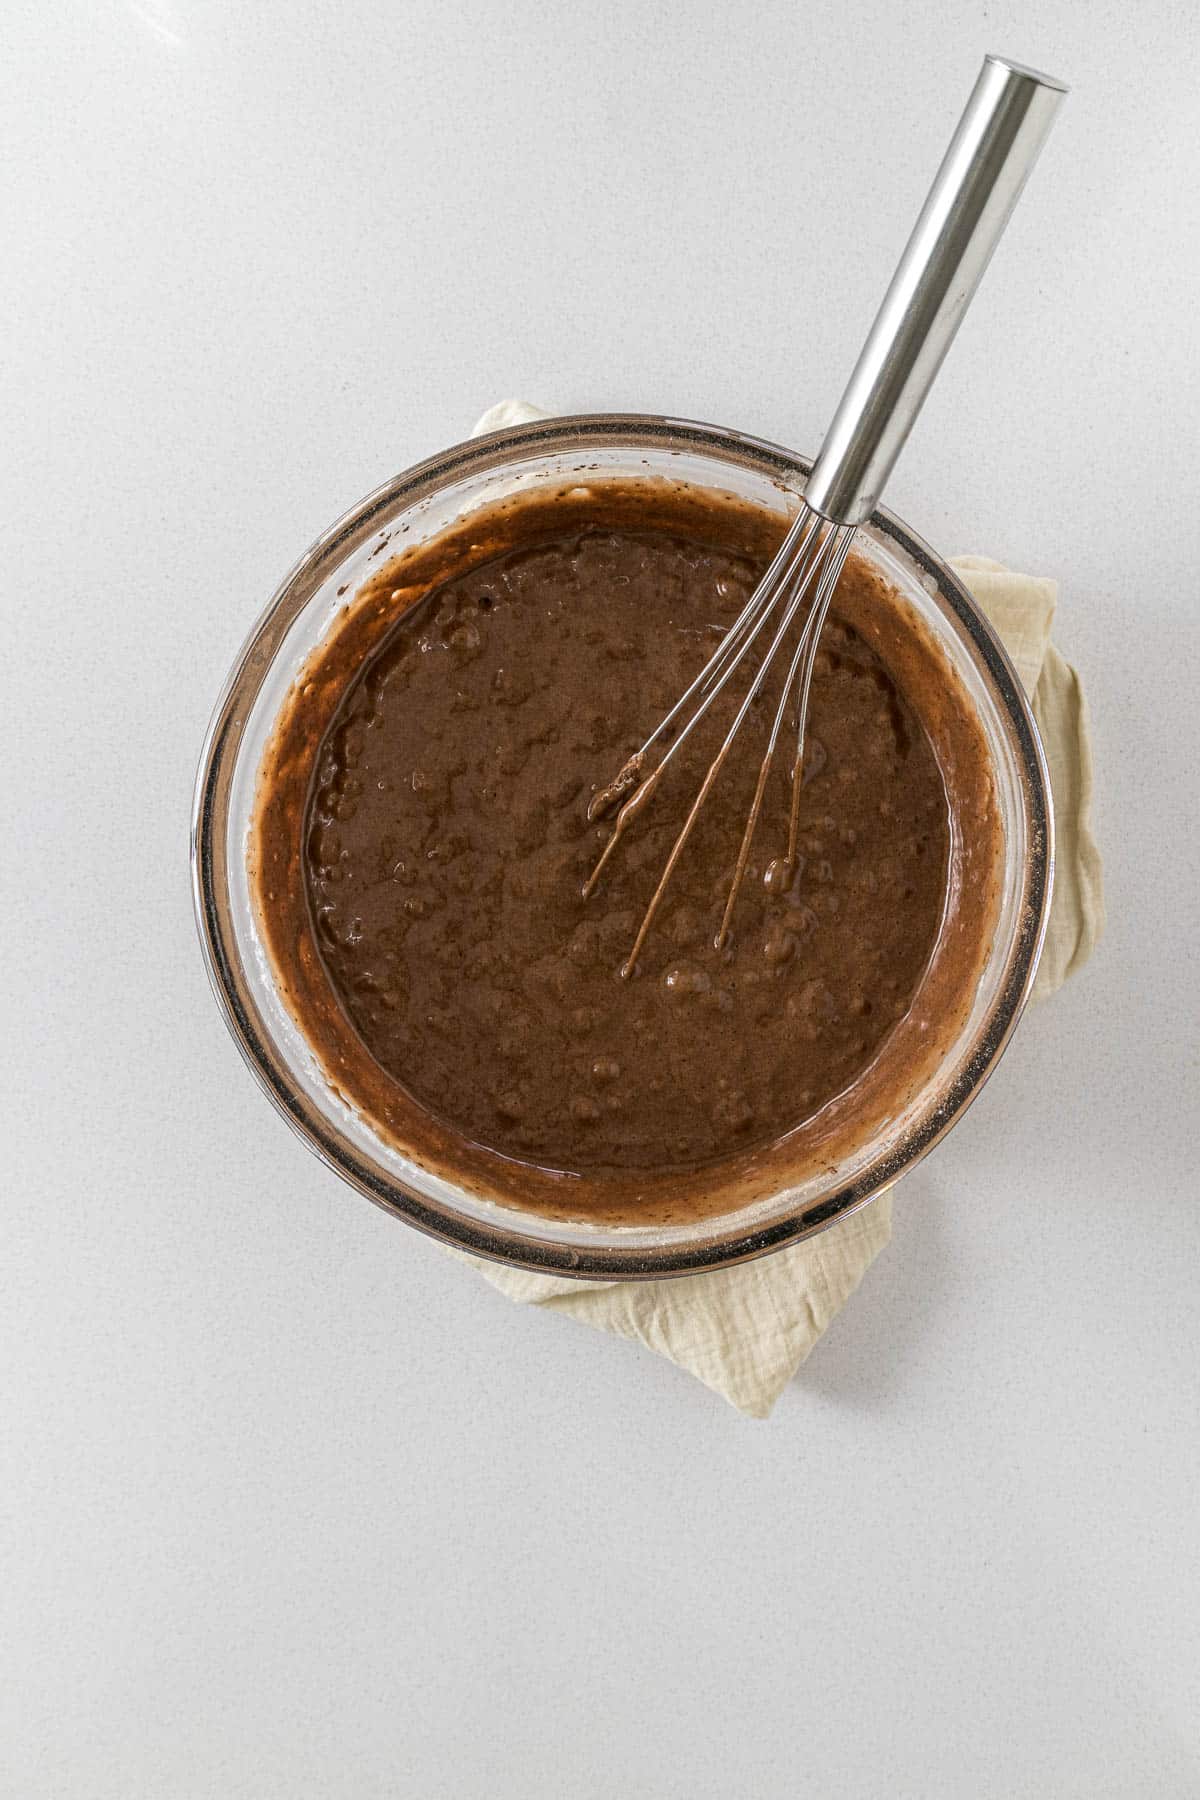
Step 6 - Sieve the cocoa powder, baking powder, salt, and half of the flour over the egg mixture. Mix until just combined. Then sieve over the rest of the flour and mix until just combined.

Step 7 - Divide the batter between the two prepared cake pans. Approximately 640-650 grams of batter per pan.
Tip - I use a cake pan with a 3-inch tall side, so I like also to cover the cake pan with foil to slow down the setting of the top of the cake for flatter cake levels. After 25/30 minutes remove the foil and bake until done.
Step 8 - Bake for 30 to 40 minutes or until a toothpick comes out mostly clean from the center. Test 9-inch cakes at the 25-minute mark. Allow the cakes to cool in the pans for 5 to 15 minutes before turning them out onto a wired cooling rack to cool completely.
Tip - I run a plastic knife (no scratched pans here) around the sides of the pan to make sure the cakes release easily.
Step 10 - When they are completely cool, wrap them in plastic wrap and store them in the fridge or freezer.
Chocolate Cream Cheese Frosting Instructions Method
Step 1 - Bring the butter and cream cheese to room temperature. If your bowls are cold, run the outside of the bowls under some warm water and dry off before using.
Step 2 - Place the butter, vanilla, and salt into a large mixing bowl and start beating with a whisk attachment on a low to medium speed for 2-3 minutes. Then increase the speed to high and beat for 2-5 minutes, scraping down the bowl in regular intervals to make sure all the butter is being beaten. The butter will become soft, fluffy, have lightened in color.
Step 3 - Sieve the icing sugar over the butter, add the salt, use the paddle attachment, and beat the icing sugar into the butter. The mixture will look fairly crumbly.
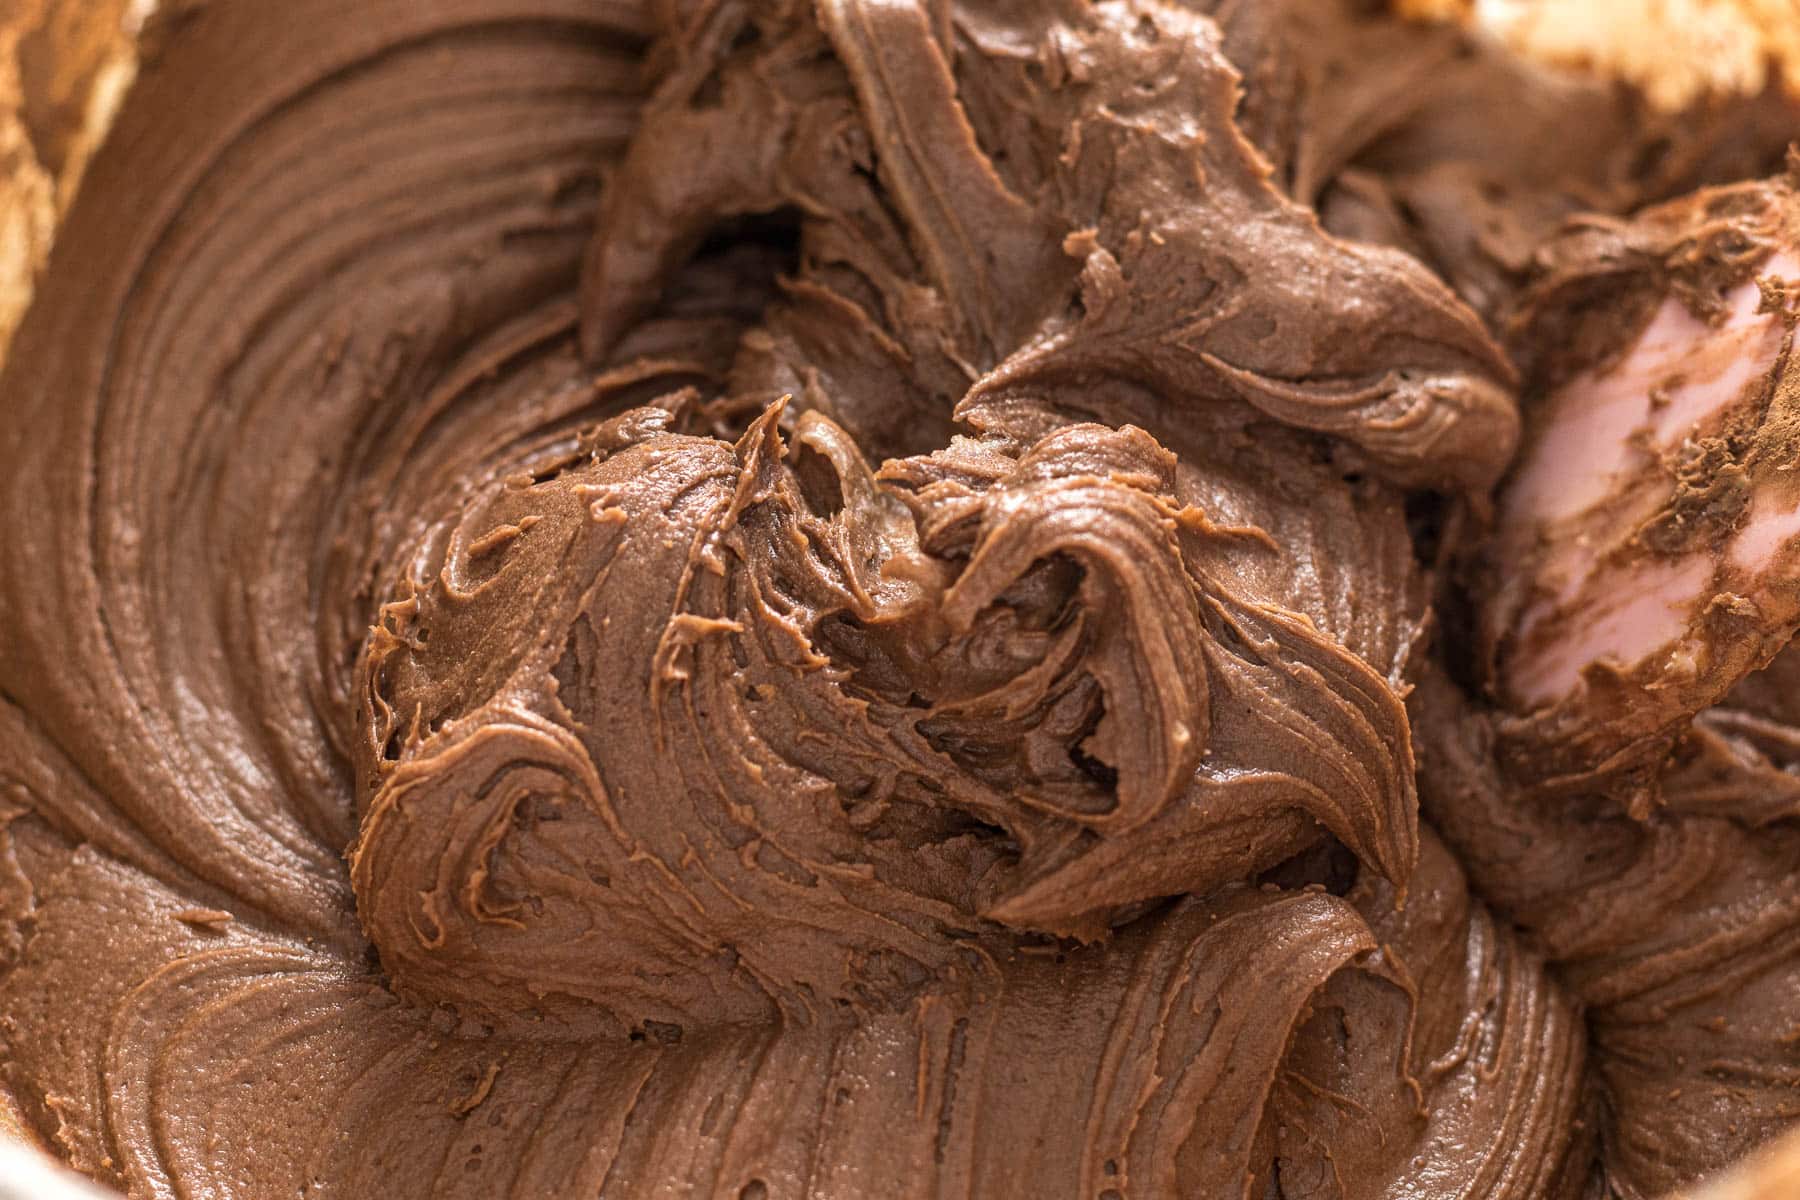
Step 4 - Add in the soft room temperature cream cheese and beat on low/medium speed with a paddle attachment until combined. The mixture will become thick. Start adding the cream/milk to thin out the frosting as needed (especially if using a hand mixer).
Step 5 - Once the cream cheese is mixed in, sieve the cocoa powder over the frosting and mix in until combined.
Cake Decorating Instructions
Step 1 - If desired, level off the tops of the cakes using a cake leveler or large bread knife.
Step 2 - Place a dollop of cream cheese frosting on the base of your cakestand or plate. Place the first cake layer onto the plate.
Tip - if the frosting feels a little bit stiff, soften the portions of frosting in the microwave in short bursts to help the frosting process. This will soften the frosting enough to spread smoothly. And allow it to set up nicely when done decorating without making the frosting too soft.
Step 3 - Place ¾ cup of frosting on the bottom layer and smooth out towards the edges.
Step 4 - If adding any filling, use an offset spatula or the back of a spoon to create an indent in the frosting. Add the filling into the indent and then smooth out.
Step 5 - Add the second layer, bottom side up on the bottom frosted layer.
Step 6 - Smooth on ¾ cup of frosting on the sides of the cake, using an offset spatula, bench scraper, or icing smoother, smooth the sides of the cakes.
Step 7 - Then place ¼ cup of frosting on the top, smooth to the edges, and then repeat the process to smooth over the sides. Place the cake in the fridge to allow the frosting to set up.
Step 8 - Place about 1 cup of frosting on the top of the cake and smooth over the top and down the sides. Use an offset spatula, bench scraper, or icing smoother, and smooth the sides of the cakes.
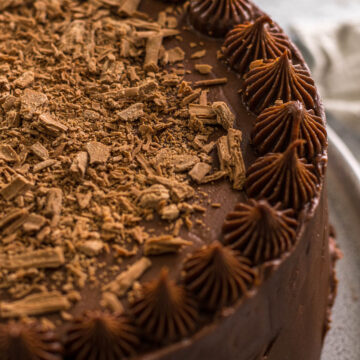
Step 9 - Use the rest of the frosting for decorative swirls.
Expert Tips for this Recipe
Cutting Baking Paper Rounds
The easiest way to line the bottom of a round cake tin is to use a piece of round baking paper...but it needs to become round first. One method is to use a pencil and outline the bottom of your tin on the baking paper and then cut it out.
My preferred method is to take a square of baking paper, fold it in half, quarters, and then eights. I flip my cake tin over, place the center of the baking paper in the center of my cake tin, and then cut around the edges. Open the paper and voila - a round piece of baking paper.
Prepare and line a round cake tin
I use a baking spray - the brand I am using currently is Pam's rice bran oil spray. I lightly spray the bottom of the pan, and place the baking paper over it, smoothing it out. Then I spray the sides of the pan.
Baking Flat Cake Layers
Baking flat cake layers is a bit of an art. It begins with a light-colored metal cake pan. I am using Pro-Pan 8 Inch round cake tins that are 3 inches tall with straight sides.
If you don't have a light-colored cake pan, as most pans sold in the local shops are dark in color, then I highly recommend wrapping the sides of the pan with bake-even strips, or foil. this stops the sides of the cake from baking too quickly, setting and resulting in a domed cake.
Because I have nice high cake sides, I like to cover my cake with foil in the first 30 minutes of baking. This stops the top from crusting over too quickly in the bake. If you have a fairly short cake pan then I would skip this step.
Get the oven temperature right! If the oven is too hot then:
- The cake will bake too quickly on the edges impeding the rise up the side of the cake pan.
- The high heat will activate the chemical leavener (baking powder) too quickly which will result in a highly domed cake.
Then finally, since it is an art, use a cake leveler or large bread knife to even off the layers, especially if you are stacking the cakes.
Ovens & Air Fryers
The temperatures stated are for conventional ovens. For convection, fan-forced, fan-assisted, or air-fryers, the temperature must be reduced by 20°C/25°F.
For baking, make sure the oven is fully preheated, and that the rack is in the middle of the oven. Open the oven as little as possible. For best baking results use an oven thermometer.
Remember that all ovens work slightly differently and bake times may need to be adjusted for your specific oven.
Storage and Freezing
Baked cakes can be wrapped in plastic wrap and stored in plastic wrap and frozen for up to 3 months before thawing in the fridge overnight and then decorating.
This cake, due to its cream-cheese frosting should be stored in an airtight container in the fridge for up to a week.
The whole cake, or slices of cake can be frozen in an airtight container for up to 3 months.
Other Recipes You May Like
Rate & Review!
If you made this recipe, please leave a star rating! It gives my readers and me helpful feedback. If you want more recipes, subscribe to my newsletter, and follow me on Instagram, Pinterest, and Facebook!
Recipe Card
Chocolate Cake with Cream Cheese Frosting
Equipment
- Stand Mixer
- Electric hand mixer
- 8 Inch Round (20cm) Cake Pan (can use 9 inch/23cm round cake pans)
- Mixing Bowls
Ingredients
Two-Layer Chocolate Cake Ingredients
- 120 grams butter (1 stick plus 1 tsp)
- 240 grams milk
- 2 teaspoons vanilla extract
- 2 teaspoons instant coffee (espresso powder)
- 4 eggs (Size 6/Med/large*note 1)
- 400 grams white granulated sugar (caster/granulated)
- 60 grams unsweetened cocoa powder (Dutch-processed)
- 3 teaspoons baking powder
- ½ teaspoons table salt
- 380 grams plain flour (all-purpose/standard-grade)
Chocolate Cream Cheese Frosting
- 150 grams butter (room temperature)
- 2 teaspoons vanilla extract
- ½ teaspoons table salt (if using unsalted butter)
- 500 grams icing sugar (powdered/confectioner's sugar)
- 226 grams cream cheese (8 oz - block cream cheese)
- 6-8 tablespoons cream (or milk)
- 60 grams unsweetened cocoa powder (Dutch-processed)
Filling Options
- 4-5 tablespoon fruit jam/Nutella
Instructions
Two-Layer Chocolate Cake
- Preheat the oven to 180°C/355°F/gas mark 4. Grease and line two 8-inch round cake pans. *Note 2
- Melt the butter and milk together, either in the microwave or on the stovetop on low heat.120 grams butter, 240 grams milk
- Add the vanilla and coffee to the butter/milk mixture and stir through until most of the coffee is dissolved. Set aside.2 teaspoons vanilla extract, 2 teaspoons instant coffee
- In a large mixing bowl, beat together the eggs and sugar either with an electric hand mixer or with a stand mixer for 3- 5 minutes. The egg mixture will lighten to a pale yellow and almost triple in volume when done.4 eggs, 400 grams white granulated sugar
- With the beaters running, slowly add the butter/milk mixture to the eggs.
- Sieve the cocoa powder, baking powder, salt, and half of the flour over the egg mixture. Mix until just combined. Then sieve over the rest of the flour and mix until just combined.60 grams unsweetened cocoa powder, 3 teaspoons baking powder, ½ teaspoons table salt, 380 grams plain flour
- Divide the batter between the two prepared cake pans. Approximately 640-650 grams of batter(3 cups) per pan. Tap the cake pan on the counter a few times to bring the large bubbles to the surface. *Note 3
- Bake for 30 to 40 minutes or until a toothpick comes out mostly clean from the center. Allow the cakes to cool in the pans for 5 to 15 minutes before turning them out onto a wired cooling rack to cool completely. *Note 4
- When they are completely cool, wrap them in plastic wrap and store them in the fridge or freezer. Frosting fridge cold or frozen cakes is easier than room temp cakes.
Chocolate Cream Cheese Frosting
- Cut the butter and cream cheese into blocks. Bring the butter and cream cheese to room temperature. If your bowls are cold, run the outside of the bowls under some warm water and dry off before using.
- Place the butter, vanilla and salt into a large mixing bowl and start beating with a whisk attachment on a low to medium speed for 2-3 minutes. Then increase the speed to high and beat for 2-5 minutes, scraping down the bowl in regular intervals to make sure all the butter is being beaten. The butter will become soft, fluffy, and almost white in color. *Note 5150 grams butter, 2 teaspoons vanilla extract, ½ teaspoons table salt
- Sieve the icing sugar over the butter, add the salt, use the paddle attachment, and beat the icing sugar into the butter. The mixture will look fairly crumbly.500 grams icing sugar
- Add in the room temperature cream cheese and beat on low/medium speed with a paddle attachment until combined. The mixture will become thick. Start adding the cream/milk to thin out the frosting as needed.226 grams cream cheese, 6-8 tablespoons cream
- Once the cream cheese is mixed in, sieve the cocoa powder over the frosting and mix in until combined.60 grams unsweetened cocoa powder
Frosting and Decoration
- If desired, level off the tops of the cakes using a cake leveler or large bread knife.
- Place a dollop (1 tbsp) of cream cheese frosting on the base of your cakestand or plate. Place the first cake layer onto the plate. *Note 6
- Place ¾ cup of frosting on the bottom layer and smooth out towards the edges.
- If adding any filling, use an offset spatula or the back of a spoon to create an indent in the frosting. Add the filling into the indent and then smooth out.4-5 tablespoon fruit jam/Nutella
- Add the second layer, bottom side up on the bottom frosted layer.
- Smooth on ¾ cup of frosting on the sides of the cake, using an offset spatula, bench scraper, or icing smoother, smooth the sides of the cakes.
- Then place ¼ cup of frosting on the top, smooth to the edges, and then repeat the process to smooth over the sides. Place the cake in the fridge to allow the frosting to set up and become hard.
- Place about 1 cup of frosting on the top of the cake and smooth over the top and down the sides. Use an offset spatula, bench scraper, or icing smoother, and smooth the sides of the cakes.
- Use the rest of the frosting for decorative swirls.
Notes
- New Zealand size 6 eggs are around the same size as an Australian/South African Large or a US/Europe Medium.
- If you have dark cake pans, either use bake-even strips or wrap the sides of the pan with a few strips of foil. This will help the cake to rise up the sides of the pan for even layers.
- I use a cake pan with a 3-inch tall side, so I like also to cover the cake pan with foil to slow down the setting of the top of the cake for flatter cake levels. After 25/30 minutes remove the foil and bake until done.
- I run a plastic knife (no scratched pans here) around the sides of the pan to make sure the cakes release easily. Check 9-inch cakes at the 25-minute mark.
- Making cream cheese frosting with this method results in a super thick frosting. If you want to make it a bit easier on your beaters (especially if using a hand-held electric mixer) after beating the butter, add in a third of the cream cheese and beat until smooth and completely incorporated before moving on to the next steps.
- If the frosting feels a little bit stiff, soften the portions of frosting in the microwave in short bursts to help the frosting process. This will soften the frosting enough to spread smoothly. And allow it to set up nicely as well.
Storage and Freezing
Baked cakes can be wrapped in plastic wrap and stored in plastic wrap and frozen for up to 3 months before thawing in the fridge overnight and then decorating. This cake, due to its cream-cheese frosting should be stored in an airtight container in the fridge for up to a week. The whole cake, or slices of cake can be frozen in an airtight container for up to 3 months.Nutrition
Nutrition information is an estimate. If scaling the recipe remember to scale your cook and bakeware accordingly. All temperatures stated are conventional, unless otherwise stated. Recipes tested in grams and at sea level.
Comments
No Comments