


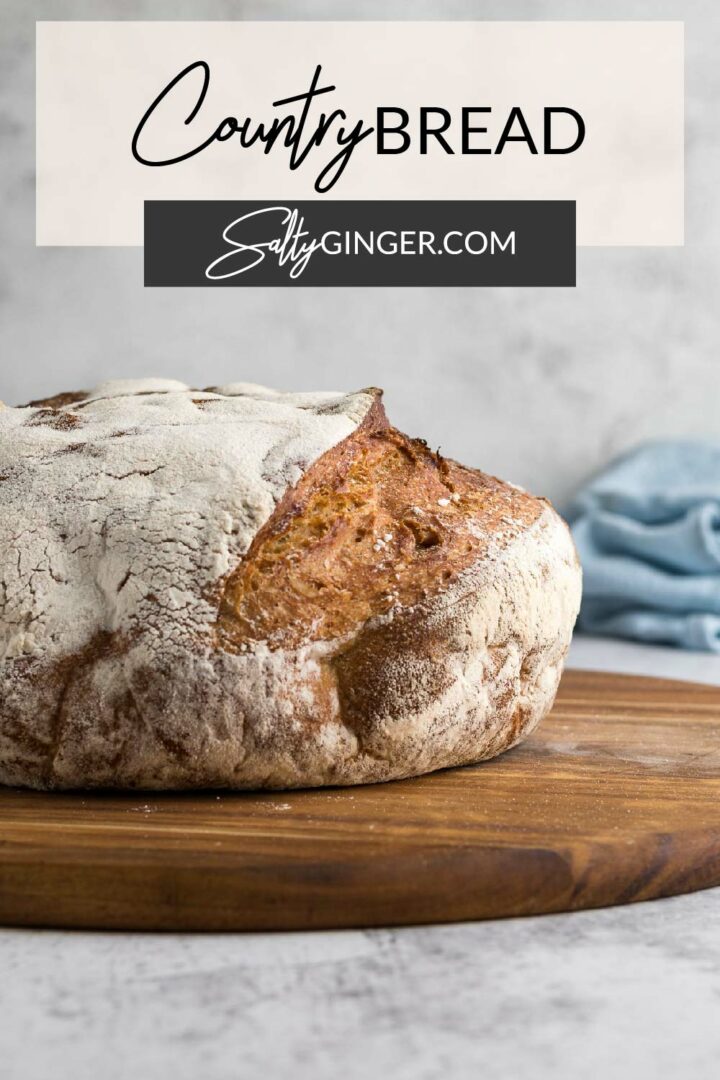
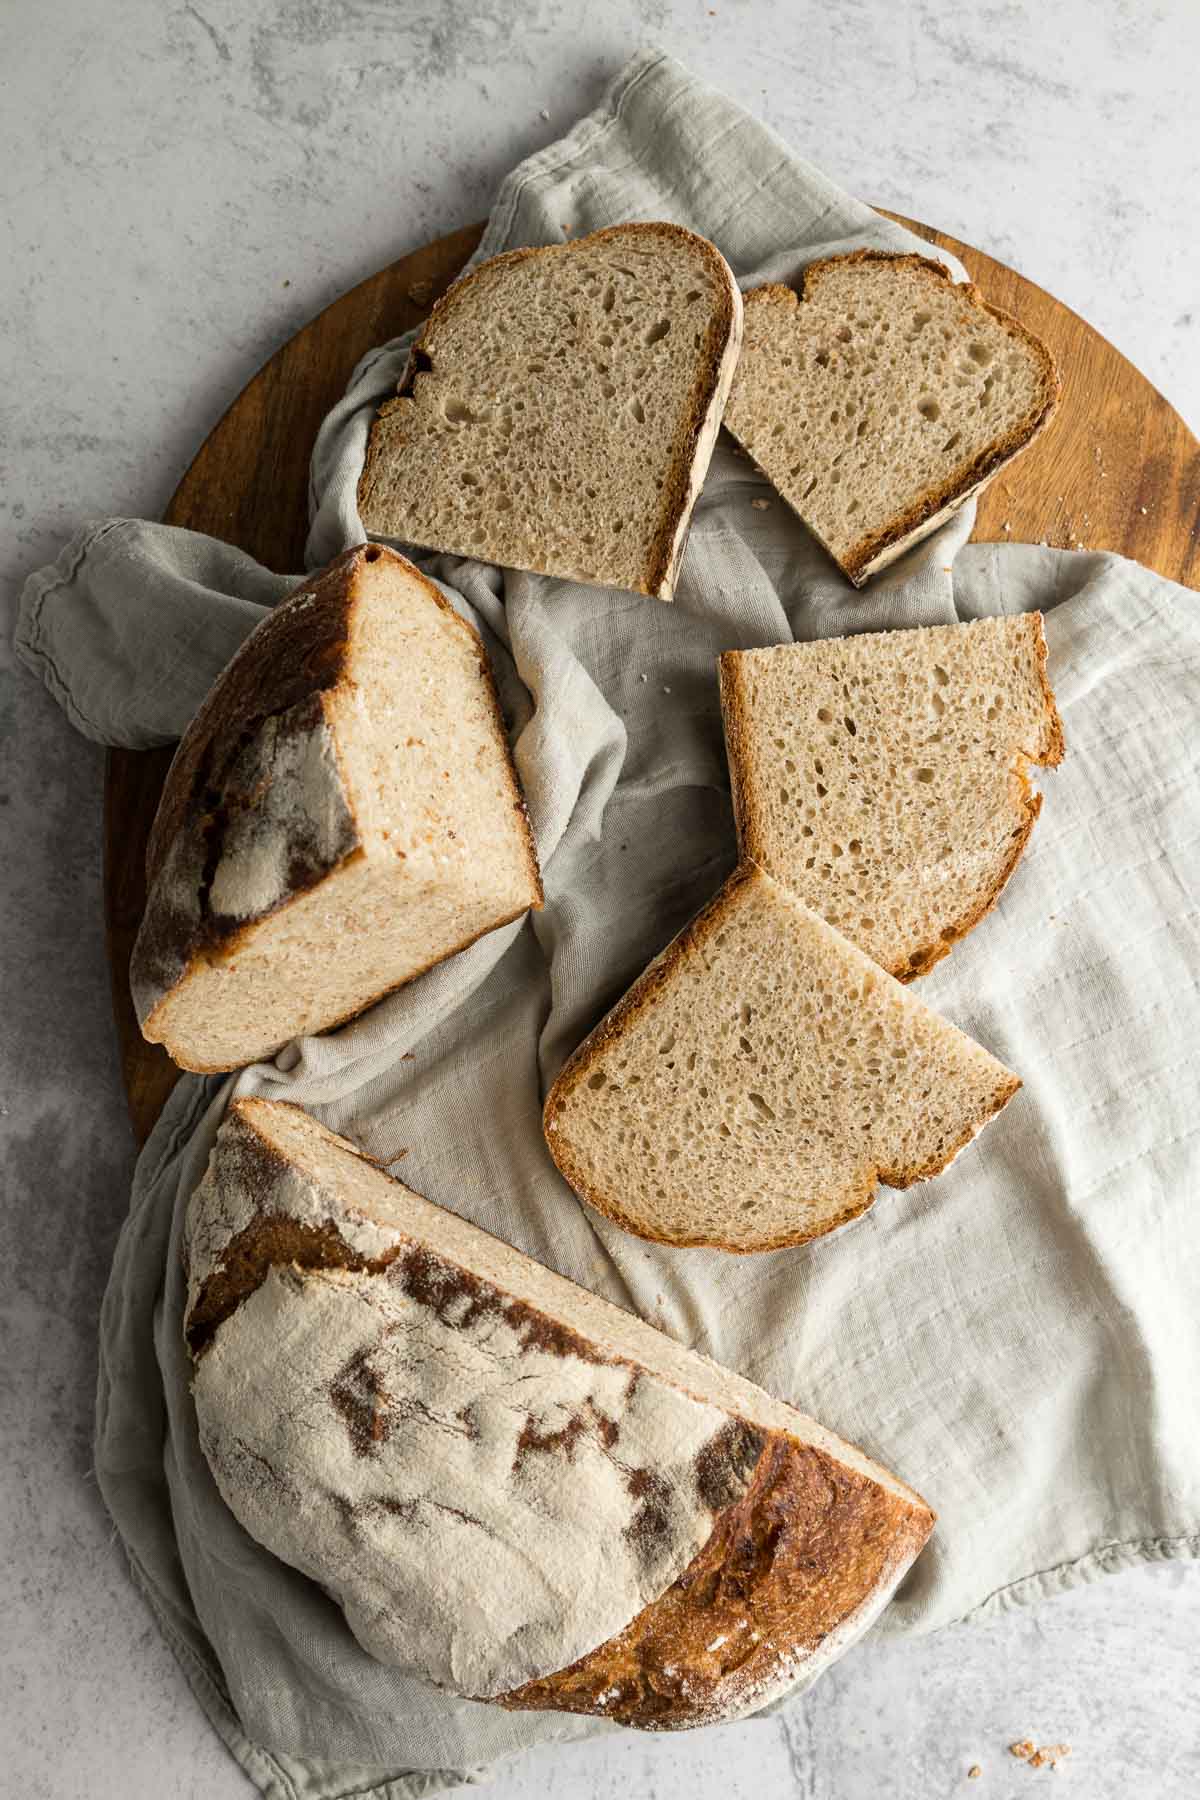
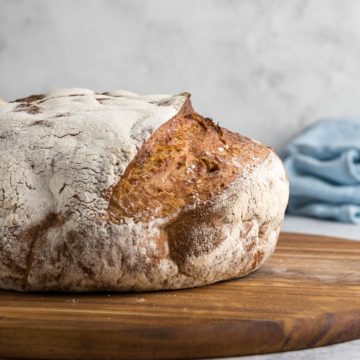
This country bread recipe requires only flour, salt, sugar, water, and yeast to deliver beautiful crusty homemade artisan bread.
This country bread begins with making sponge or poolish, which is the no-commitment version of a sourdough starter. But because this doesn't have the long fermentation times that a typical loaf of sourdough bread has, it has a much milder flavor.
This artisanal homemade bread is perfect for anyone who wants to venture into bread making without the commitment and pre-planning that a sourdough requires.
Jump to:
Ingredients
Here are notes on the ingredients used, please refer to the recipe card for full quantities.
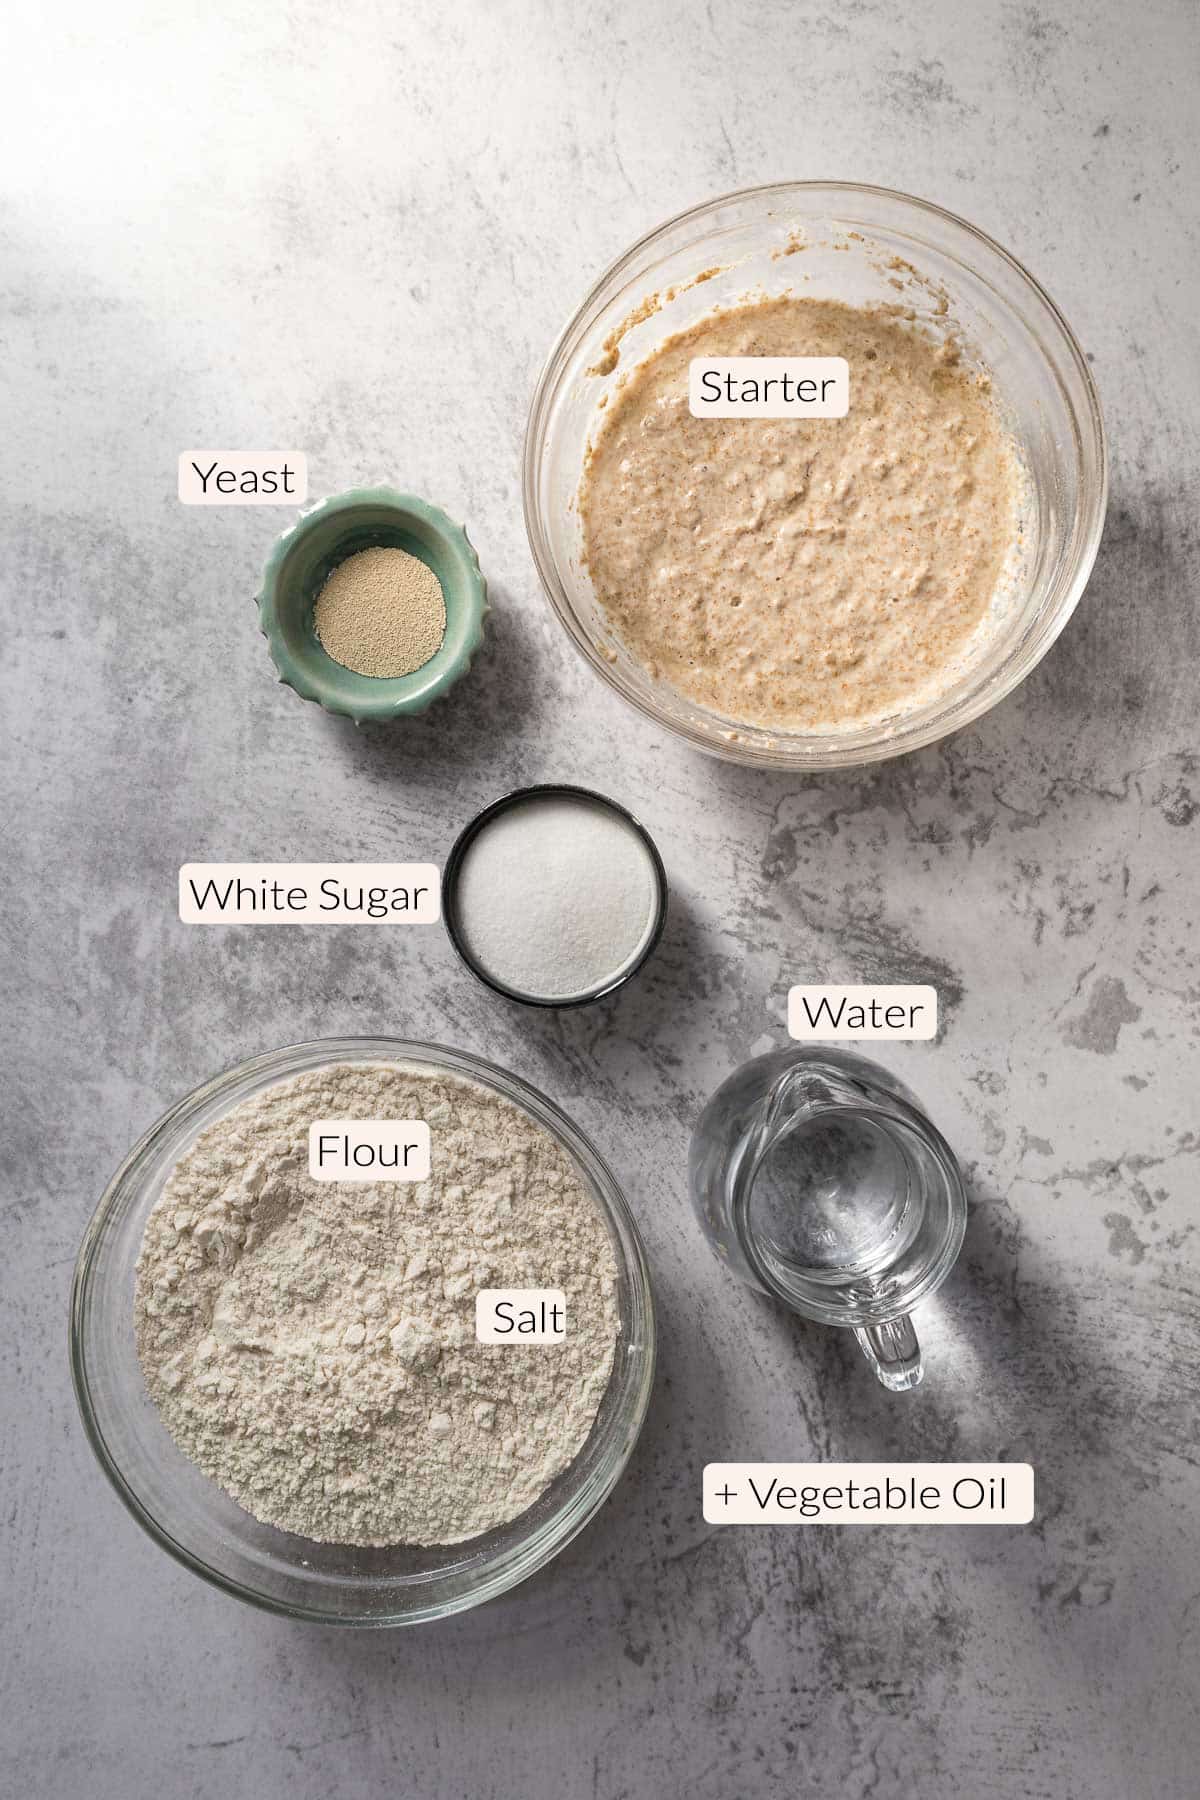
Bread Flour/Strong Flour/High-Grade Flour (white bread flour) has a protein content between 11-14%. This higher protein content is great for building gluten which results in the stretchy cohesive dough required for yeasted bread.
Substitute the white bread flour in the starter with whole wheat flour or whole meal or whole grain flour for some added flavor and variety to your loaf.
Because all-purpose flour has a protein content between 9.5-12%, it can be used instead of bread flour. However, it may require just a little bit more kneading than bread flour.
Salt is a crucial ingredient in all baked goods. I use table salt in all my recipes. One teaspoon of table salt equals 1.5 teaspoons of Morton Kosher Salt equals 2 teaspoons of Diamond Crystal.
Yeast - I used instant dry yeast for this recipe. Instant yeast has smaller granules and doesn't require rehydration before use, meaning there is no blooming period. If you are using active dry yeast dissolve it in lukewarm water before use.
Water hydrates the bread. This is a basic bread recipe and doesn't use any enriching ingredients.
Vegetable oil is used to grease the bowl for the rising stage, this is to ensure the dough doesn't stick and prevents the dough from drying out.
Weighing and Measuring Ingredients
Weighing ingredients with a kitchen scale is more accurate than using measuring cups. All my recipes are developed and tested using grams only.
However, I have activated the metric-to-cup conversions. Simply click on "USA/Cups" or "metric" for your preferred measurements. For these conversions, cups are equal to 240mL/8 fl oz, tablespoons are 15mL and teaspoons are 5mL.
Country Bread Step-By-Step Instructions
Making the Starter
1 - Combine the flour, warm water, and yeast in a large mixing bowl. Mix until the flour is mostly hydrated.
2 - Cover the starter mixture with plastic wrap or cling film. Allow to sit at room temperature for at least 2 hours. Alternatively, let it rest on the kitchen counter overnight (if it is cool) or in the fridge (for the warmer days).
3 - The starter or sponge will have risen and be covered in air pockets after it has been allowed to rest.
Making the Bread Dough
1 - Add the lukewarm water, yeast, and sugar to the starter in the large bowl and combine all the ingredients.
2 - Add about 400 grams (3 cups) of the flour and salt. Mix to form a loose shaggy dough with a fork or wooden spoon.
3 - Let the dough rest for 15 to 20 minutes. This allows the flour to hydrate and kicks off gluten formation.
4 - On a clean work surface, place about half the leftover flour. Empty the bread dough on top of the flour, and sprinkle the rest of the flour onto the dough.
5 - Grease a clean large mixing bowl with oil and set aside.
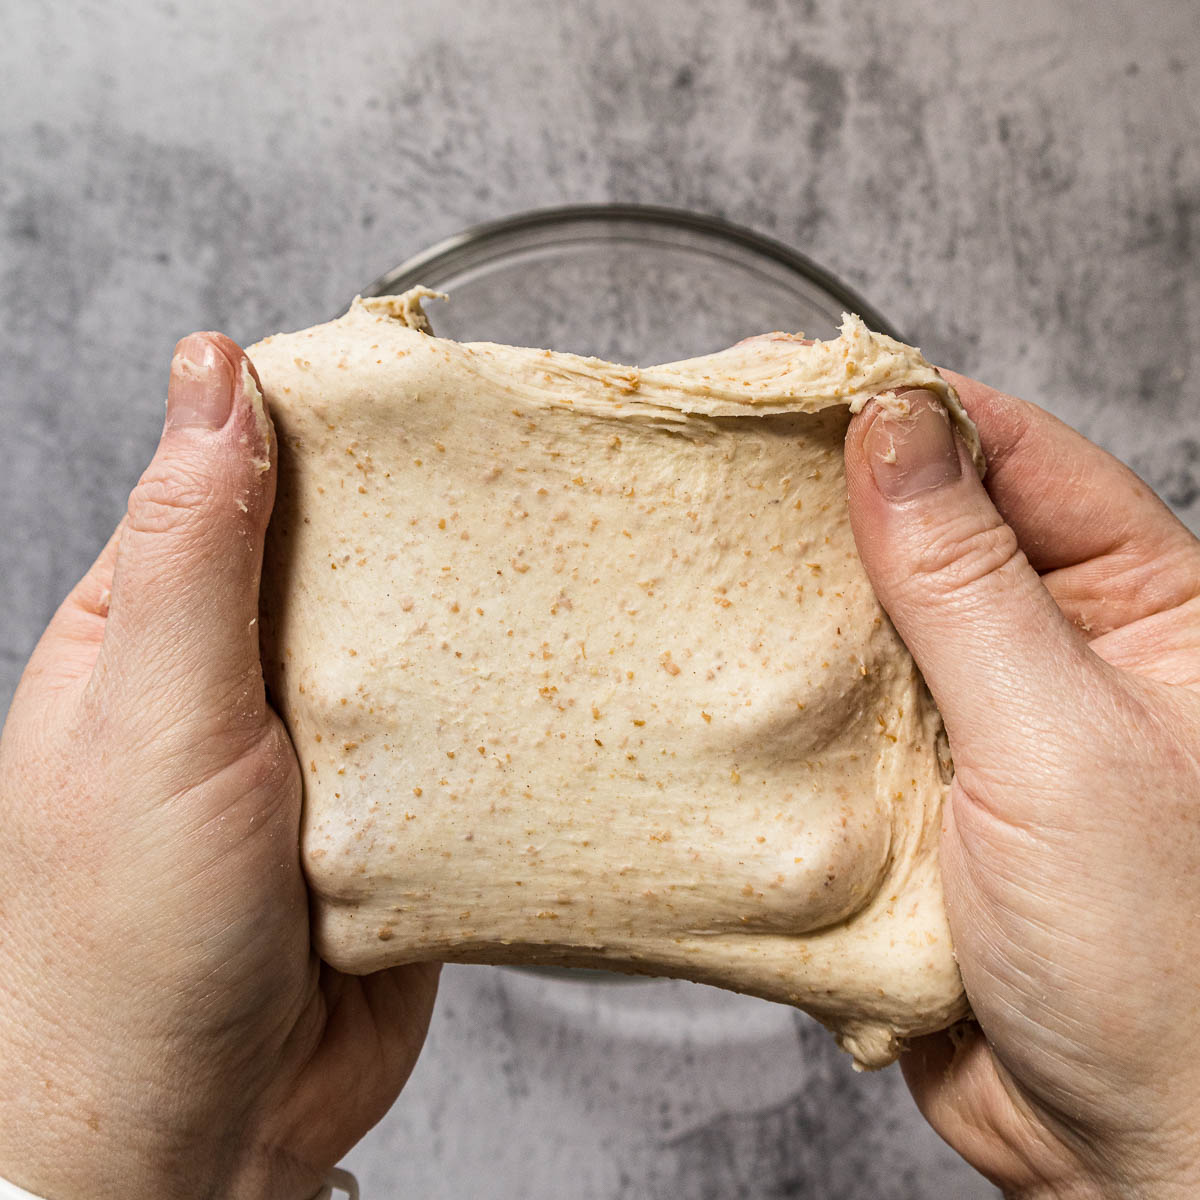
6 - Knead the dough for 10 to 12 minutes. The dough is ready once you have achieved the window-pane stage, this means that when you take a small piece of dough and stretch it gently it will become very thin and allow light through without easily tearing. If the dough tears or breaks easily, knead for a few more minutes and check again.
Note - the dough can be kneaded by hand or in a stand mixer using a dough hook.
7 - Place dough into the lightly greased bowl, flipping the dough around until it is completely covered in the oil. Then cover the dough with plastic wrap and/or a tea towel.
8 - Let the dough rise, in a warm place, for 1 to 2 hours.
Shaping the Dough
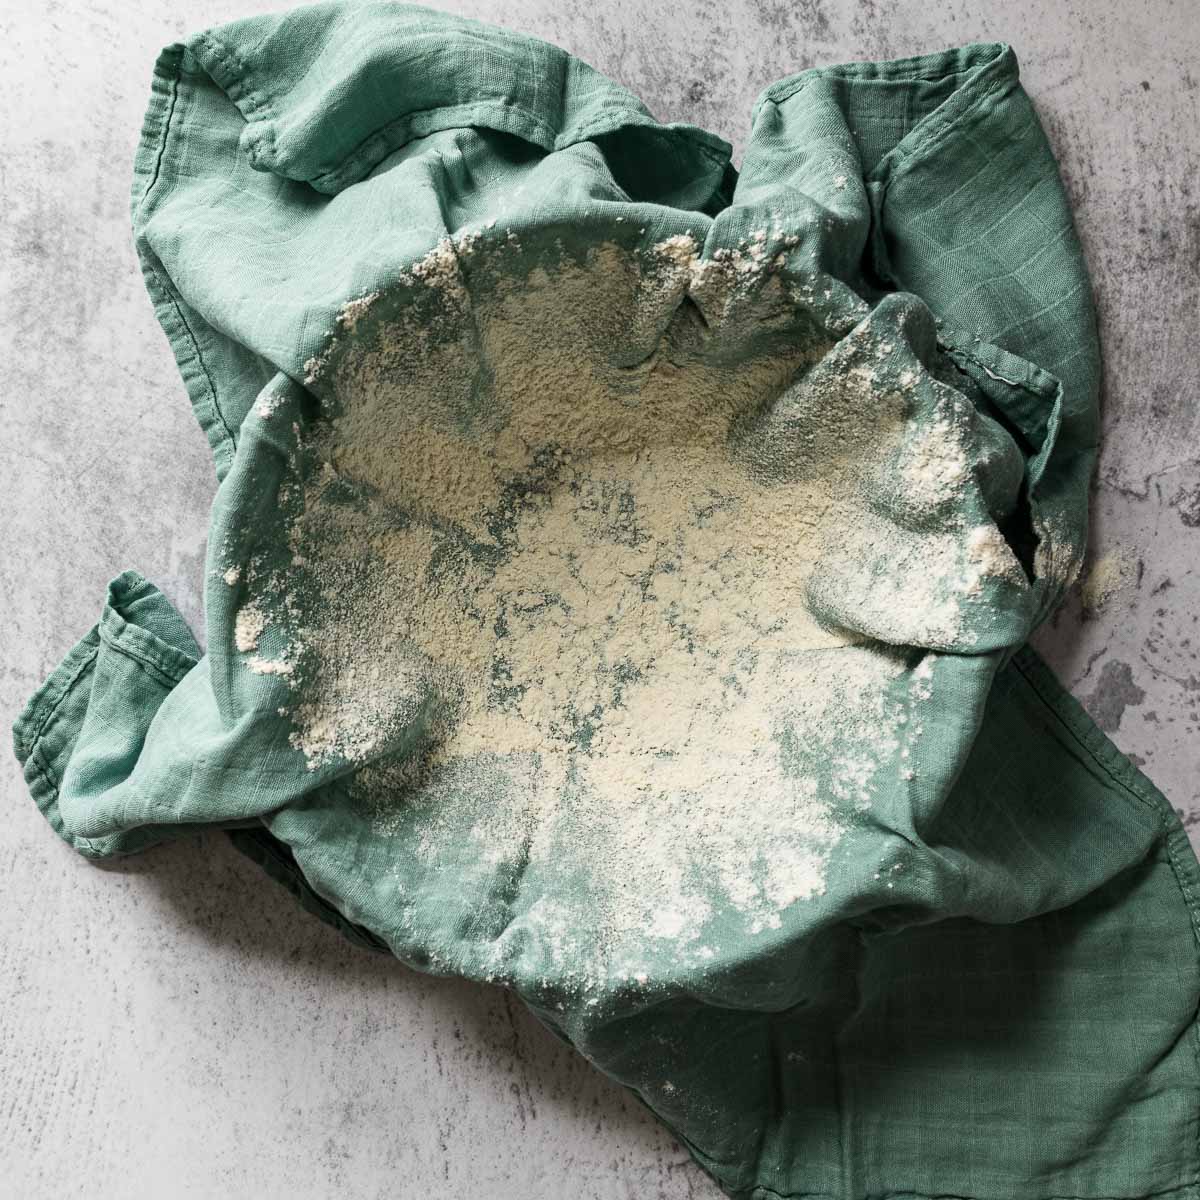
1 - Prepare a banneton (brotform or proofing basket) by flouring the inside of the basket. If you don't have a banneton, drape a clean kitchen towel into a glass or plastic bowl about an inch or two smaller in diameter than your cast iron pot or Dutch oven (if using one).
2- Place the bread dough onto a clean surface (un-floured), and press roughly into a circle. Pushing out the air. Then take the edge of the dough and pull it to the center, repeat this process around the bread. Then flip the bread over onto the un-floured surface and move the bread in a clockwise circle using the tension from the surface to create a large bun, tucking the edges as you go. Do this until the top is smooth.
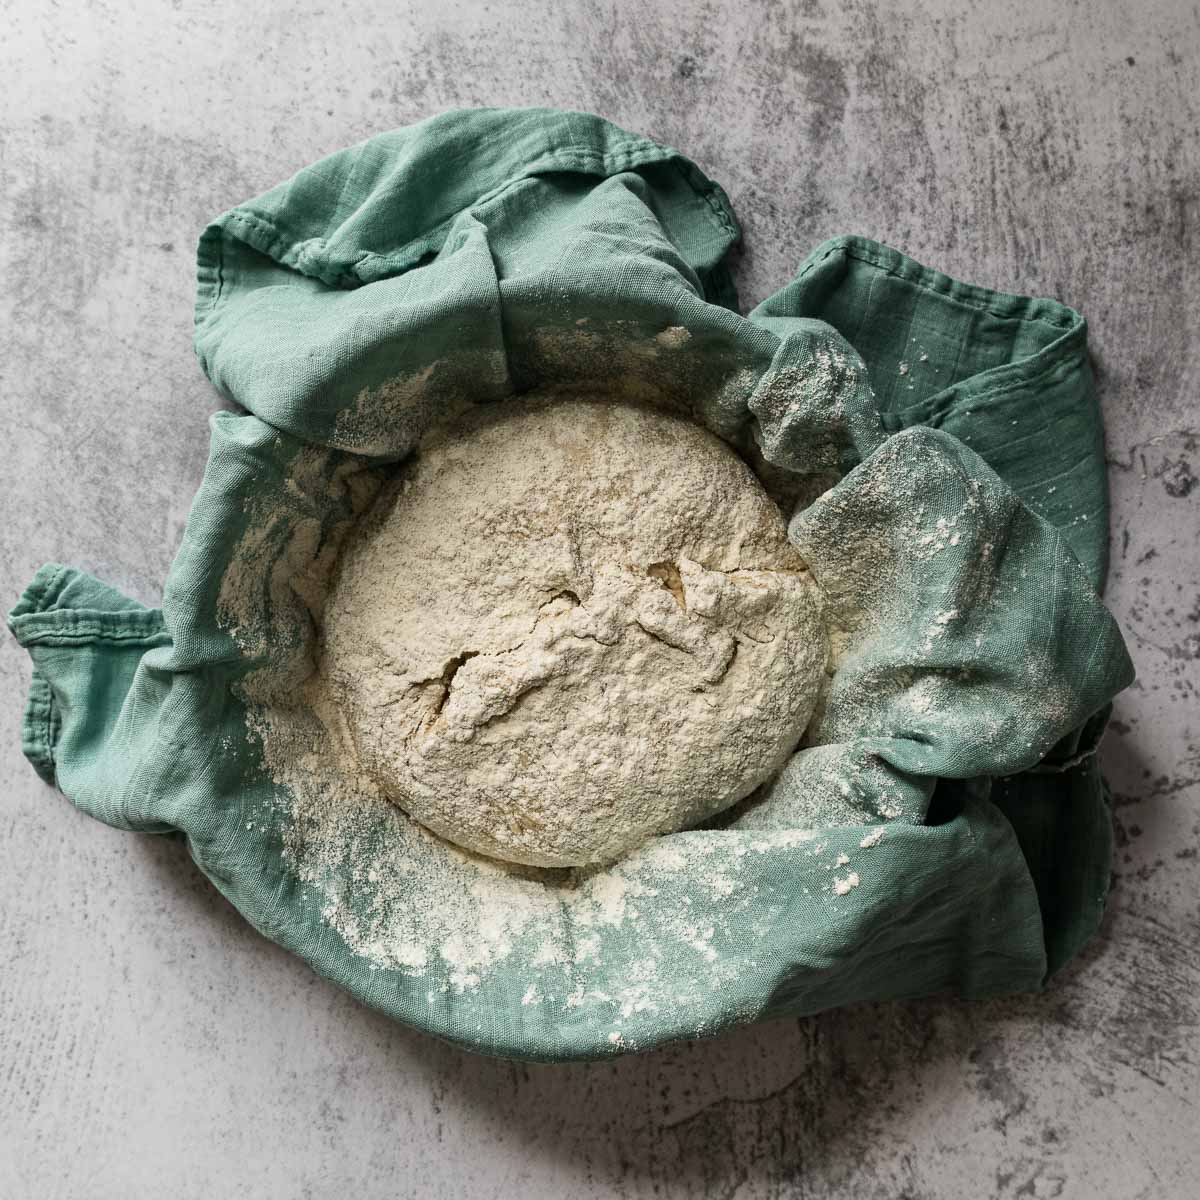
3 - Flip the bread, seam-side up and smooth side down into the prepared proofing basket.
4 - Dust the bread with flour, core with a tea towel, and allow to rise for 30 to 90 minutes. The second rise is finished when it has increased in size by about 50% or passes the poke test. If you poke the bread and it pops back but leaves an indentation it is proofed. If it pops back immediately with no indentation it is underproofed.
Baking the Bread on a Baking Sheet
1 - While the dough is rising, preheat the oven to 220°C/390°F.
2 - Place a roasting dish in the bottom of the oven while it is preheating. Have a baking sheet ready for the bread dough. Boil about 1.5 to 2 litres of water.
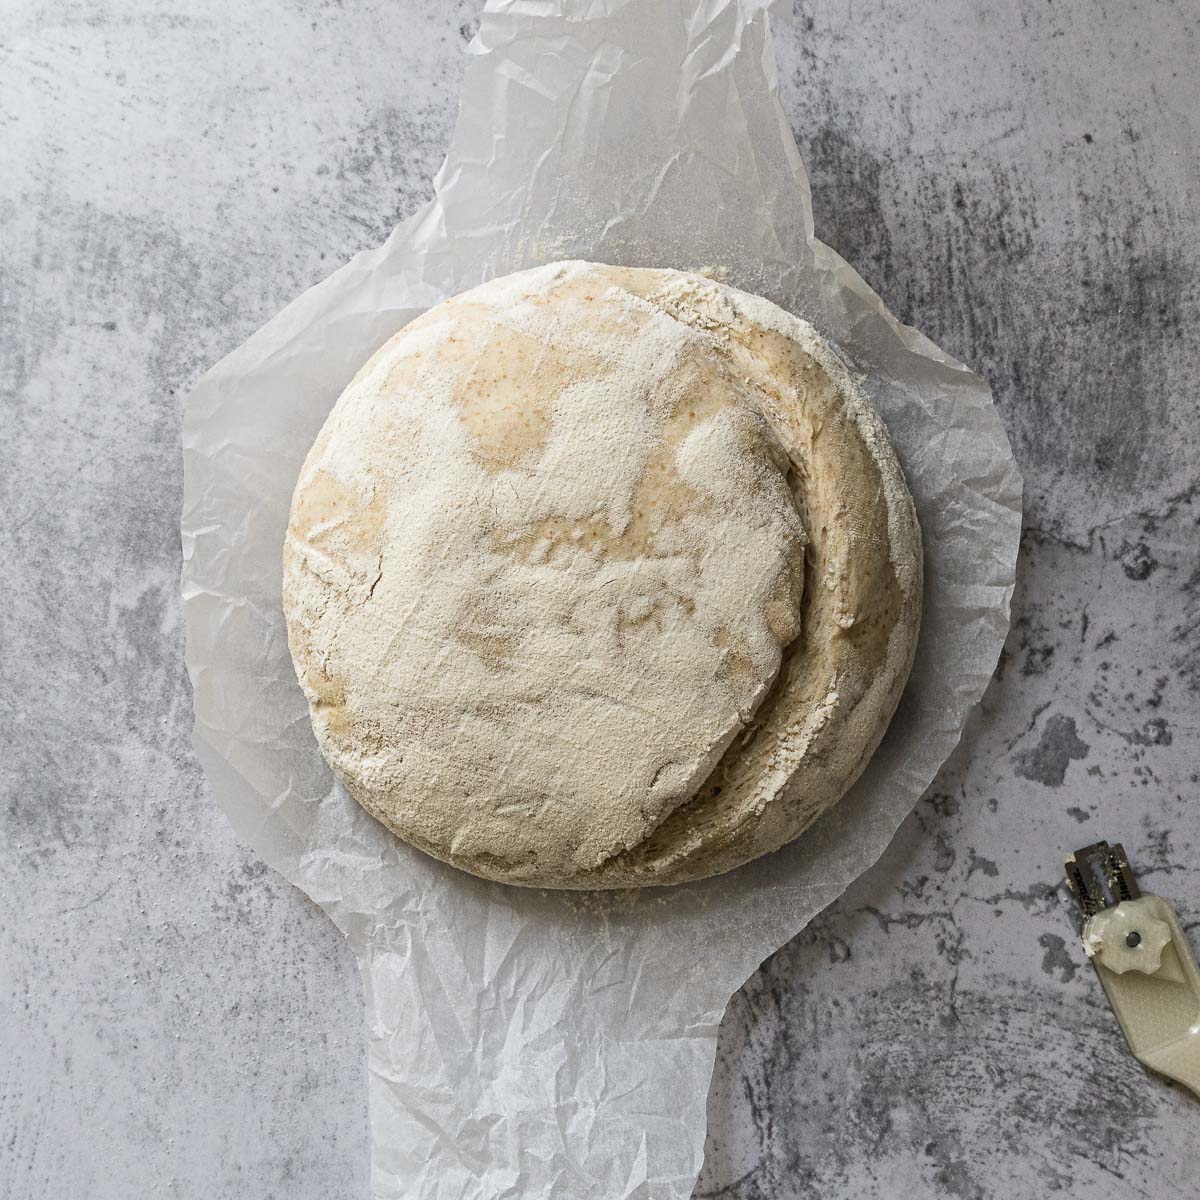
3 - Tip the bread out of the banneton onto the baking sheet, seam side down. Use a razor blade or sharp knife to score across the loaf around 2 inches or 2.5cm deep.
4 - Put the bread into the oven and pour the boiling water into the roasting dish.
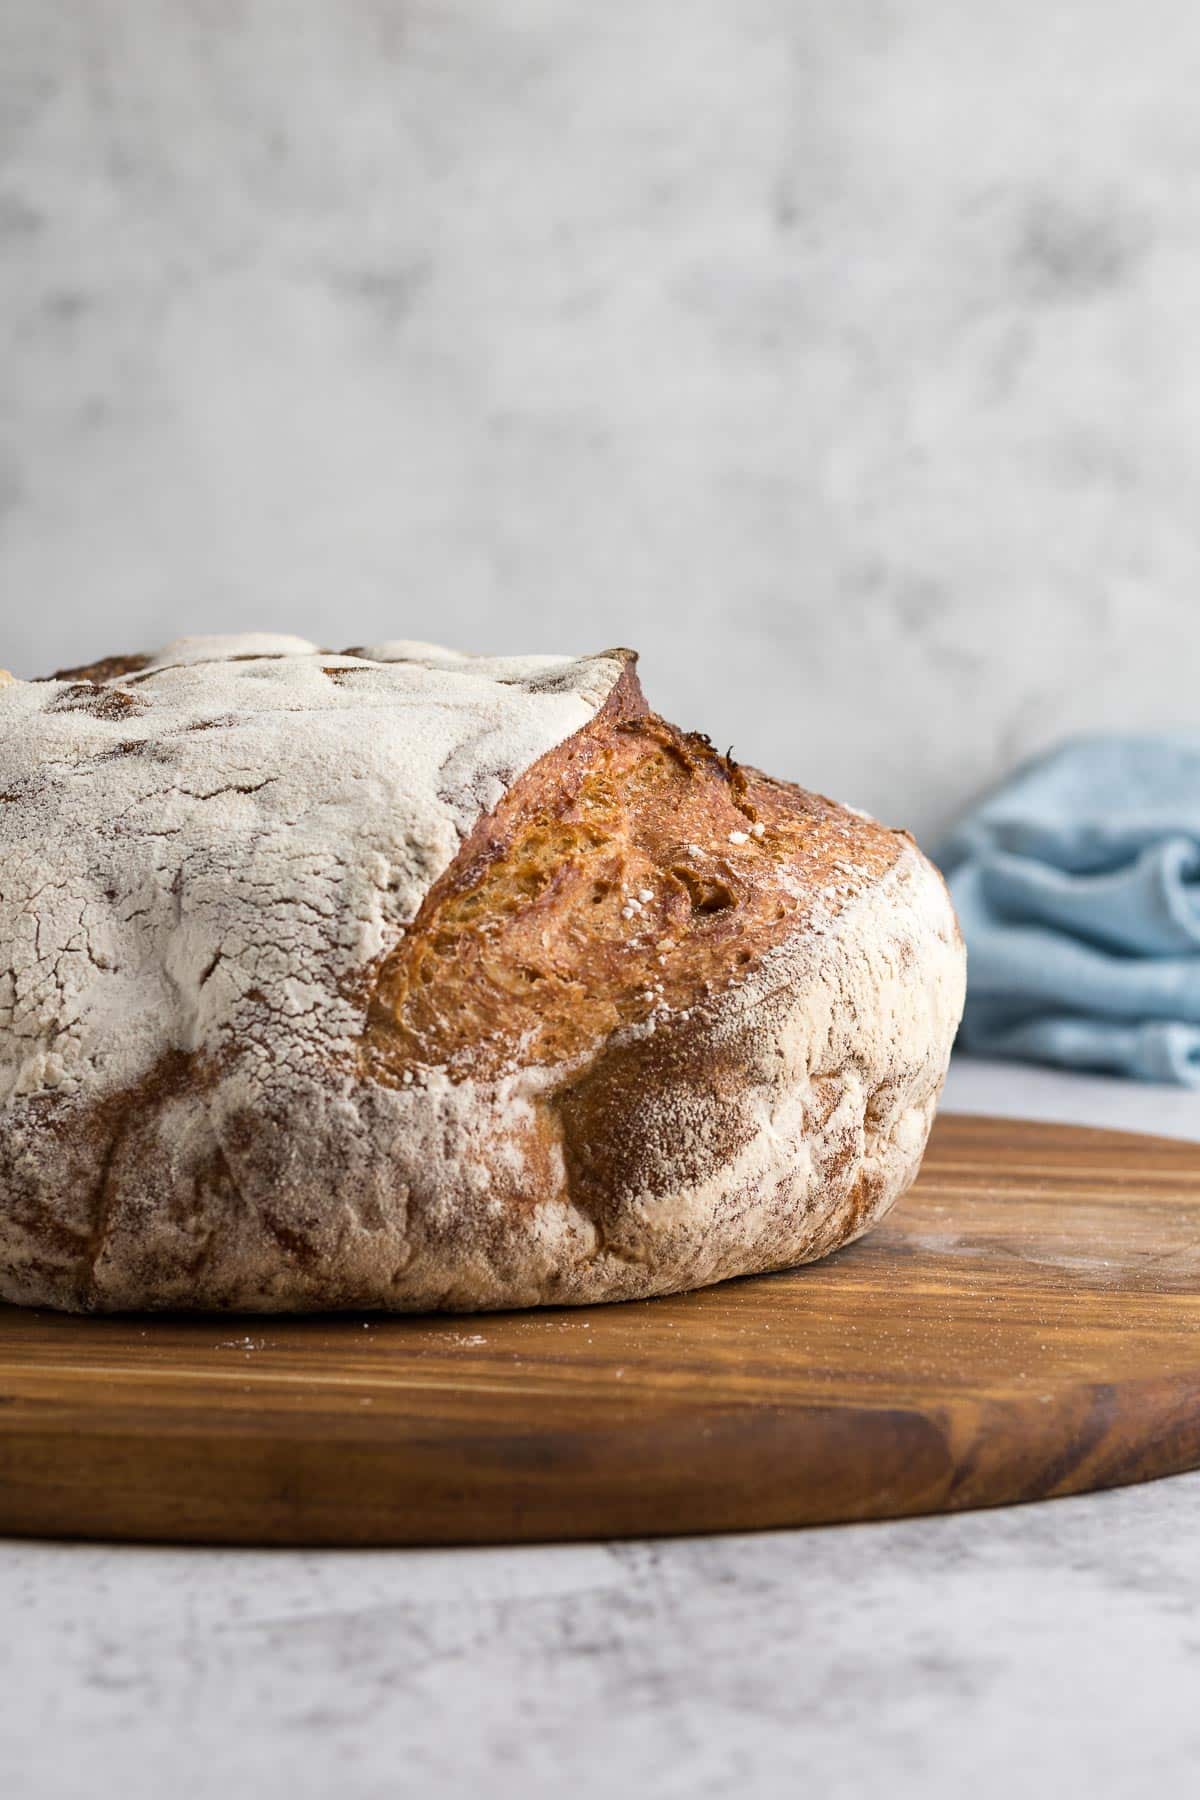
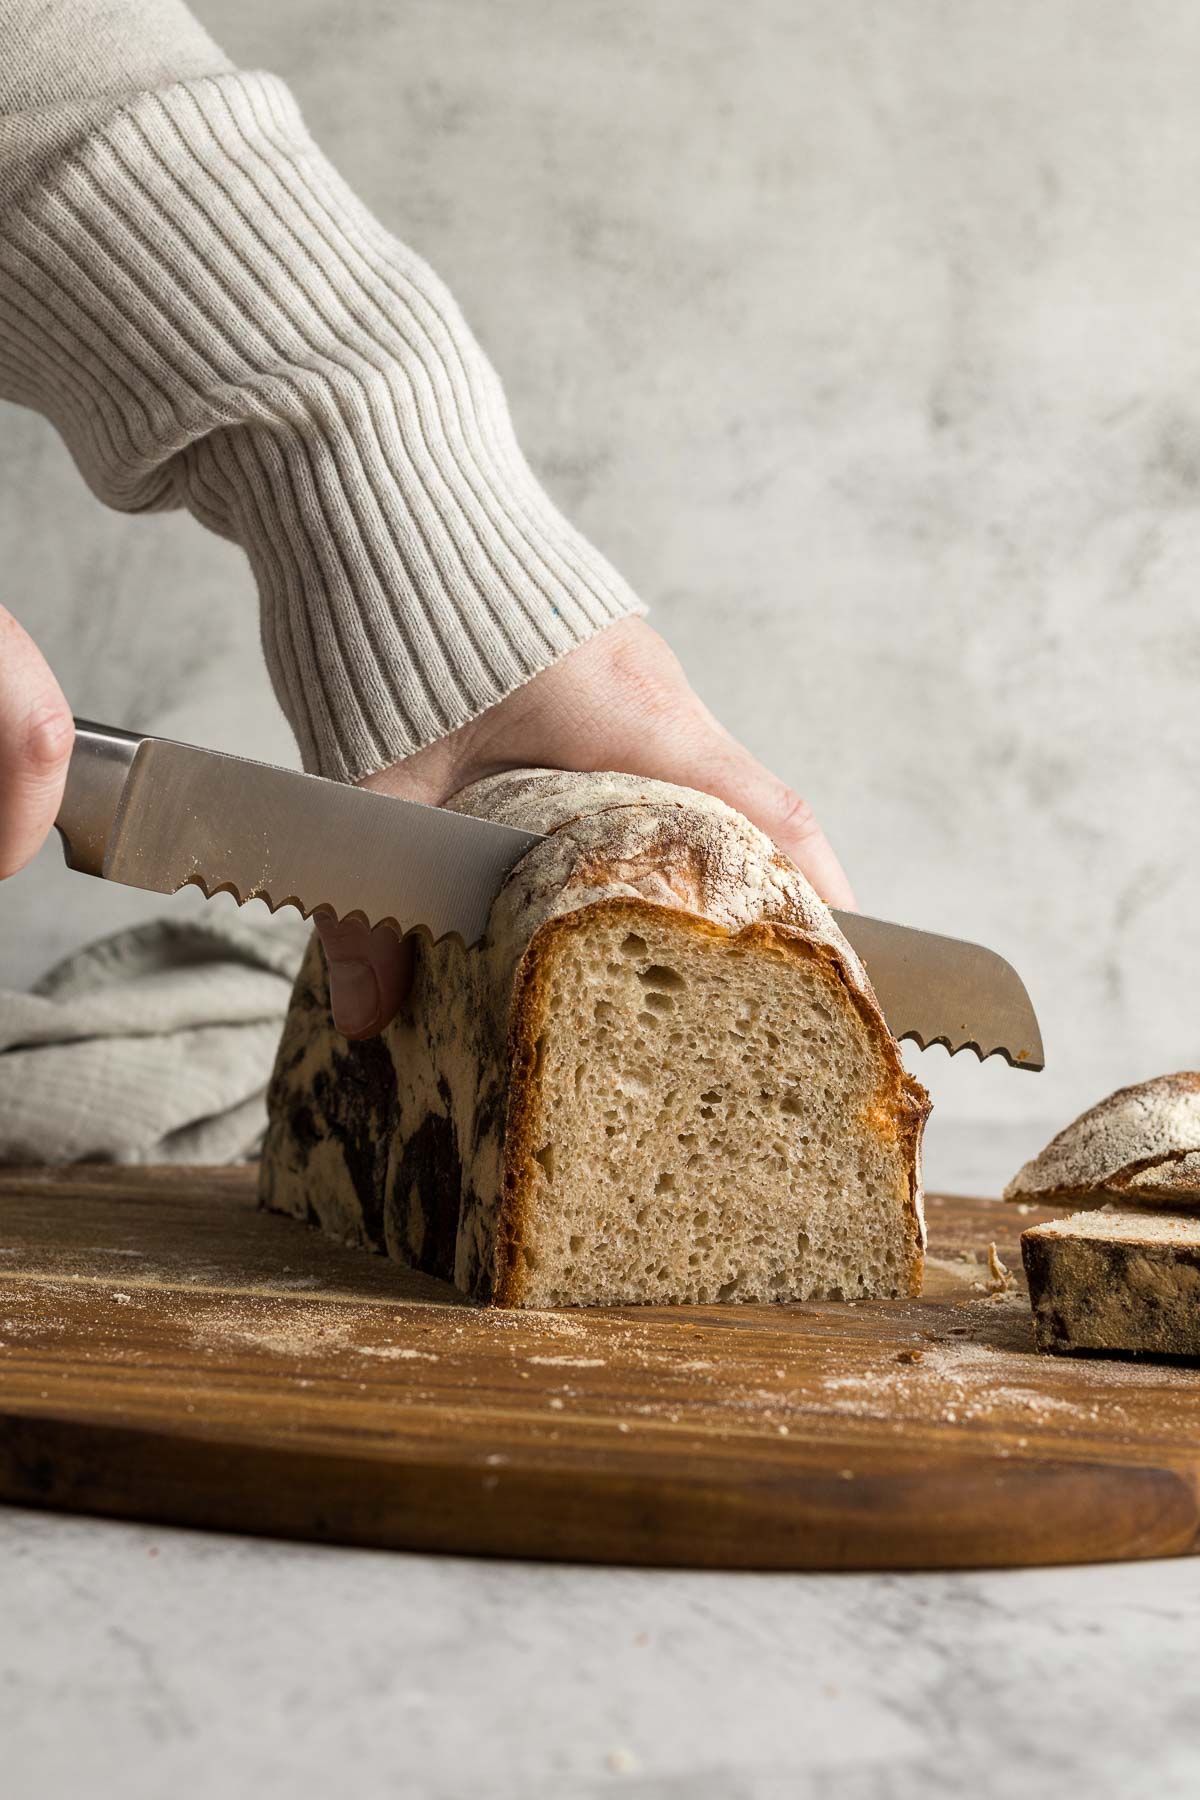
5 - Bake the bread for 35 to 40 minutes. The bread is done with it has reached an internal temperature of around 100°C or 190°F or sounds hollow when tapped.
6 - Place the baked bread on a wire rack to cool before slicing.
Baking the bread in a Dutch oven
1 - While the dough is rising, preheat the oven to 220°C/390°F.
2 - Cut out a piece of parchment paper or baking paper that the bread will sit on. It should be round with two long arms to allow easy placement and removal of the bread.
3 - Turn the bread seam side down onto the parchment paper. Use a razor blade or sharp knife to score across the loaf around 2 inches or 2.5cm deep.
4 - Place the bread into the Dutch oven, splash the bread with water, close it, and place it in the oven. Bake for 20 minutes. Remove the lid of the pot and bake for an additional 15 to 20 minutes. The bread is done with it has reached an internal temperature of around 100°C or 190°F or sounds hollow when tapped.
5 - Place the baked country bread on a wire rack to cool before slicing.
Note - We are creating steam in the oven to ensure the biggest oven spring for the bread. Oven spring is a fast rise at the beginning of the bake before the outside of the bread crusts over. If the crust forms too quickly it can hamper the rise of the bread.
Expert Tips for This Recipe
Trust the recipe. At first, it may seem that there is just too much moisture in the dough. The sticky dough is a mess, sticking to your hands. But as you knead and work that gluten it will become more cohesive and tighten up.
The windowpane test lets you know when the dough has been kneaded enough. Simply take about half of your bread dough and gently stretch it out. If you can hold it up to the light and see the light coming through without the dough tearing, she is done.
Using a cast-iron pot or Dutch oven is the gold standard when it comes to sourdough or rustic artisanal bread baking. The pot is placed in the oven while you are preheating. After I’ve placed my bread into the pot, I will flick some water over the top of the bread or onto the pot lid. This creates steam. Baking on a baking sheet is perfectly fine if you do not have a cast-iron pot.
Steam is great for making sure your bread gets the biggest oven spring it can in the first 15 -20 minutes of baking before the crust starts to brown which impedes growth. If you don’t have a Dutch oven or a cast iron pot, the easiest way to create steam is to place a cookie sheet or other dish in the bottom of your oven while it is preheating. Once you have put your bread in, pour boiling water into the cookie sheet or dish.
Scoring a loaf allows for the bread dough to rise in an orderly fashion. Not scoring a loaf will result in the bread expanding at the weakest point on the loaf. Score using a bread lame, razor blade, or a sharp knife. Make sure the score is at least 2cm deep. Creative or decorative scorings are usually rather shallow.
The poke test is a simple test to determine whether your dough is finished proofing.
- You poke and the dough pops back immediately: underproofed
- You poke and the dough doesn’t pop back at all: over-proofed
- You poke and the dough pops back but still leaves an indentation: perfectly proofed
Ovens and Air-Fryers
The temperatures stated are for conventional ovens. For convection, fan-forced, fan-assisted, or air-fryers, the temperature must be reduced by 20°C/25°F.
For baking, make sure the oven is fully preheated. Having a nice hot oven is especially important when baking bread, as this initial exposure to the heat aids in a nice big oven spring.
Remember that all ovens work slightly differently and bake times may need to be adjusted for your specific oven.
Storage and Freezing
This country bread is best eaten within 2 to 3 days of baking. I love storing homemade bread in a linen bag or wrapped in a clean kitchen or tea towel, or a bread box. I usually save the heels (ends of bread) and keep them pressed into the cut side.
I don't like storing bread in plastic or airtight containers as I find this leads to the bread going stale or becoming moldy very quickly.
Country Bread FAQ
Bulk Fermentation is the first rise or the primary (main) rise that a bread dough undergoes. This starts when the mixing and kneading ends right up until the pre-shaped or shaped. For this loaf of bread, it refers to the time that the dough is allowed to rise in a greased bowl.
This is the period in which the flour and water are mixed and then left to rest before adding in the yeast, salt, and other ingredients. This allows the flour to hydrate and kicks off the gluten formation process. This can cut down the kneading time.
Other Bread Recipes You May Like
Rate & Review!
If you made this recipe, please leave a star rating! It gives my readers and me helpful feedback. If you want more recipes, subscribe to my newsletter, and follow me on Instagram, Pinterest, and Facebook!
Recipe Card
Country Bread
Ingredients
Starter
- 120 grams bread flour (high-grade/strong) *Note 1
- 160 grams lukewarm water
- ¼ teaspoon instant yeast
Bread Dough
- All the starter
- 230 grams lukewarm water
- 1 teaspoon instant yeast
- 2 tablespoons white granulated sugar (caster/granulated)
- 500 grams bread flour (high-grade/strong)
- 10 grams salt 2 tsp
- 2-3 tablespoons oil
Instructions
Making the Starter
- Combine the flour, warm water, and yeast in a large mixing bowl. Mix until the flour is mostly hydrated.120 grams bread flour, 160 grams lukewarm water, ¼ teaspoon instant yeast
- Cover the starter mixture with plastic wrap or cling film. Allow to sit at room temperature for at least 2 hours. Alternatively, let it rest on the kitchen counter overnight (if it is cool) or in the fridge (for the warmer days).
- The starter or sponge will have risen and be covered in air pockets after it has been allowed to rest.
Making the Bread Dough
- Add the lukewarm water, yeast, and sugar to the starter in the large bowl and combine all the ingredients.All the starter, 230 grams lukewarm water, 1 teaspoon instant yeast, 2 tablespoons white granulated sugar
- Add about 400 grams (3 cups) of the flour and salt. Mix to form a loose shaggy dough with a fork or wooden spoon.500 grams bread flour, 10 grams salt
- Let the dough rest for 15 to 20 minutes. This allows the flour to hydrate and kicks off gluten formation.
- On a clean work surface, place about half the leftover flour (½ cup). Empty the bread dough on top of the flour, and sprinkle the rest of the flour onto the dough (½ cup).
- Grease a clean large mixing bowl with oil and set aside.2-3 tablespoons oil
- Knead the dough for 10 to 12 minutes. The dough is ready once you have achieved the window-pane stage, this means that when you take a small piece of dough and stretch it gently it will become very thin and allow light through without easily tearing. If the dough tears or breaks easily, knead for a few more minutes and check again.
- Place dough into the lightly greased bowl, flipping the dough around until it is completely covered in the oil. Then cover the dough with plastic wrap and/or a tea towel.
- Let the dough rise, in a warm place, for 1 to 2 hours.
Shaping the Dough
- Prepare a banneton (brotform or proofing basket) by flouring the inside of the basket. If you don't have a banneton, drape a clean kitchen towel into a glass or plastic bowl about an inch or two smaller in diameter than your cast iron pot or Dutch oven (if using one).
- Place the bread dough onto a clean surface (un-floured), and press roughly into a circle. Pushing out the air. Then take the edge of the dough and pull it to the center, repeat this process around the bread. Then flip the bread over onto the un-floured surface and move the bread in a clockwise circle using the tension from the surface to create a large bun, tucking the edges as you go. Do this until the top is smooth.
- Flip the bread, seam-side up and smooth side down into the prepared proofing basket.
- Dust the bread with flour, core with a tea towel, and allow to rise for 30 to 90 minutes. The second rise is finished when it has increased in size by about 50% or passes the poke test. If you poke the bread and it pops back but leaves an indentation it is proofed. If it pops back immediately with no indentation it is underproofed.
Baking the Bread on a Baking Sheet
- While the dough is rising, preheat the oven to 220°C/390°F.
- Place a roasting dish in the bottom of the oven while it is preheating. Have a baking sheet ready for the bread dough. Boil about 1.5 to 2 litres of water.
- Tip the bread out of the banneton onto the baking sheet, seam side down. Use a razor blade or sharp knife to score across the loaf around 2 inches or 2.5cm deep.
- Put the bread into the oven and pour the boiling water into the roasting dish.
- Bake the bread for 35 to 40 minutes. The bread is done with it has reached an internal temperature of around 100°C or 190°F or sounds hollow when tapped.
- Place the baked bread on a wire rack to cool before slicing.
Baking the bread in a Dutch oven
- While the dough is rising, preheat the oven to 220°C/390°F.
- Cut out a piece of parchment paper or baking paper that the bread will sit on. It should be round with two long arms to allow easy placement and removal of the bread.
- 3 - Turn the bread seam side down onto the parchment paper. Use a razor blade or sharp knife to score across the loaf around 2 inches or 2.5cm deep.
- Place the bread into the Dutch oven, splash the bread with water, close it, and place it in the oven. Bake for 20 minutes. Remove the lid of the pot and bake for an additional 15 to 20 minutes. The bread is done with it has reached an internal temperature of around 100°C or 190°F or sounds hollow when tapped.
- Place the baked country bread on a wire rack to cool before slicing.
Notes
Expert Tips for This Recipe
Bread flour can be replaced with whole wheat flour in the starter. We are creating steam in the oven to ensure the biggest oven spring for the bread. Oven spring is a fast rise at the beginning of the bake before the outside of the bread crusts over. If the crust forms too quickly it can hamper the rise of the bread. rust the recipe. At first, it may seem that there is just too much moisture in the dough. The sticky dough is a mess, sticking to your hands. But as you knead and work that gluten it will become more cohesive and tighten up. The windowpane test lets you know when the dough has been kneaded enough. Simply take about half of your bread dough and gently stretch it out. If you can hold it up to the light and see the light coming through without the dough tearing, she is done. Using a cast-iron pot or Dutch oven is the gold standard when it comes to sourdough or rustic artisanal bread baking. The pot is placed in the oven while you are preheating. After I’ve placed my bread into the pot, I will flick some water over the top of the bread or onto the pot lid. This creates steam. Baking on a baking sheet is perfectly fine if you do not have a cast-iron pot. Steam is great for making sure your bread gets the biggest oven spring it can in the first 15 -20 minutes of baking before the crust starts to brown which impedes growth. If you don’t have a Dutch oven or a cast iron pot, the easiest way to create steam is to place a cookie sheet or other dish in the bottom of your oven while it is preheating. Once you have put your bread in, pour boiling water into the cookie sheet or dish. Scoring a loaf allows for the bread dough to rise in an orderly fashion. Not scoring a loaf will result in the bread expanding at the weakest point on the loaf. Score using a bread lame, razor blade, or a sharp knife. Make sure the score is at least 2cm deep. Creative or decorative scorings are usually rather shallow. The poke test is a simple test to determine whether your dough is finished proofing.- You poke and the dough pops back immediately: underproofed
- You poke and the dough doesn’t pop back at all: over-proofed
- You poke and the dough pops back but still leaves an indentation: perfectly proofed
Storage and Freezing
This country bread is best eaten within 2 to 3 days of baking. I love storing homemade bread in a linen bag or wrapped in a clean kitchen or tea towel, or a bread box. I usually save the heels (ends of bread) and keep them pressed into the cut side.Nutrition
Nutrition information is an estimate. If scaling the recipe remember to scale your cook and bakeware accordingly. All temperatures stated are conventional, unless otherwise stated. Recipes tested in grams and at sea level.
Comments
No Comments